
Explorer 4WD V8-4.6L (2008)
6. Remove the bolts and position the heated PCV fitting aside.
7. Disconnect the evaporative emission (EVAP) hose from the intake manifold.
8. Remove the 5 pushpins and the splash shield.
9. Remove the RH engine support insulator upper nuts.
^
To install, tighten to 90 Nm (66 lb-ft).
10. Remove the LH engine support insulator through bolt.
^
To install, tighten to 103 Nm (76 lb-ft).
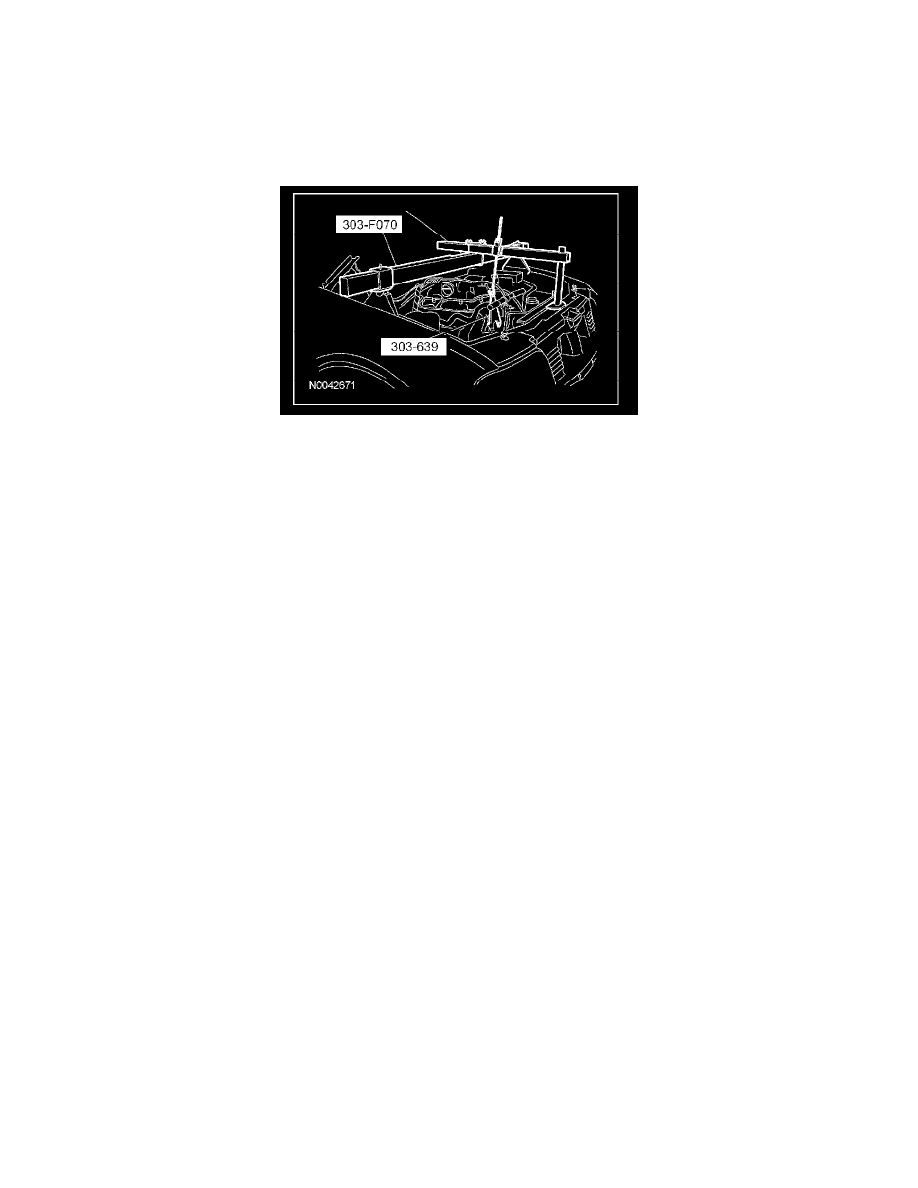
11. Install the special tools and raise the engine approximately 70 mm (2.75 in).
RH side
12. Remove the RH engine support insulator lower nut.
^
To install, tighten to 90 Nm (66 lb-ft).
13. Remove the RH engine support insulator.
Four wheel drive (4WD) vehicles
14. Remove the stabilizer bar bracket bolts and allow the stabilizer bar to hang freely.
^
To install, tighten to 55 Nm (41 lb-ft).
15. WARNING: Secure the assembly to the jack. Avoid any obstructions while lowering and raising the jack. Contact with obstructions may
cause the assembly to fall off the jack, which may result in serious personal injury.
Support the differential housing with a suitable jack stand.
16. Disconnect the vent hose from the differential housing vent tube.
17. CAUTION: Any time bolts, washers, spacers or nuts are loosened in the differential support for any reason, install new components to
prevent damage.
Remove and discard the 3 bolts and 3 flagnuts.
^
To install, tighten to 66 Nm (49 lb-ft).
18. Lower the differential housing approximately 25 mm (1 in).
LH side
19. Remove the LH engine support insulator nut.
^
To install, tighten to 90 Nm (66 lb-ft).
20. Remove the engine support insulator.
21. To install, reverse the removal procedure.
^
If equipped, install new differential housing bolts and flagnuts.