Explorer AWD V6-4.0L VIN K Flex Fuel (2003)

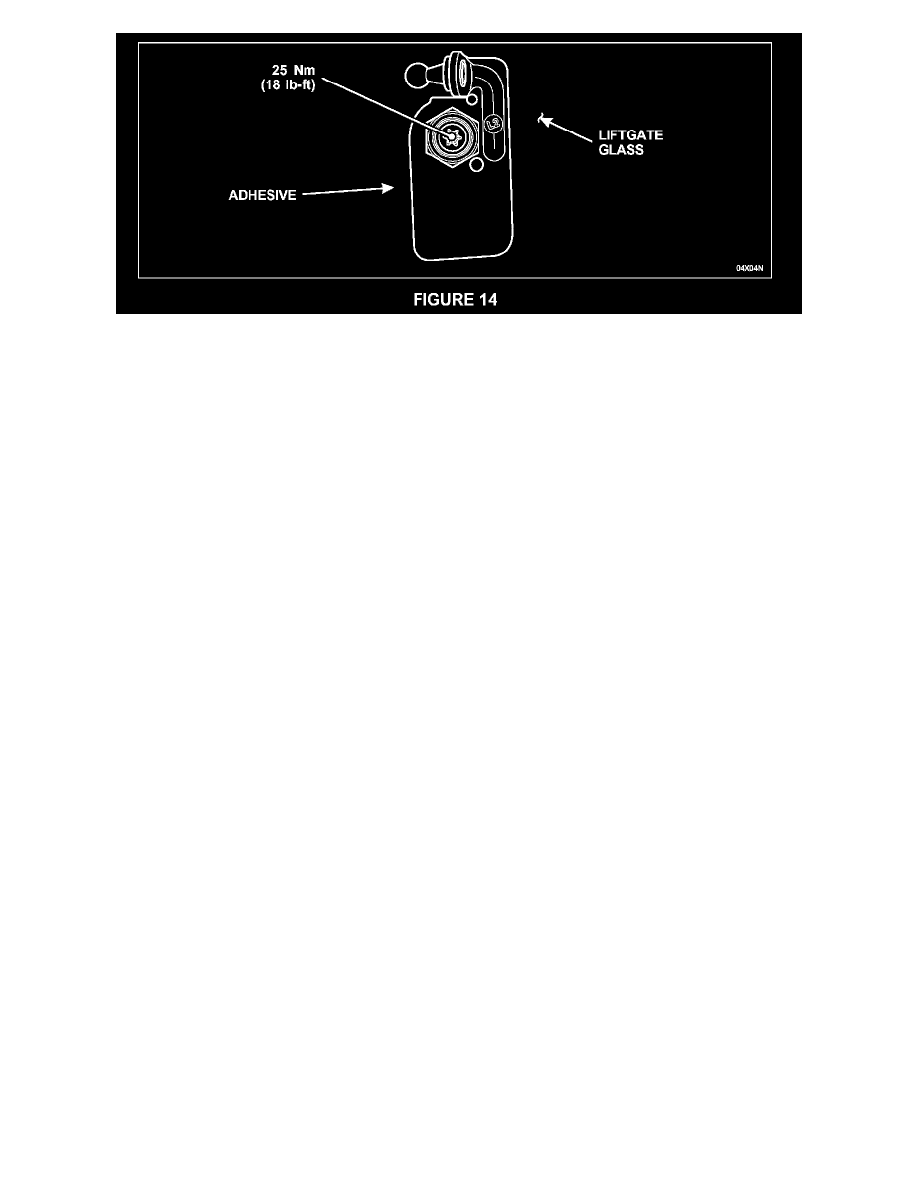
While holding the bracket nut with a 17-mm box or open-end wrench, tighten the bolt to 25 Nm (18 lb-ft). See Figure 14.
12.
Once the new bracket is in place, make sure the edge of the bracket is parallel to the edge of the glass. If the bracket position needs to be adjusted,
you may turn it using a 17-mm wrench. DO NOT separate the bracket from the glass once the bracket is in position.
CAUTION:
The adhesive used to install the liftgate glass ball stud brackets will require at least two (2) hours to cure at 21° C (70° F) or higher. If the vehicle
must be moved to a much colder environment before two hours has elapsed, cure time will increase substantially before the liftgate glass struts can be
reattached. The following guidelines must be followed in order to ensure properly cured adhesive:
^
Two (2) hour cure time at 21° C (70° F) (Preferred)
^
Three (3) hour cure time at 10° C (50° F)
^
Seven (7) hour cure time at 0° C (32° F)
^
Below 0°C (32° F), call the Special Service Support Center to review the particular circumstances and obtain further direction.
13.
NOTE: Be sure to use a new mixer tip for each bracket.
Install a new trimmed mixer tip onto the adhesive cartridge, then dispense a 75-mm (3-in) bead of adhesive onto a piece of scrap cardboard to
ensure the product is evenly mixed in the tip and is ready for application.
14.
Apply three (3) large beads (9-10 mm in diameter) of adhesive to the backside of the new right-side bracket. See Figure 13.
15.
With the correct right-hand thread beauty bolt and plastic washer ready in one hand position the new right-side bracket onto the glass and align it
with the beauty bolt hole and parallel with the edge of the glass. Install the beauty bolt and snug it down hand tight.
CAUTION:
While tightening the bolt, some adhesive will be squeezed out from under the bracket.
DO NOT WIPE AWAY THE EXCESS ADHESIVE.
While holding the bracket with a 17-mm box or open-end wrench, tighten the bolt to 25 Nm (18 lb-ft). See Figure 14.
16.
Once the new bracket is in place, make sure the edge of the bracket is parallel to the edge of the glass. If the bracket position needs to be adjusted,
you may turn it using a 17-mm wrench. DO NOT separate the bracket from the glass once the bracket is in position.
CAUTION:
The adhesive used to install the liftgate glass ball stud brackets will require at least two (2) hours to cure at 21° C (70° F) or higher. If the vehicle
must be moved to a much colder environment before two hours has elapsed, cure time will increase substantially before the liftgate glass struts can be
reattached. The following guidelines must be followed in order to ensure properly cured adhesive:
^
Two (2) hour cure time at 21° C (70° F) (Preferred)
^
Three (3) hour cure time at 10° C (50° F)
^
Seven (7) hour cure time at 0° C (32° F)
