
Explorer AWD V8-4.6L (2010)
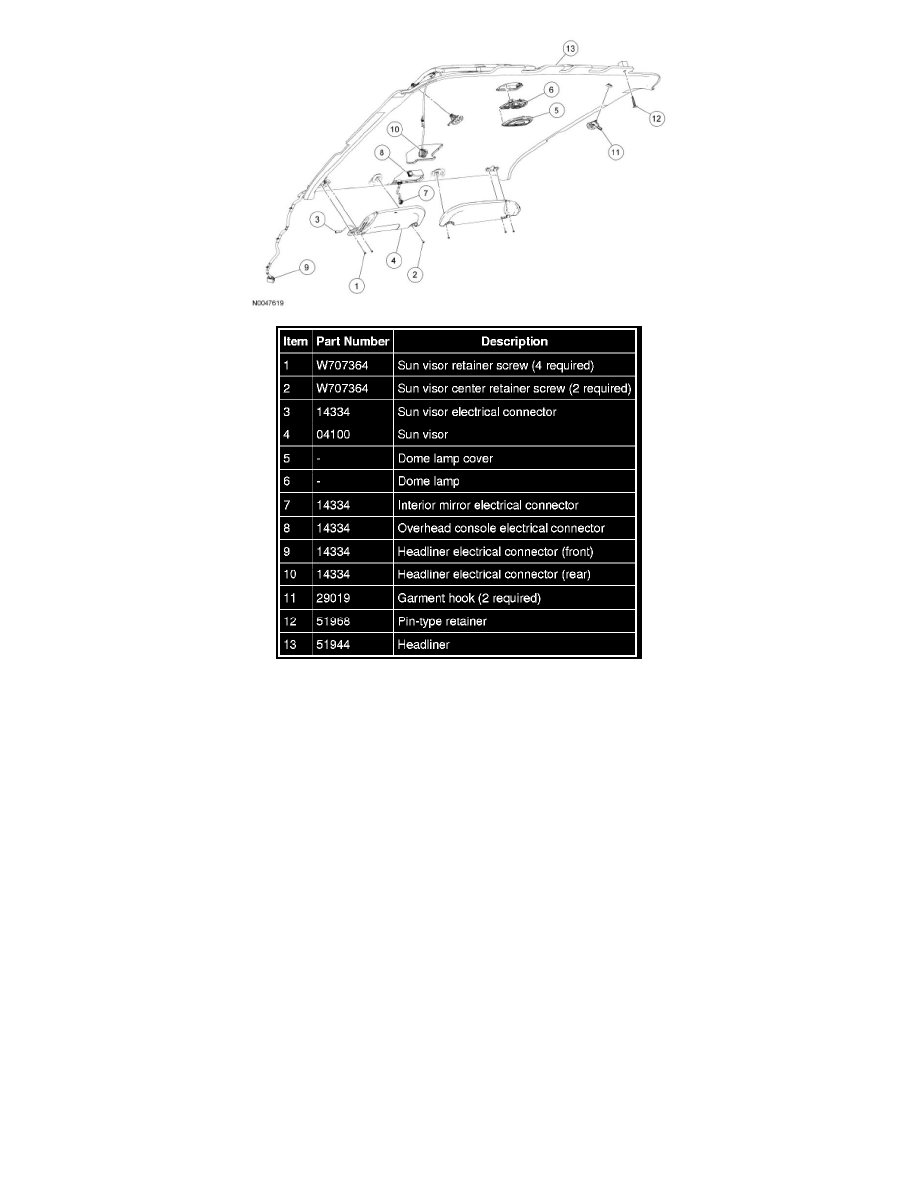
Explorer and Mountaineer only
1. If equipped, remove the rear entertainment system. For additional information, refer to Accessories and Optional Equipment.
Explorer Sport Trac only
2. NOTE: The headliner is removed through the rear passenger door. To facilitate removal, the front passenger seat must be removed.
Remove the front passenger seat.
All vehicles
3. Remove the overhead console. For additional information, refer to Instrument Cluster / Carrier &/or Interior Moulding / Trim.
4. Remove the A-pillar trim panel. For additional information, refer to A-Pillar Trim Panel See: Trim Panel/Service and Repair/A-Pillar Trim Panel.
5. Position the B-pillar upper trim panel aside. For additional information, refer to B-Pillar Upper Trim Panel See: Trim Panel/Service and
Repair/B-Pillar Upper Trim Panel.
Explorer and Mountaineer only
6. Remove the C-pillar trim panel. For additional information, refer to C-Pillar Trim Panel - Explorer, Mountaineer See: Trim Panel/Service and
Repair/C-Pillar Trim Panel.
7. Remove the D-pillar trim panel. For additional information, refer to D-Pillar Trim Panel See: Trim Panel/Service and Repair/D-Pillar Trim Panel.
Explorer Sport Trac