
Explorer AWD V8-4.6L (2010)
1. If equipped with a power seat, connect the seat control switch electrical connector.
2. Align and attach the side shield rear pin-type retainer with the metal recliner tab.
3. Align the side shield upper hooks with the seat frame and gently push down into position.
4. Push inward on the middle of the side shield to snap the two bottom retainers into place.
5. Push inward on the front of the side shield to snap the front clip into place.
48. Install the new side shield scrivet.
49. If equipped with a power seat, install the seat control switch knob by applying pressure until it completely seats.
50. If equipped with manual lumbar, install the control knob by firmly pushing until an audible click is heard.
51. Install the new spring clip on the manual recliner handle and install the handle by applying pressure until it completely seats.
Installation
52. If equipped with a manual seat, synchronize the seat tracks by aligning both of the seat track rails with the rear edge of the seat track base.
53. Position the seat into the vehicle.
54. Connect the seat electrical connectors.
1. Tip the seat rearward.
2. Connect the seat electrical connector.
3. Attach the seat wire harness pushpin.
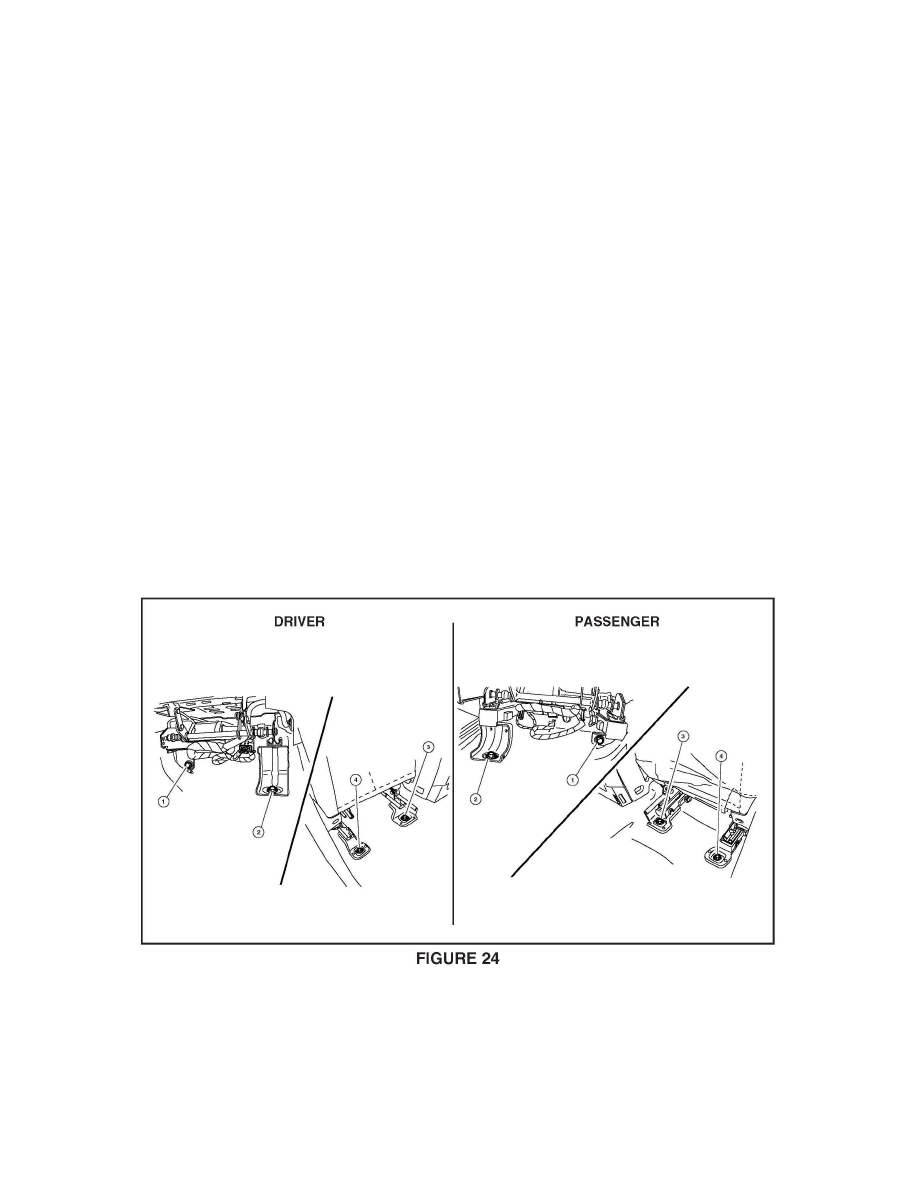
55. Secure the seat. See Figure 24.
1. Install the new seat track-to-floor front inboard bolt to its angled bracket and hand tighten.
2. Make sure the seat is aligned with the three remaining bolt holes and hand start the remaining new bolts. Do not force the remaining bolts if the
seat is not correctly aligned.
^
Tighten all floor bolts to 40 Nm (30 lb-ft) in the following sequence.