Explorer AWD V8-4.6L (2010)

Vacuum Brake Booster: Service and Repair
Brake Booster
Removal and Installation
1. NOTICE: The brake booster check valve must be disconnected from the brake booster prior to removing the master cylinder or the
master cylinder seal may be drawn into the brake booster.
Disconnect the brake booster check valve from the brake booster to deplete the residual vacuum in the brake booster.
2. Remove the brake master cylinder. For additional information, refer to Hydraulic System, Brakes &/or Brake Pedal Assy.
3. NOTICE: Do not service the brake pedal or brake booster without first removing the stoplamp switch. This switch must be removed with
the brake pedal in the at-rest position. The switch plunger must be compressed for the switch to rotate in the bracket. Attempting to
remove the switch when the plunger is extended (during pedal apply) will result in damage to the switch.
Remove the stoplamp switch.
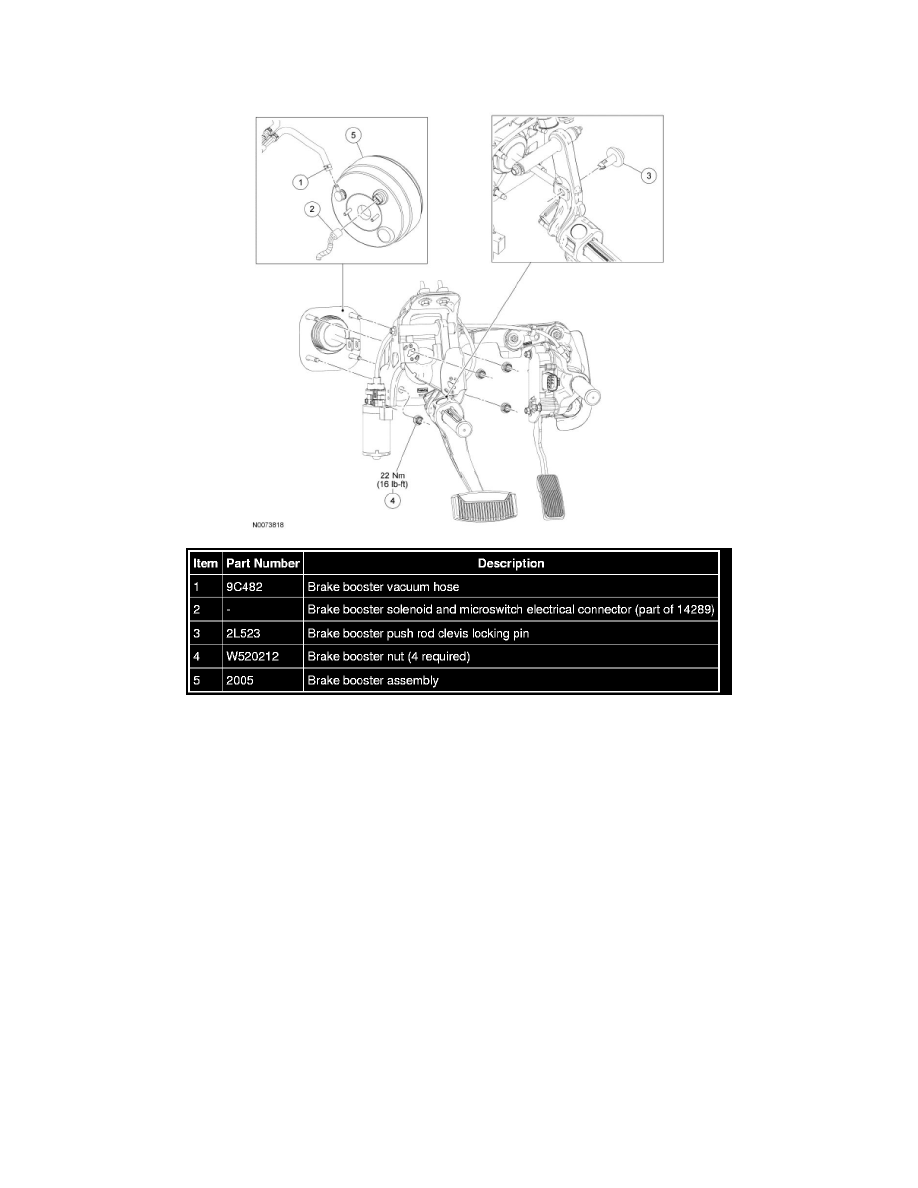
4. NOTE: When the repair is complete, make sure that the brake booster solenoid electrical connector is connected, or use of the vehicle with key-on
or vehicle running will result in DTCs being set.
Disconnect the brake booster solenoid electrical connector.
5. NOTE: The booster push rod clevis locking pin is a one-time use only part. Anytime the booster push rod clevis locking pin is removed, a new
booster push rod clevis locking pin should be used.
Remove the booster push rod clevis locking pin and discard.
6. Disconnect the brake booster rod from the brake pedal and position aside.
