
Explorer AWD V8-4.6L (2010)
Hose/Line HVAC: Service and Repair
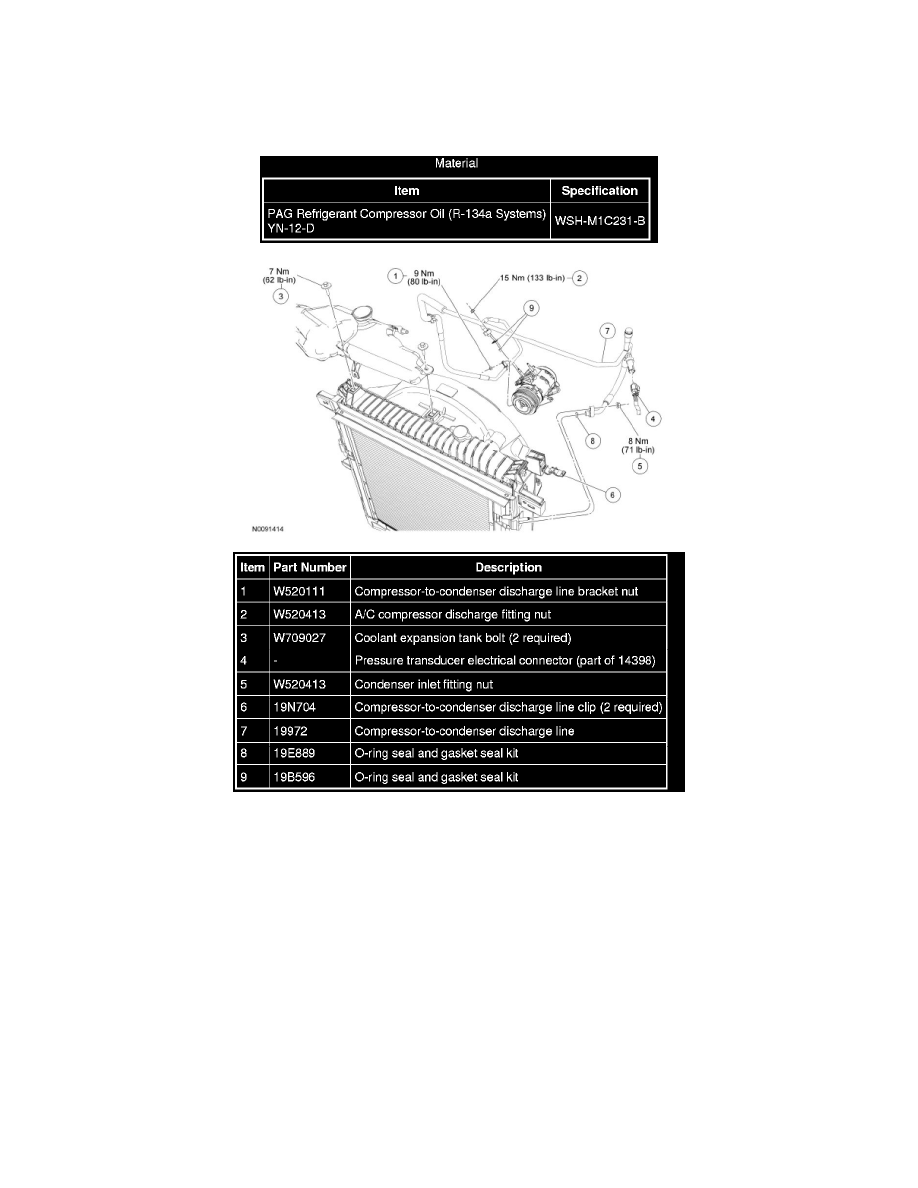
Compressor To Condenser Discharge Line
Compressor to Condenser Discharge Line - 4.6L
Removal and Installation
1. With the vehicle in NEUTRAL, position it on a hoist. For additional information, refer to Vehicle Jacking and Lifting.
2. Recover the refrigerant.
3. Remove the Air Cleaner (ACL) and ACL outlet tube. For additional information, refer to Fuel Delivery and Air Induction.
4. Remove the compressor-to-condenser discharge line bracket nut and detach the bracket.
-
To install, tighten to 9 Nm (80 lb-in).
5. Remove the compressor outlet fitting nut and disconnect the fitting.
-
Discard the O-ring seal and gasket seal.
-
To install, tighten to 15 Nm (133 lb-in).
6. Remove the 2 coolant expansion tank bolts and position the coolant expansion tank aside.
-
To install, tighten to 7 Nm (62 lb-in).
7. Disconnect the A/C pressure transducer electrical connector.