
Explorer AWD V8-4.6L (2010)
Removal
NOTICE: The boots and clamps are designed to provide an airtight seal and protect the internal components of the steering gear. If the seal is
not airtight the vacuum generated during turning will draw water and contamination into the gear causing damage. Zip ties do not produce an
airtight seal and must not be used.
NOTICE: The inner ball joint grease is not compatible with water and foreign material trapped in the grease will degrade the life of the joint.
NOTICE: If present, the orientation of the vent tube must be noted so the boots and vent tubes can be installed in the correct location.
Incorrect venting may lead to internal component damage.
1. Remove the front tire and wheel. For additional information, refer to Wheels and Tires.
2. Loosen the tie-rod end jam nut.
3. Remove and discard the tie-rod end nut.
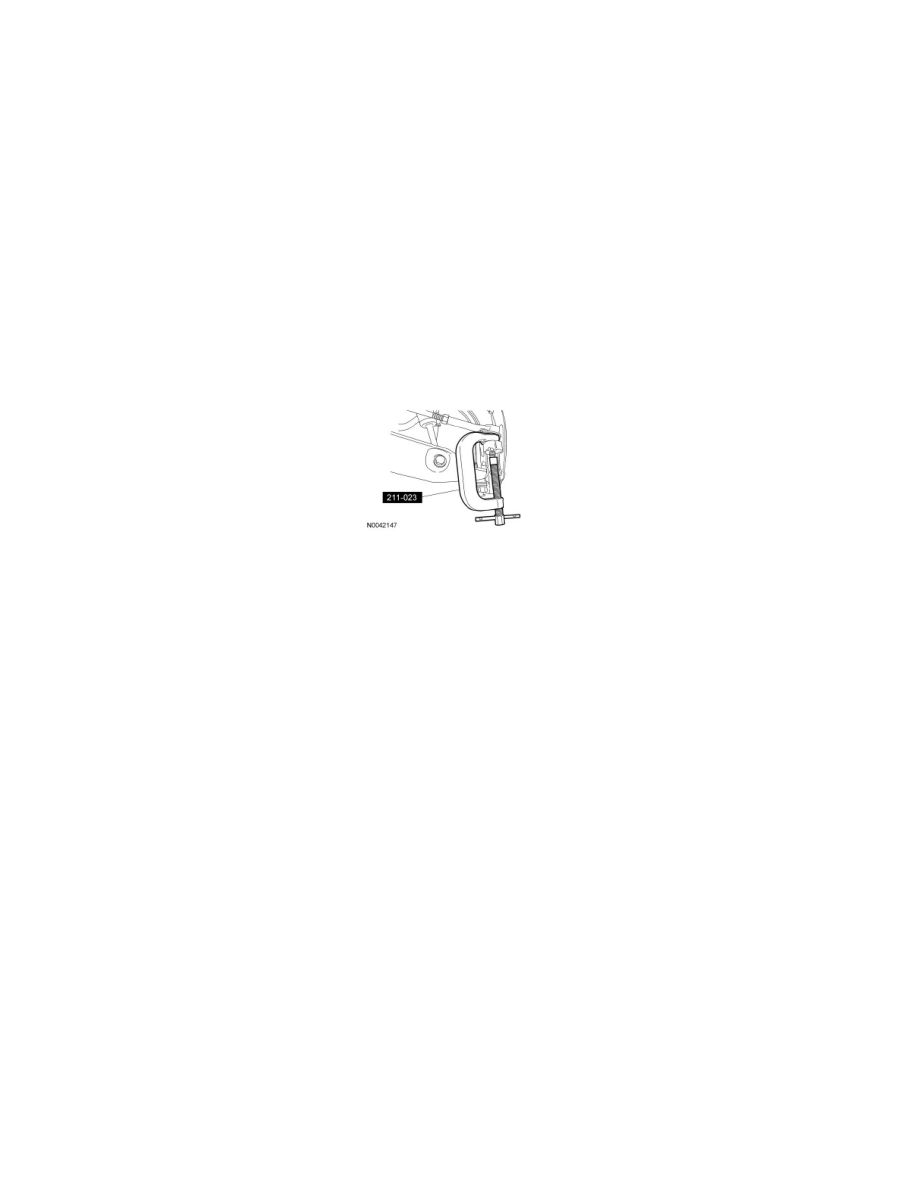
4. NOTICE: Use care when installing the C-Frame and Screw or damage to the tie-rod end boot may occur.
Using the C-Frame and Screw, separate the tie-rod end from the wheel knuckle.
5. NOTE: Count the number of turns required to remove the tie-rod end for reference during installation.
Remove the tie-rod end.
6. Remove the tie-rod end jam nut.
7. NOTE: A new outer bellows boot clamp must be installed.
Using the Boot Clamp Pliers, remove and discard the outer bellows boot clamp.
8. NOTE: A new inner bellows boot clamp must be installed.
Using the Boot Clamp Pliers, remove and discard the inner bellows boot clamp.
9. Remove the steering gear bellows boot.
10. NOTICE: Place the steering gear at the center position. Use an appropriate-sized crowfoot wrench on the flat of the rack gear to resist
rotation and to prevent damage during removal and installation of the inner tie rod.
NOTE: If repairing the RH side, it will be necessary to pull back the LH inner tie-rod boot to hold the steering gear.
NOTE: An assistant may be needed for removal of the RH inner tie rod.
While holding the steering gear rack, use an appropriate-sized crowfoot wrench to remove the inner tie rod.
11. NOTICE: Thoroughly remove any abrasive material. This material is extremely harmful to the steering gear.
Thoroughly clean and inspect all the parts to be reused. Install new parts as necessary.
Installation
1. NOTICE: Place the steering gear at the center position. Use an appropriate-sized crowfoot wrench on the flat of the rack gear to resist
rotation and to prevent damage during the installation of the inner tie rod.
NOTE: An assistant may be needed for installation of the RH inner tie rod.