
Explorer Sport 4WD V6-245 4.0L SOHC VIN K SFI (2001)
Condenser HVAC: Service and Repair
REMOVAL
NOTE:
-
Installation of a new suction accumulator/drier is not required when repairing the air conditioning system except when there is physical evidence of
system contamination from a failed A/C compressor or damage to the suction accumulator/drier.
-
If an A/C condenser core leak is suspected, the A/C condenser core must be leak tested before it is removed from the vehicle.
1. Prepare the vehicle for A/C condenser core removal.
1
Disconnect the battery ground cable.
2
Perform the Refrigerant Discharging and Recovery Procedure to remove the refrigerant.
3
Remove the air cleaner assembly.
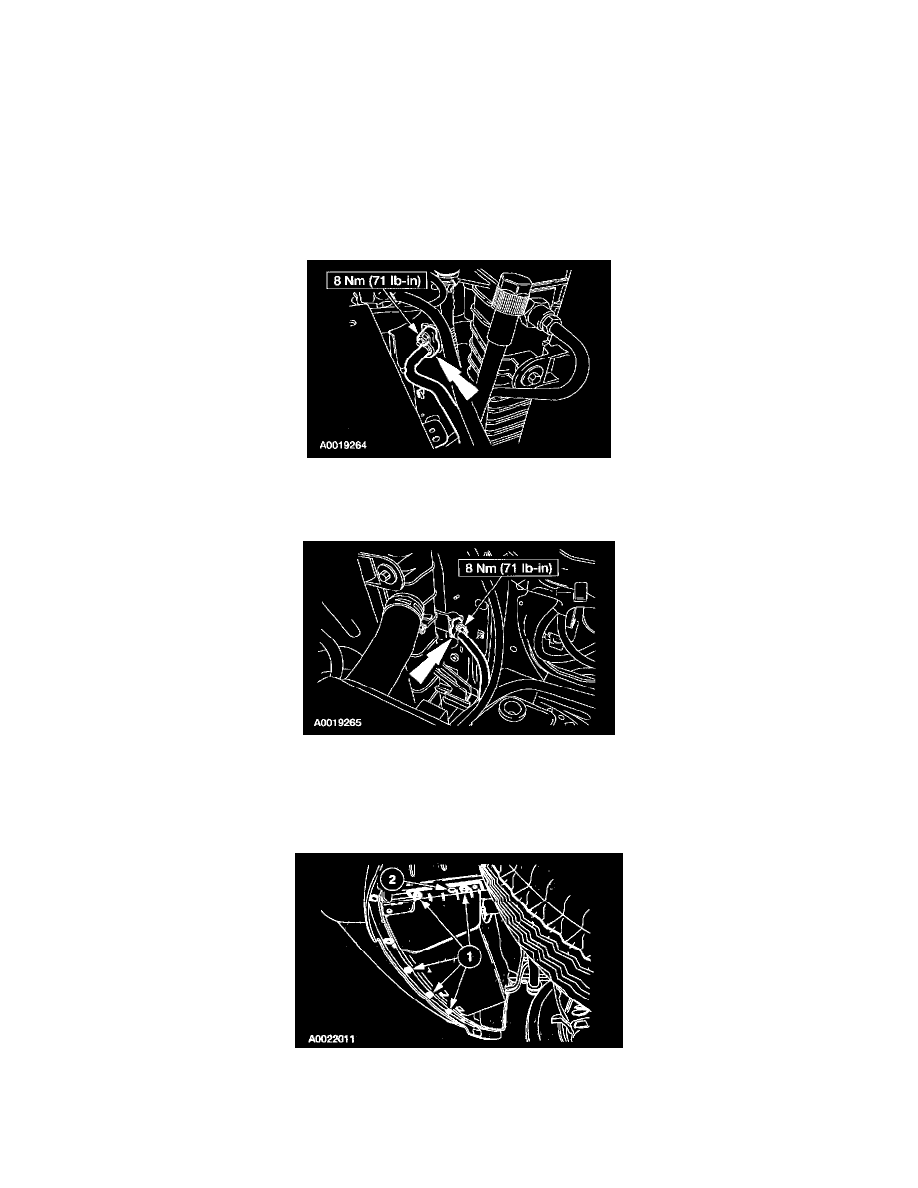
2. Disconnect the A/C manifold and tube from the A/C condenser core. Remove and discard the O-ring seal.
-
During installation, install a new O-ring seal lubricated with PAG Refrigerant Compressor Oil (R-134a Systems) F7AZ-19589-DA (Motorcraft
YN-12-C) or equivalent meeting Ford specification WSH-M1C231-B.
3. Disconnect the condenser to evaporator tube from the A/C condenser core. Remove and discard the O-ring seal.
-
During installation, install a new O-ring seal lubricated with PAG Refrigerant Compressor Oil (R-134a Systems) F7AZ-19589-DA (Motorcraft
YN-12-C) or equivalent meeting Ford specification WSH-M1C231-B.
4. Raise the vehicle.
5. Remove the lower air deflector.
1
Remove the seven screws.
2
Remove the two pin-type retainers and the air deflector.