
Explorer Sport Trac 2WD V6-4.0L VIN E (2002)
3.
On the upper side of the junction box (relay locations), locate the 16-way green connector on the outboard side of the junction box (Figure 1).
4.
Remove the green connector from the junction box.
5.
Remove spacer from the engagement side of the connector.
6.
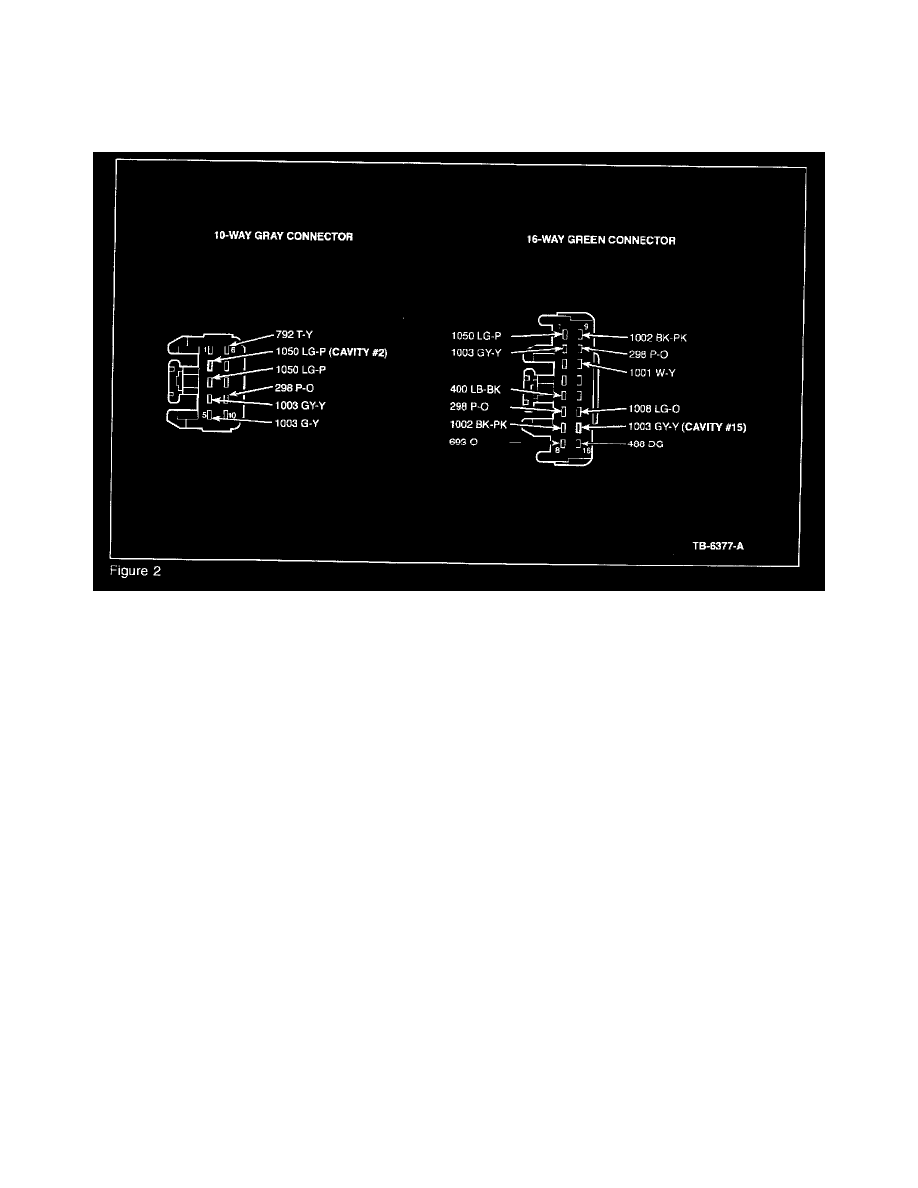
Locate cavity 15 (gray/yellow wire), remove terminal from connector, and cut off terminal (Figure 2).
7.
On the gray/yellow wire, strip the wire insulation away and prepare for a splice. This wire will be used later in the procedure.
8.
Reinstall the spacer on the engagement end of the green connector and install connector in the junction box (Figure 1).
9.
Locate the 10-way gray connector on the inboard side of the junction box (Figure 1).
10.
Remove the gray connector from the junction box.
11.
Locate cavity # 2, light green/purple wire (Figure 2).
12.
Center splice into this wire by spreading the insulation apart.
13.
Locate the gray/yellow wire from Step 7.
14.
Attach the gray/yellow wire to the light green/purple wire. Crimp a wire splice onto the two wires, solder the splice and cover with electrical tape.
15.
Install the gray connector in to the junction box (Figure 1).
16.
Reposition the junction box under the instrument panel and reinstall the 3 attaching screws. Torque to 2.4 +/- 0.4 Nm (21 lb-in +/- 3.5 lb-in.)
17.
Verify proper functionality of the manual A/C system and that the clicking/fluttering noise condition has been corrected.
OTHER APPLICABLE ARTICLES: NONE
WARRANTY STATUS: Eligible Under The Provisions Of Bumper To Bumper Warranty Coverage
OPERATION
DESCRIPTION
TIME
011206A
Perform Wiring Harness
0.5 Hr.
Modifications