Explorer Sport Trac 4WD V6-245 4.0L SOHC VIN K SFI (2001)

removed from the vehicle and the restraint system diagnostic tools must be installed in the side airbag and the safety belt pretensioner (if equipped)
connectors at the floor connectors. The restraint system diagnostic tools must be removed prior to operating the vehicle over the road.
^
Diagnostics may be performed on seat systems other than the side airbag or the safety belt pretensioner (if equipped) system (lumbar, climate
controlled, heated, power seat track) with the seat installed in the vehicle as long as the restraint system diagnostic tools are installed under the
seats in the side airbag and safety belt pretensioner to floor connectors.
^
After diagnosing/repairing a seat system the restraint system diagnostic tools must be removed before operating the vehicle over the road.
^
Repair is made by installing a new part only. If the new part does not correct the condition, install the original part and perform the diagnostic
procedure again.
All vehicles
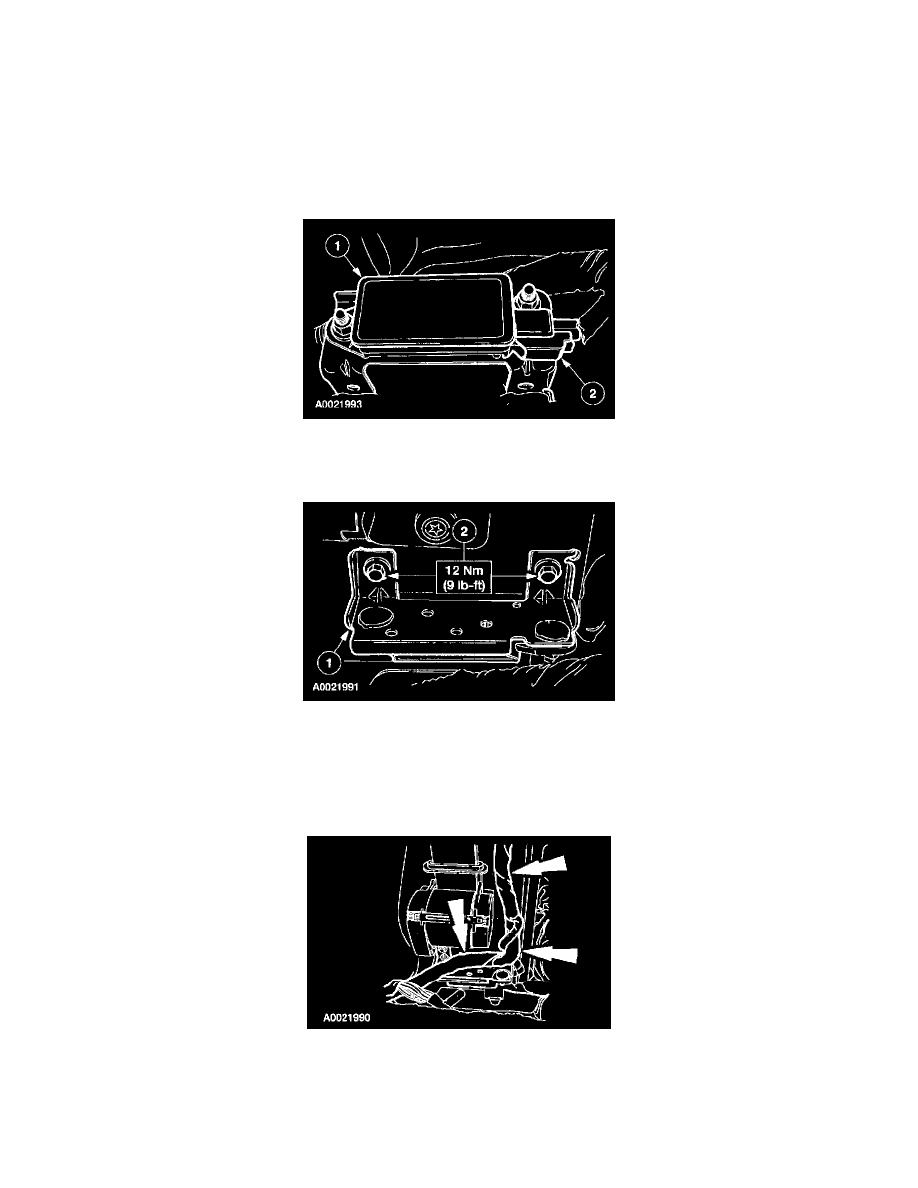
1. Connect the side crash sensor electrical connector.
1
Position the side crash sensor.
2
Connect the side crash sensor electrical connector.
2. Install the side crash sensor.
1
Position the side crash sensor with the bracket to the B-pillar.
2
Install the bolts.
WARNING: THE TIGHTENING TORQUE OF THE AIR BAG SIDE CRASH SENSOR RETAINING BOLTS IS CRITICAL FOR
PROPER SYSTEM OPERATION.
3. Route the wire harness and attach the pin-type retainers to the B-pillar.
4. Connect the battery ground cable.
5. Position the front seats rearward.
6. With the diagnostic tools still in place at all deployable devices, prove out the air bag system.
7. Move and tilt the front seats to their highest and most forward position.
8. Disconnect the battery ground cable and wait at least one minute.
