
Explorer Sport Trac 4WD V8-4.6L (2008)
Part 2
Removal and Installation
1. With the vehicle in NEUTRAL, position it on a hoist.
2. Recover the refrigerant.
3. Remove the spare tire.
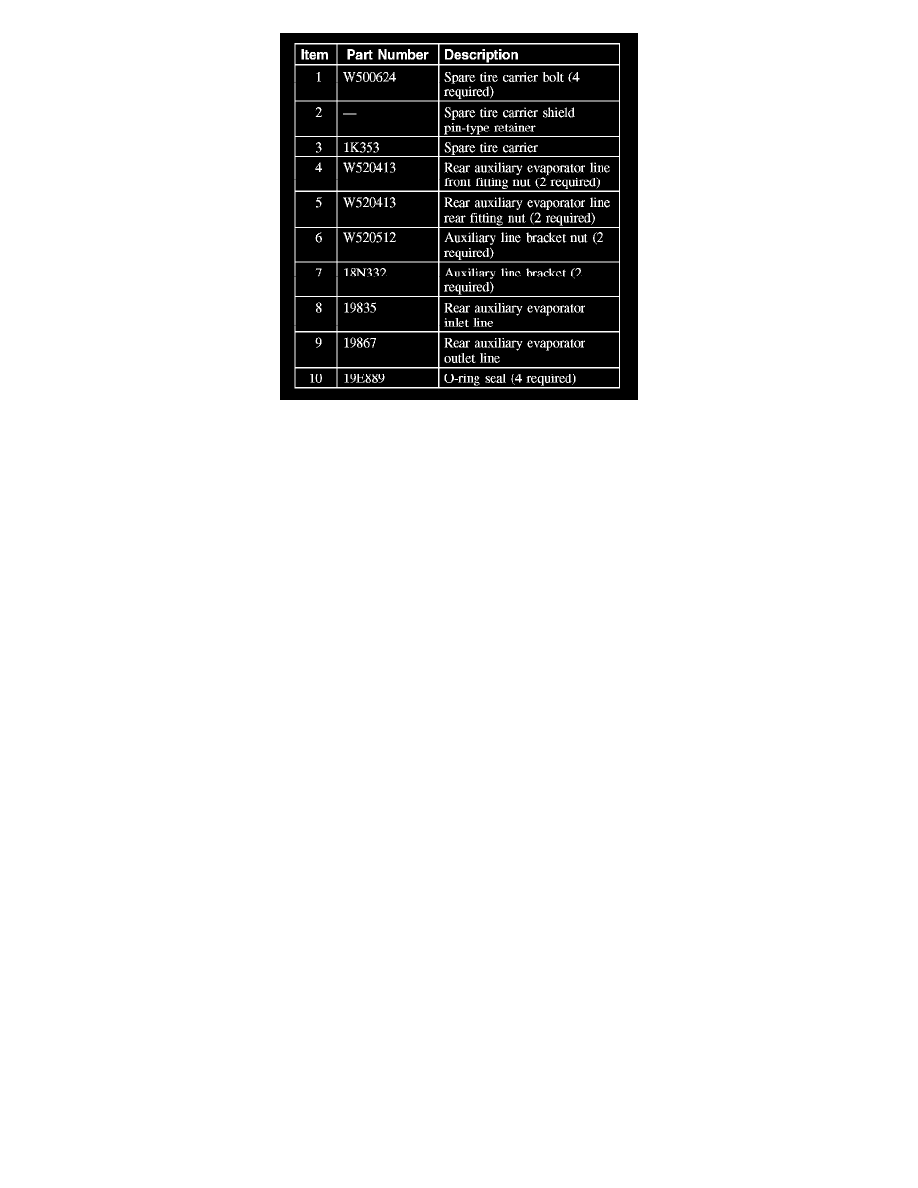
4. Remove the 4 spare tire carrier bolts and the 2 spare tire carrier shield pin-type retainers.
5. Remove the spare tire carrier.
6. Remove the 2 rear auxiliary evaporator line front fitting nuts and disconnect the fittings.
-
Discard the O-ring seals.
-
To install, tighten to 8 Nm (71 lb-in).
7. Remove the 2 rear auxiliary evaporator line rear fitting nuts and disconnect the fittings.
-
Discard the O-ring seals.
-
To install, tighten to 8 Nm (71 lb-in).
8. Remove the auxiliary line bracket nut.
-
To install, tighten to 6 Nm (53 lb-in).
9. Remove the 2 auxiliary line brackets.
10. Remove the rear auxiliary evaporator outlet line.
11. Remove the rear auxiliary evaporator inlet line.
-
Discard the thermostatic expansion valve (TXV) filter.
12. To install, reverse the removal procedure.
-
Install new O-ring seals.
-
Install a new TXV filter.
-
Lubricate the refrigerant system with the correct amount of clean PAG oil.
13. Evacuate, leak test and charge the refrigerant system.
Suction Accumulator To Compressor Line
SUCTION ACCUMULATOR TO COMPRESSOR LINE