
Explorer Sport Trac 4WD V8-4.6L VIN 8 (2007)
All Vehicles (Part 2)
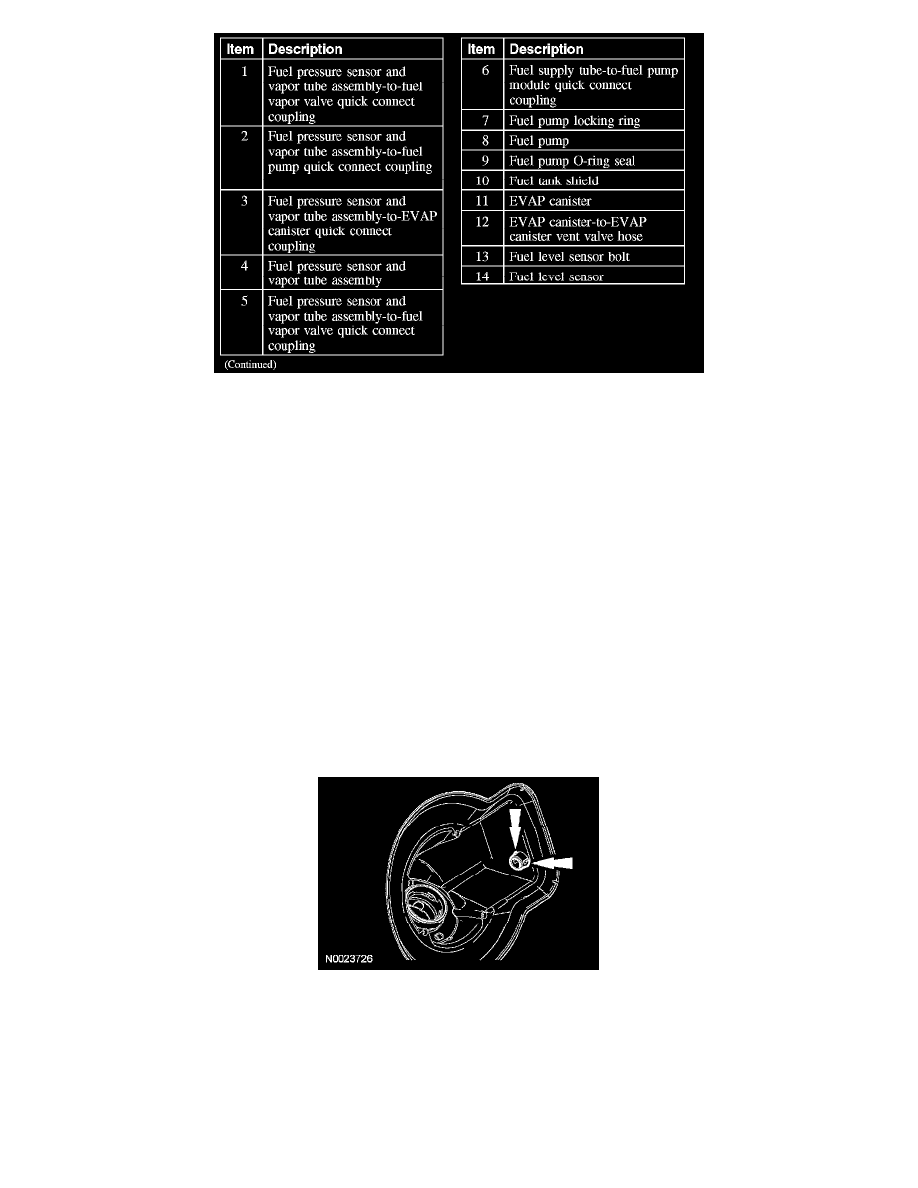
Exploded View
Removal and Installation
All vehicles
WARNING: Do not smoke or carry lighted tobacco or open flame of any type when working on or near any fuel-related component. Highly
flammable mixtures are always present and may be ignited. Failure to follow these instructions may result in personal injury.
NOTE: During the repair or replacement of fuel-related components, all liquid and vapor fuel openings shall be capped, taped or otherwise
appropriately protected to prevent the ingress of dirt or other contamination. All caps, tape and other protective materials shall be removed prior to
installation.
1. With the vehicle in NEUTRAL, position it on a hoist.
2. Disconnect the battery ground cable.
3. Open the fuel tank filler cap.
4. Remove the 3 bolts and the fuel tank filler cap.
-
To install, tighten to 1 Nm (9 lb-in).
Explorer/Mountaineer
5. NOTE: Body panel and fuel door removed for clarity.
Depress the 2 tabs on the fresh air vent tube in the fuel filler door pocket and disconnect the fresh air vent tube from the inner fenderwell.
All vehicles
6. Disconnect the fuel filler pipe vapor tube-to-fuel pressure sensor and vapor tube assembly quick connect coupling.
7. Disconnect the rear axle vent hose.
8. Disconnect the dust separator hose.
9. Loosen the fuel tank filler pipe hose clamp and disconnect the hose.