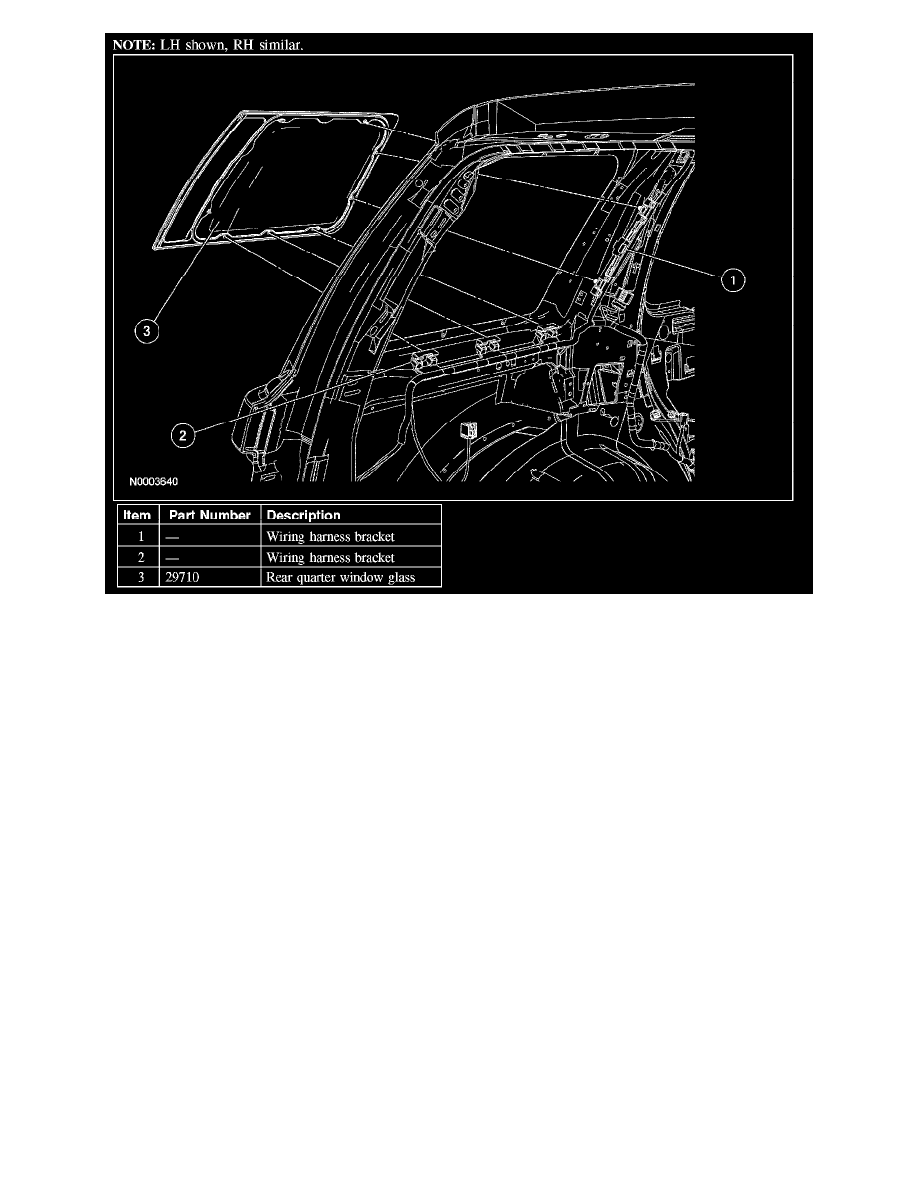
Explorer Sport Trac 4WD V8-4.6L VIN 8 (2007)

Removal
WARNING: To prevent glass splinters from entering the eyes or cutting hands, wear safety glasses and heavy gloves when cutting the glass
from the vehicle. Failure to follow these instructions may result in personal injury.
1. Remove the rear quarter trim panel.
2. Remove the wiring harness brackets.
3. NOTE: Locating tabs need to be cut through in order to remove the rear quarter window glass. The new rear quarter window glass will be
equipped with new locating tabs.
Lubricate the urethane adhesive with water to aid the special tool when cutting.
4. Using the special tool, cut the urethane adhesive from the rear quarter window glass starting at the top center, working toward the bottom corners
to remove the rear quarter glass.
5. Using a soft brush or vacuum, remove any foreign material or dirt from the pinchweld.
Installation
CAUTION: After installing the urethane installed glass, the vehicle should not be driven until the urethane adhesive has cured. Refer to the
drive away chart time for the cure time as temperatures and humidity vary. Inadequate curing of the urethane adhesive will adversely affect
the strength of the urethane bond.
1. Dry fit the rear quarter window glass, making alignment marks with tape or non-staining grease pencil.
2. NOTE: Avoid scratching the pinch weld. For minor scratches or exposed metal on the pinch weld, see manufacturer's recommendations.
Using an appropriate tool, trim the urethane adhesive leaving a 1-mm to 2-mm base of original equipment urethane on the pinch weld.
3. Clean the inside of the rear quarter glass encapsulation rim surface with glass cleaner, making sure the area is clean.
