
F 150 2WD V8-4.6L (2008)
Seat Position Sensor: Service and Repair
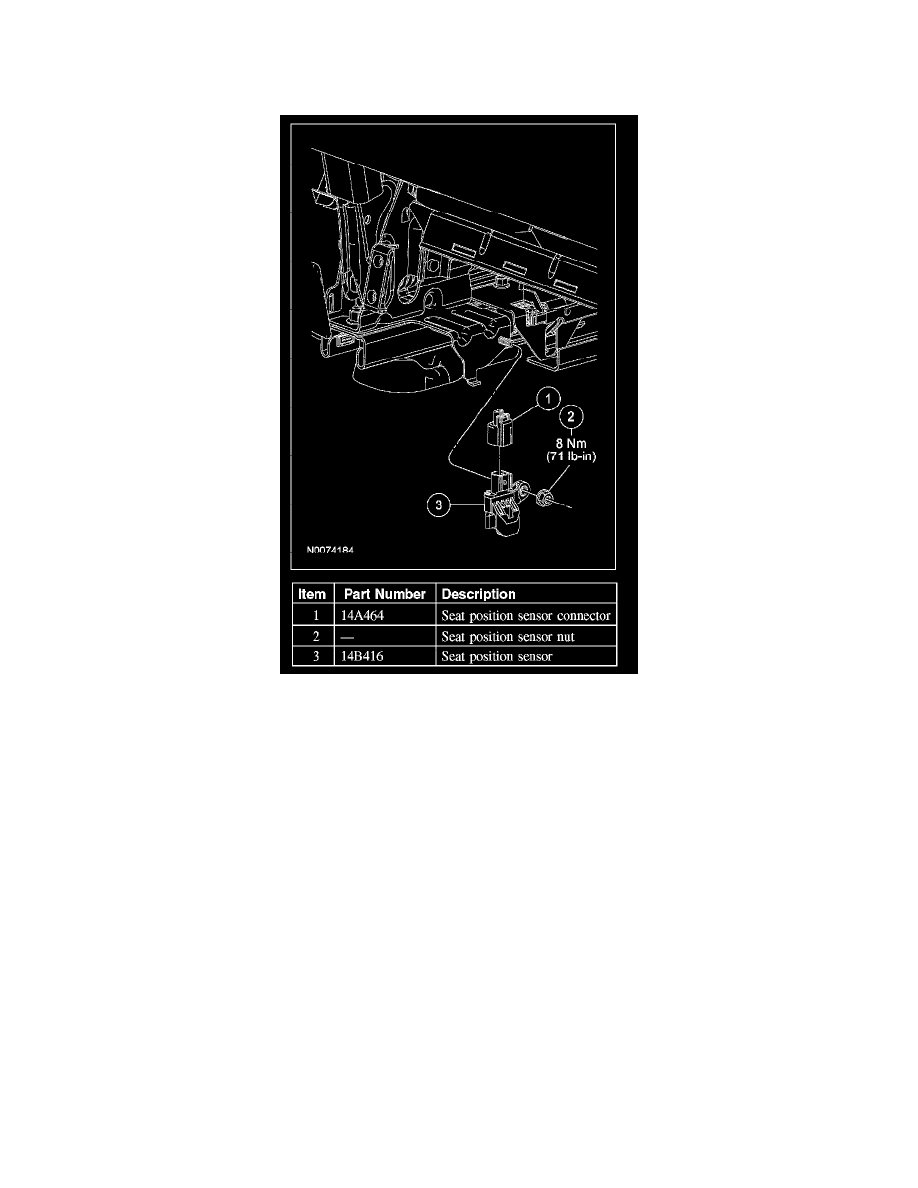
Seat Position Sensor - Manual Seat Track
SEAT POSITION SENSOR - MANUAL SEAT TRACK
Removal and Installation
WARNING: Never probe the electrical connectors on safety belt buckle/retractor pretensioners or adaptive load limiting retractors. Failure to
follow this instruction may result in the accidental deployment of the safety belt pretensioners or adaptive load limiting retractors, which
increases the risk of serious personal injury or death.
NOTE:
-
The air bag warning indicator illuminates when the restraints control module (RCM) fuse is removed and the ignition switch is ON. This is normal
operation and does not indicate a supplemental restraint system (SRS) fault.
-
The SRS must be fully operational and free of faults before releasing the vehicle to the customer.
-
Repair is made by installing a new part only. If the new part does not correct the condition, install the original part and perform the diagnostic
procedure again.
1. Depower the SRS.
2. Disconnect the seat position sensor electrical connector.
3. Remove the nut and seat position sensor.
-
To install, tighten to 8 Nm (71 lb-in).
4. To install, reverse the removal procedure.
5. Repower the SRS.
-
After installation and power is restored, position the driver seat from its forward most position to its rearmost position and then back again.
While positioning the seat, make sure that the seat position sensor and bracket and the wire harness do not come in contact with any other part
of the seat that may cause damage.