
F 150 2WD V8-5.4L Flex Fuel (2008)
Disassembly
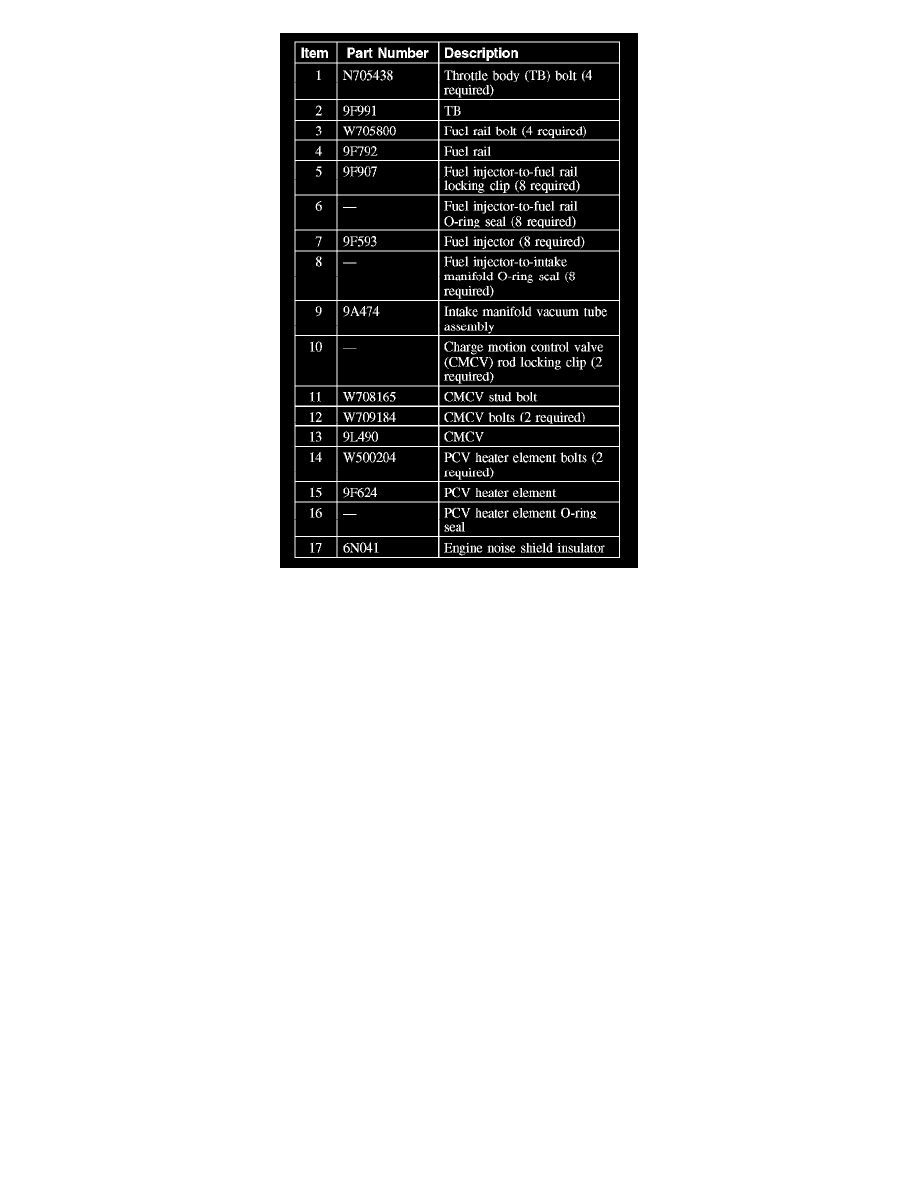
1. Remove the 4 bolts and the throttle body (TB).
^
Discard the TB O-ring seal.
2. Remove the 4 bolts and the fuel rail.
3. Remove the fuel injector-to-fuel rail locking clips and separate the fuel injectors from the fuel rail.
^
Discard the 2 O-ring seals from each fuel injector.
4. Remove the vacuum tube assembly from the intake manifold.
5. Remove the charge motion control valve (CMCV) rod locking clips.
6. Remove the stud bolt, the 2 bolts and the CMCV.
7. Remove the 2 bolts and the PCV heater element.
^
Discard the O-ring seal.
8. Remove the engine noise shield insulator from the intake manifold.
Assembly
1. Install the engine noise shield insulator onto the intake manifold.
2. NOTE: Lubricate the new O-ring seal with clean engine oil prior to installation.
Using a new O-ring seal, install the PCV heater element and the 2 bolts.
^
Tighten to 6 Nm (53 lb-in).
3. Position the CMCV and install the stud bolt and the 2 bolts.
^
Tighten to 10 Nm (89 lb-in).
4. Install the CMCV rod locking clips.
5. Install the vacuum tube assembly onto the intake manifold.
6. NOTE: Lubricate the new O-ring seals with clean engine oil prior to installation.
Install new O-ring seals on each of the fuel injectors.
7. Assemble the fuel injectors onto the fuel rail and install the locking clips.
8. Install the fuel rail and fuel injector assembly onto the intake manifold.
9. Install the 4 fuel rail bolts.
^
Tighten to 10 Nm (89 lb-in).