
F 150 2WD Pickup L6-300 4.9L VIN E 1-bbl (1982)
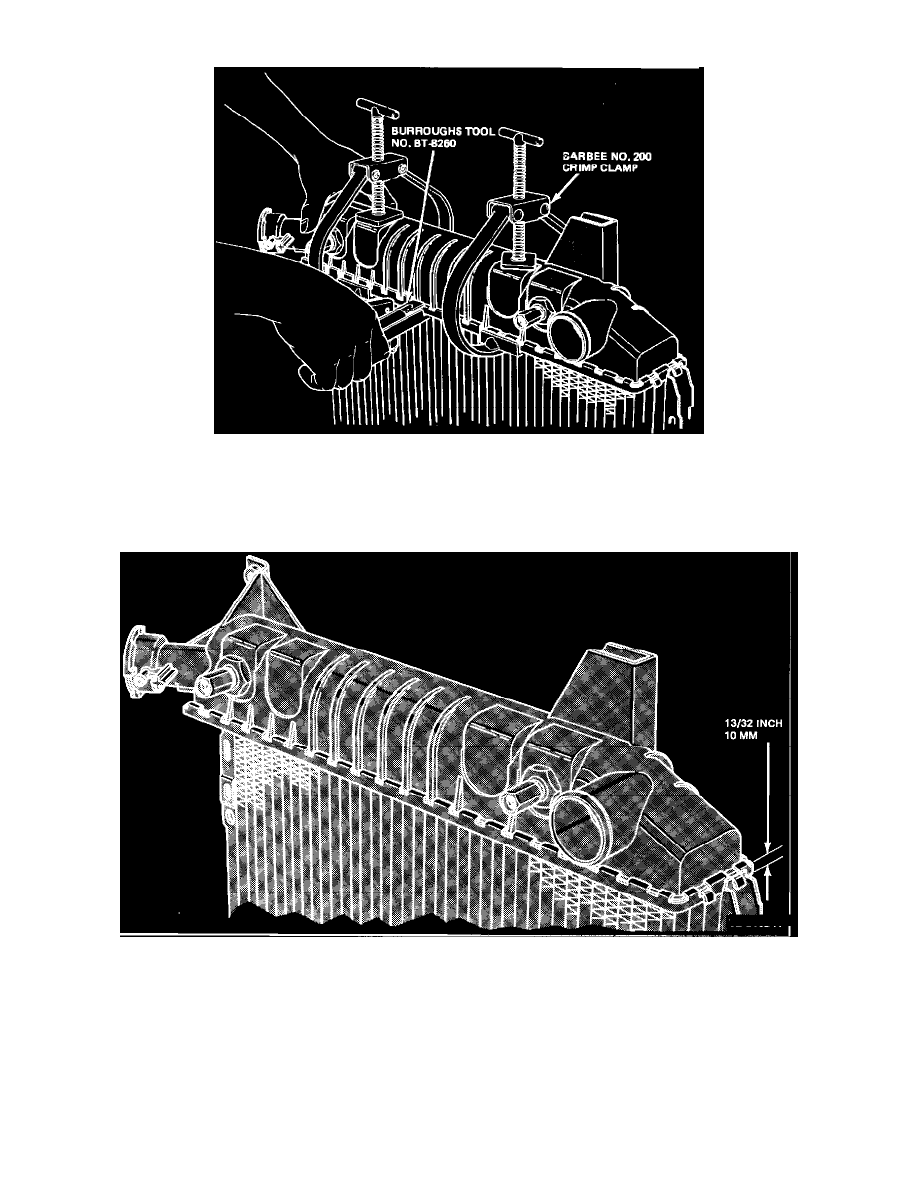
Figure 23 - CRIMPING HEADER TABS WITH LOCKING TYPE PLIERS - F SERIES AND BRONCO
Figure 24 - CRIMPING HEADER TABS WITH BURROUGHS TOOL NO. BT 8260 - F SERIES AND BRONCO
9.
Squeeze the header tabs down against the lip of the tank base with the locking-type pliers while rotating the pliers toward the tank (Figure 23).
10.
If a special crimping tool is used such as the one shown in Figure 24, follow the manufacturer's instructions.
Figure 25 - CRIMP ASSEMBLED HEIGHT - F SERIES AND BRONCO RADIATOR
NOTE:
It is, however, important that the assembled height of the crimp be 13/32 inch when measured from the bottom of the header to the top of the
tab (Figure 25).
11.
Remove the header clamps and squeeze the header tabs down that were behind the clamps.
12.
Leak test the radiator at 145 kPag (21 psig). Most minor leaks at the header to tank seal can be corrected by again squeezing the header tabs down
against the tank lip in the area of the indicated leak.
Radiator Core Repair
The only approved repair method for the aluminum radiator core requires a two-component epoxy material. The materials and supplies necessary to