
F 150 2WD Pickup V6-4.2L VIN 2 (1997)
^
Pack the exposed portion of the oil pan with shop towel(s).
CAUTION
Do not use a Scotch-Brite(R) disk to clean this surface. Fibers from the disk could get into the oil pan and oil, and clog the oil by-pass valve.
^
It is recommended that a ROLOC(R) "Bristle Disk" be used to clean this gasket surface. The most appropriate disk for this surface is a Yellow,
2-inch disk, model # 07525.
^
After the gasket surface is cleaned, blow out the oil galleys using compressed air.
2.
Clean and inspect the gasket surface of the front cover.
3.
Clean all gasket surfaces that require RTV sealant with Metal Surface Cleaner F4AZ-19A536-RA.
4.
Clean and inspect the water pump gasket surface.
5.
Raise and support the vehicle.
6.
Drain the engine oil. Tighten the drain plug to 11-16 Nm (97-141 lb-in).
7.
Lower the vehicle.
Front Cover Installation
1.
Install the timing chain tensioner. Tighten the retaining bolts to 8-14 Nm (6-10 lb-ft)
2.
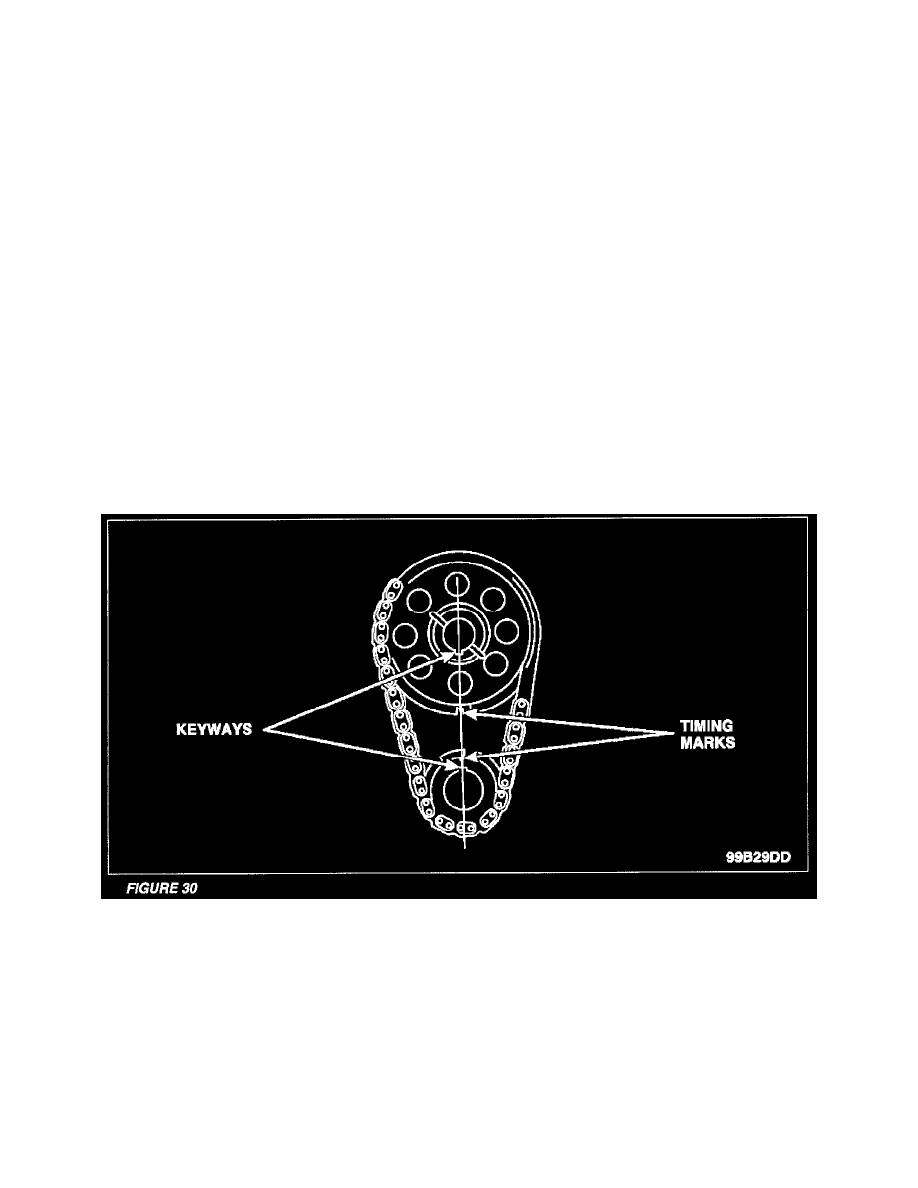
Install the timing chain, crankshaft sprocket and the camshaft sprocket as an assembly.
3.
Make sure the timing marks and keyways are aligned. See Figure 30.
4.
Apply tension to the timing chain by removing the pick from the tensioner housing.
5.
Install the camshaft position sensor drive gear. Tighten the retaining bolt to 40-50 Nm (30-36 lb-ft).
6.
Apply a light coat of engine oil to all front cover bolt and stud threads. Do not lubricate the capscrew threads or the two stud ends with sealant
already applied.
7.
position the new front cover gasket on the engine block.
8.
Apply Silicone Gasket and Sealant (F6AZ-19562-A) or equivalent to the exposed portion of the oil pan.