
F 150 2WD Pickup V8-351 5.8L Lightning (1993)
b.
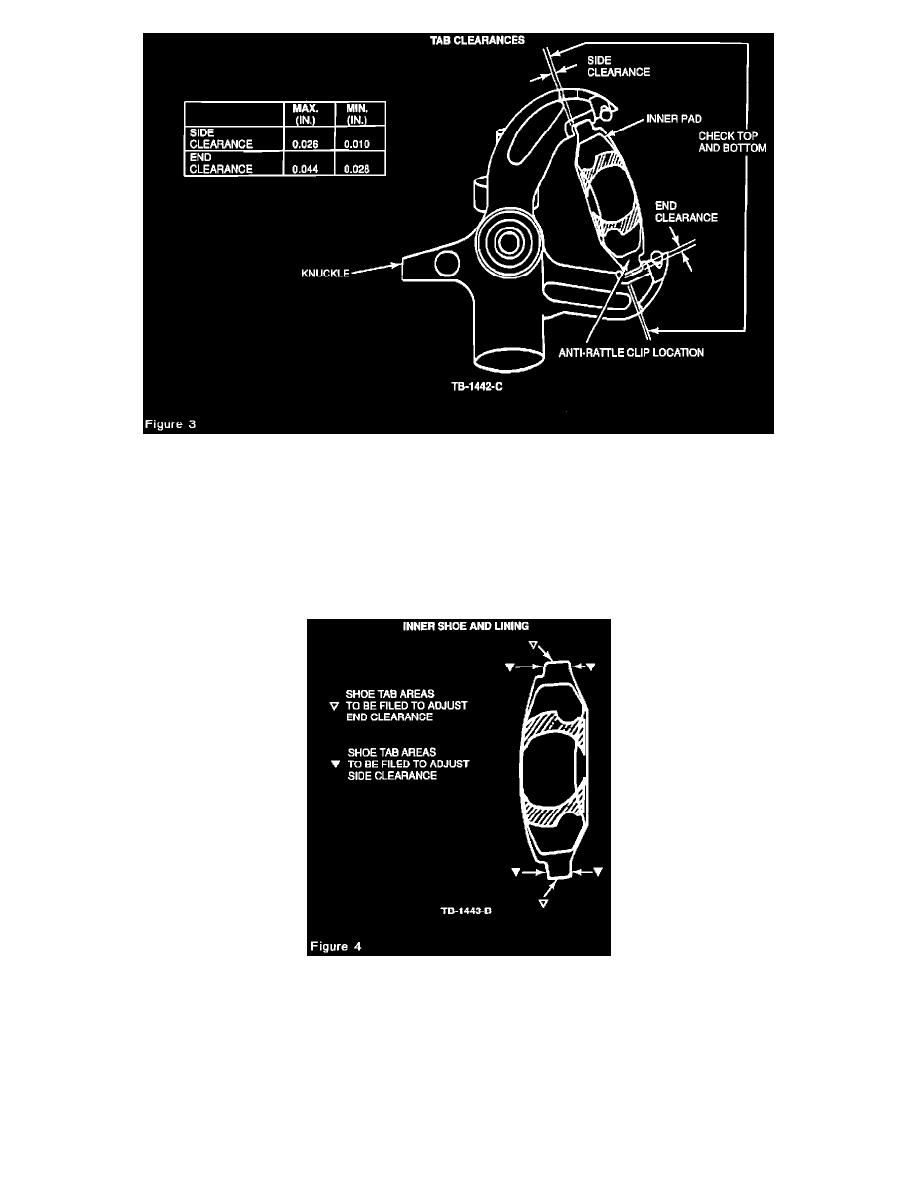
Reinstall the pad, without anti-rattle clip, and check the side and end clearances with a feeler gauge. (See Figure 3 for clearance
dimensions.)
c.
If the pad clearances are within specification, install the anti-rattle clip on the lower pad tab, Figure 3, and proceed to Step 6.
d.
If the pad clearances are NOT WITHIN SPECIFICATION, file the shoe tabs.
WARNING:
USE SAFETY GLASSES WHEN FILING SHOE TABS.
^ File material, removing equal amounts from both sides or ends (See Figures 3 and 4).
CAUTION:
DO NOT GRIND. IT IS POSSIBLE TO REMOVE TOO MUCH MATERIAL WHEN GRINDING SHOES.
^ Re-check the tab clearances, and re-install anti-rattle clip, if within specifications, on the lower pad tab, Figures 3 and 4.
6.
Apply a light coat of lubricant (D7AZ-19590-A) to the knuckle top and bottom pad groove and caliper rails.
CAUTION: