
F 150 2WD Pickup V8-4.6L CNG SOHC VIN 9 (1997)
a.
Remove bolts attaching transmission mount to the crossmember.
b.
Lift the transmission to remove any load to the crossmember. The crossmember should now be completely loose.
NOTE:
YOU MAY NOTICE THE FRAME RAILS TWIST SLIGHTLY AND "RELAX" AFTER THIS NEXT STEP.
2.
Loosen crossmember:
a.
Loosen all bolts attaching the crossmember to the frame siderails.
b.
Loosen all bolts attaching the crossmember gusset(s) to the crossmember and to the frame siderails. The crossmember should now be
completely loose.
3.
Turn the steering wheel lock-to-lock and then straighten the wheels. This helps to remove any stress in the frame.
4.
Install new crossmember fastening hardware one at a time and replace each nut and bolt with a new Nut (N800937-S427) and Bolt (N802114-52)
and leave them loosely assembled until all crossmember and gusset fasteners have been replaced.
NOTE:
IT IS IMPERATIVE THAT THE FOLLOWING TIGHTENING SEQUENCE BE FOLLOWED.
5.
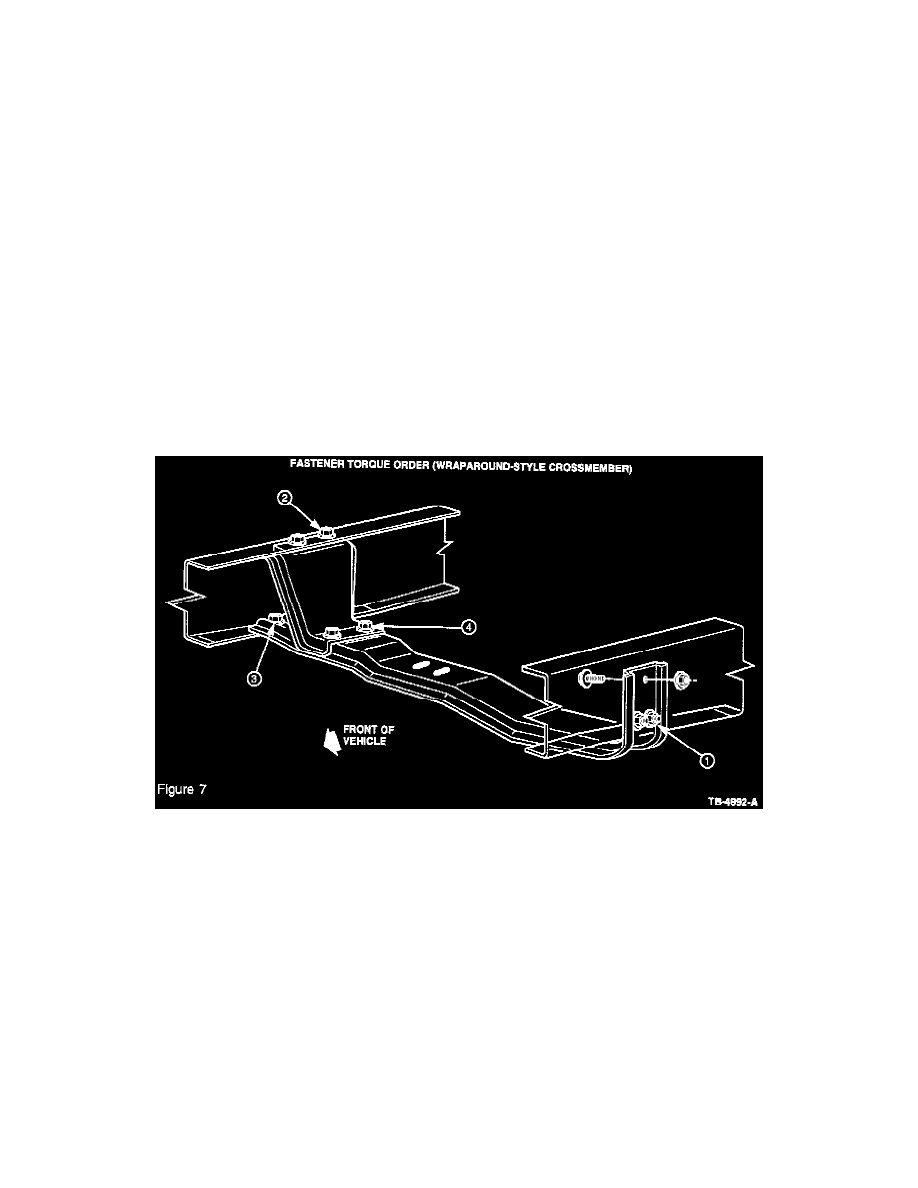
Secure the crossmember attaching hardware. Determine which style of crossmember the vehicle is equipped with, and follow Step 6 or 7.
6.
If the vehicle has a wraparound-style crossmember (Figure 7), torque each grouping of fasteners in the order listed in the following Substeps to 70
+/- 10.5 Nm (52 +/- 8 lb-ft).
a.
Torque all three (3) bolts/nuts at the crossmember-to-frame siderail at the wraparound side (Figure 7, Number 1).
b.
Torque the gusset-to-frame bolts (Figure 7, Number 2).
c.
Torque the crossmember-to-frame bolts (Figure 7, Number 3).
d.
Torque the gusset-to-crossmember bolts (Figure 7, Number 4).