
F 150 2WD Pickup V8-4.6L VIN W (2006)
2. NOTE: If the valve cover is not secured within 4 minutes, the sealant must be removed and the sealing area cleaned with silicone gasket remover
and metal surface prep. Follow the directions on the packaging. Allow to dry until there is no sign of wetness, or 4 minutes, whichever is longer.
Failure to follow this procedure can cause future oil leakage.
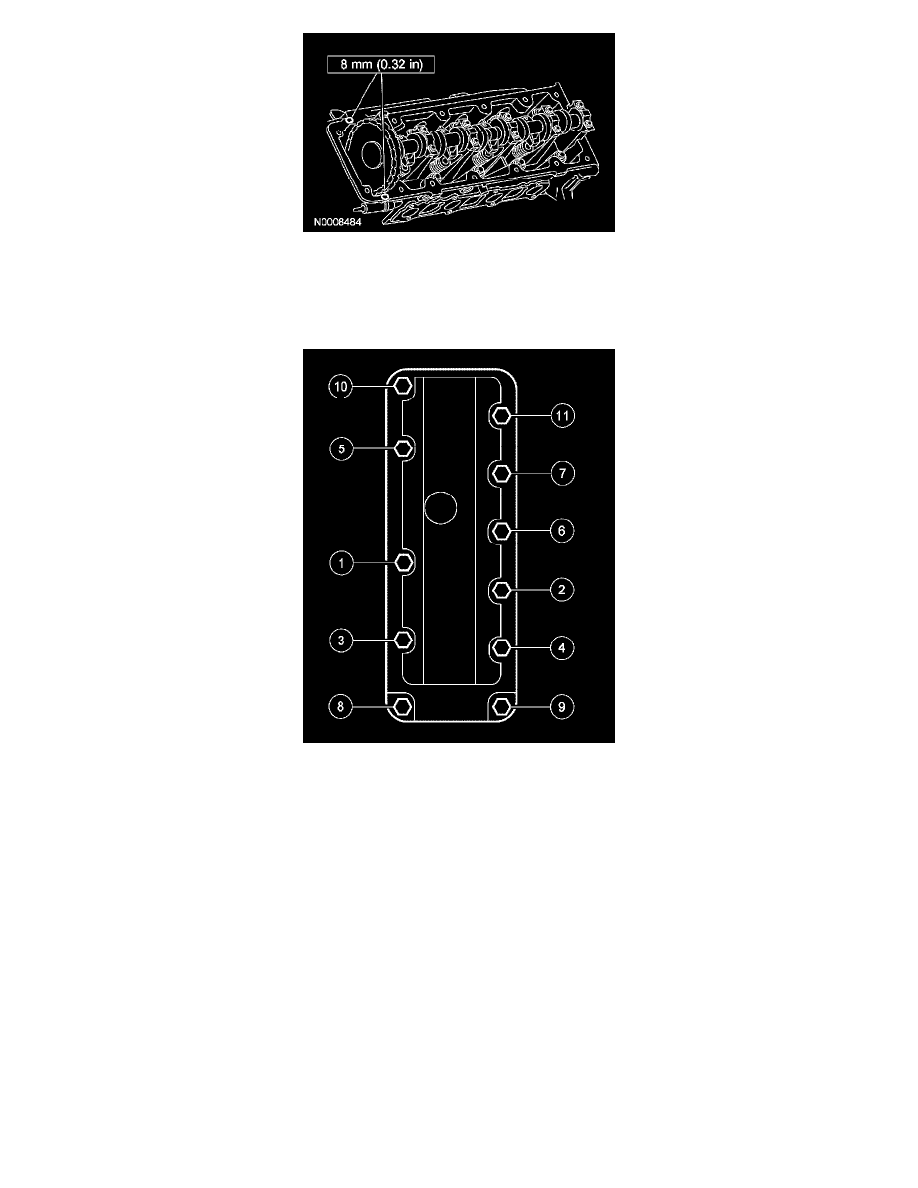
Apply a bead of silicone gasket and sealant in 2 places where the engine front cover meets the cylinder head.
3. Install the valve cover and the 5 stud bolts and 6 bolts.
^
Tighten to 10 Nm (89 inch lbs.) in the sequence shown.
4. Connect the 3 engine wiring harness retainers.
5. Install the EGR system module-to-exhaust manifold tube.
^
Tighten to 40 Nm (30 ft. lbs.).
6. Position the crankcase ventilation tube and connect the quick connect coupling.
7. Position the oil level indicator and install the bolt.
^
Tighten to 10 Nm (89 inch lbs.).
8. Position the power steering reservoir and support bracket assembly and install the 2 power steering reservoir support bracket-to-cylinder head
bolts.
^
Tighten to 40 Nm (30 ft. lbs.).
9. Install the power steering reservoir support bracket-to-intake manifold bolt.
^
Tighten to 11 Nm (8 inch lbs.).
10. Connect the battery ground cable.
11. Install the air cleaner outlet pipe and the air cleaner assembly.