
F 150 4WD V8-4.6L VIN 8 (2010)
12. Using a 50 mm (1.968 in) hole saw, drill a hole into the floor pan.
13. Bend the tabs of the damaged cage nut upward to access the cage nut.
14. Using a suitable tool, hold the cage nut and remove the body mount bolt.
-
Discard the body mount bolt.
15. NOTICE: Do not use a standard nut as a replacement for the nut being removed. Failure to use the correct part number for the nut may
result in damage to the vehicle.
NOTE:
-
If the cage nut is not damaged, it is not necessary to replace it with a new cage nut. The old cage nut may be used if the threads of the nut are
not damaged.
-
Make sure that the surface of the cage nut retainer is flat prior to installing the cage nut.
-
Remove the new cage nut from the cage and install the cage nut into the pre-existing cage.
Install the new cage nut into the location from which the damaged nut was removed.
16. Install a new body mount bolt.
-
Tighten the new bolt to 115 Nm (85 lb-ft).
17. Install the new service plug (7C3Z-2500155-B).
18. Position the carpet into the correct orientation.
19. NOTICE: To avoid damage to the scuff plate trim panel, remove any retaining clips from the body and attach them to the scuff plate
trim panel before installing.
Install the scuff plate trim panel.
Body mount No. 2 (SuperCab and SuperCrew only)
20. Remove the scuff plate trim panel.
-
Pull upward to release the scuff plate trim panel clips from the body.
21. Remove the front seat.
22. Remove the console.
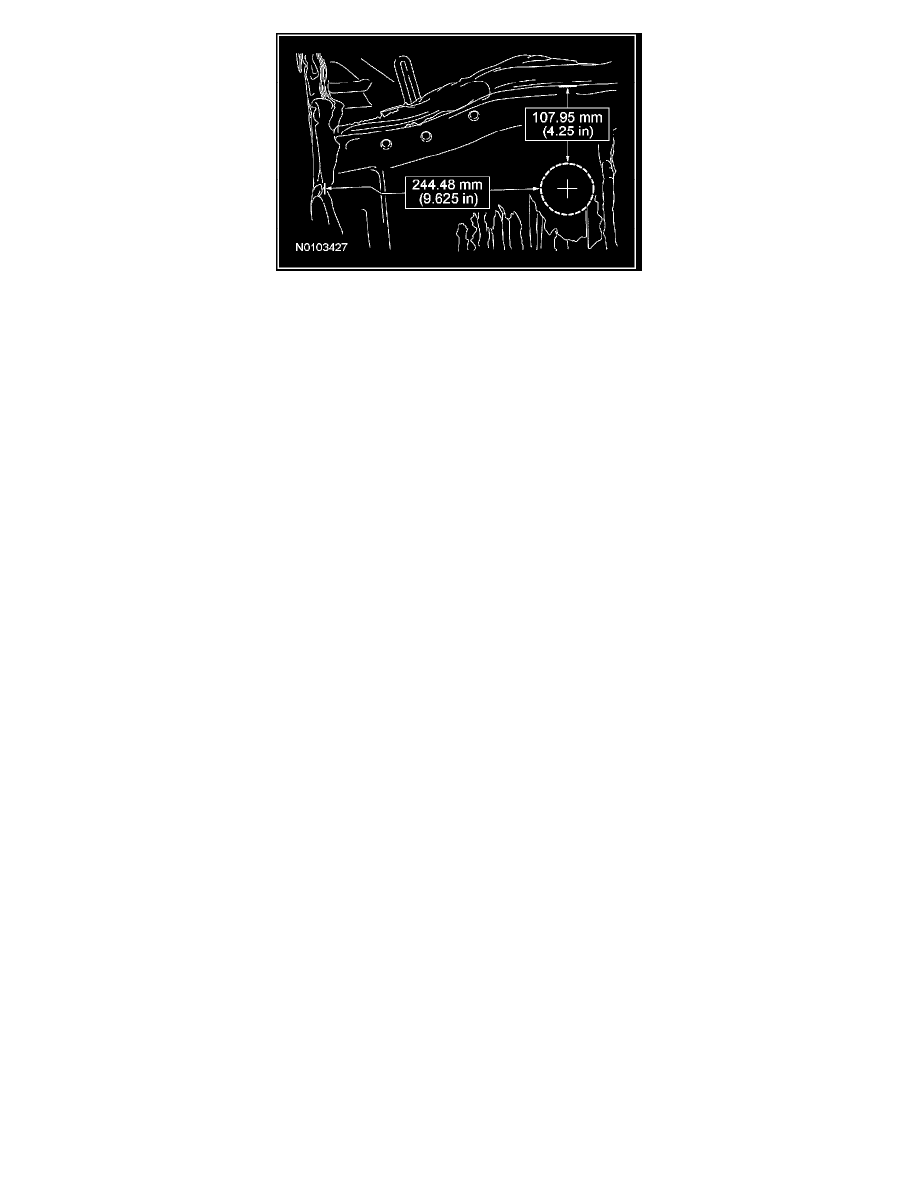
23. NOTE: The No. 2 body mounts are located directly under the locations shown.
Peel the carpet back to gain access to the body mount No. 2 location.