
F 150 4WD V8-4.6L VIN 8 (2010)
Removal and Installation
All vehicles
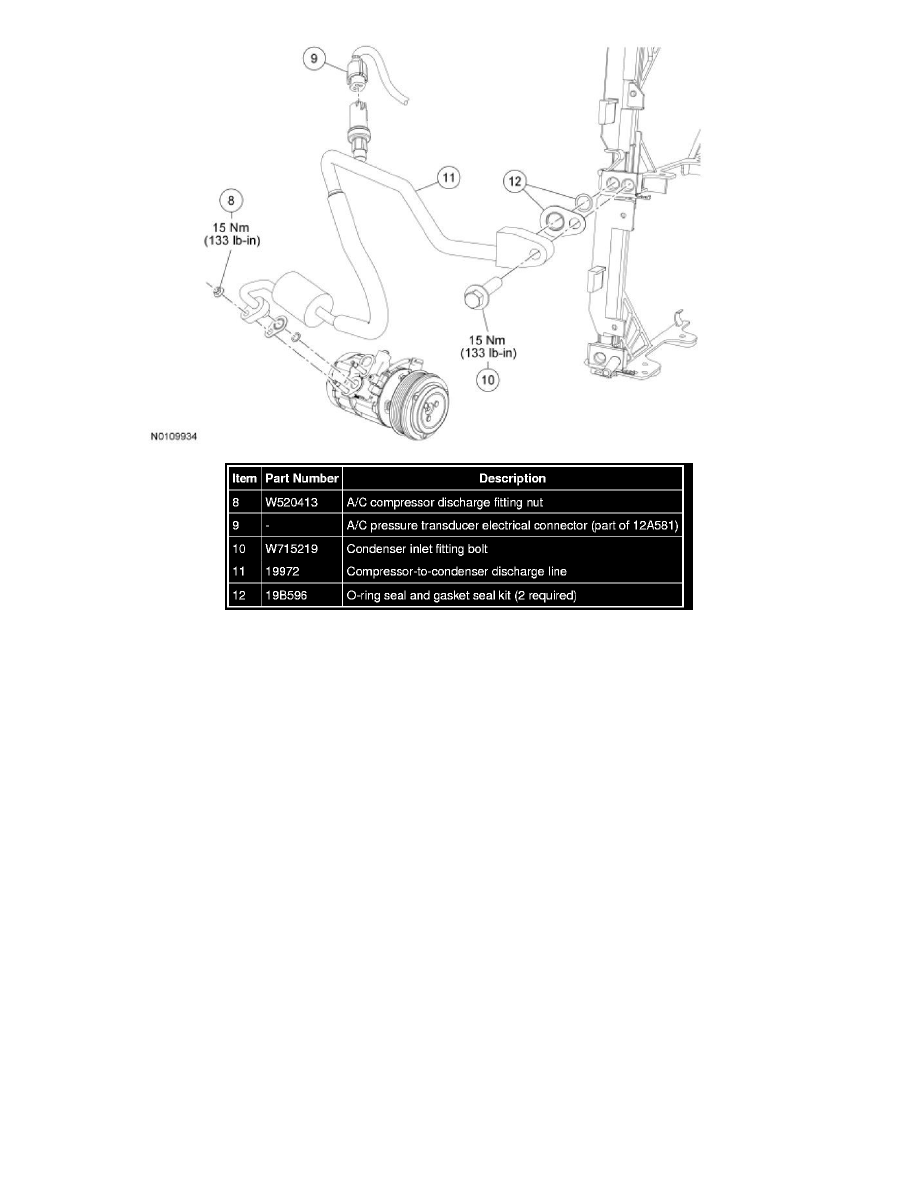
1. Recover the refrigerant.
2. Detach the wire harness clip from the A/C compressor discharge fitting stud.
3. Remove the A/C compressor discharge fitting nut and disconnect the fitting.
-
Discard the O-ring seal and gasket seal.
-
To install, tighten to 15 Nm (133 lb-in).
4. Remove the RH radiator air deflector upper pin-type retainer and position the air deflector aside.
Vehicles built on or after 12/21/2009 with "F" as second VIN digit, or vehicles built on or after 1/11/2010 with "B" as second VIN digit
5. Remove the condenser inlet jumper line fitting nut and disconnect the fitting.
-
Discard the O-ring seal and gasket seal.
-
To install, tighten to 15 Nm (133 lb-in).
6. Remove the compressor-to-condenser discharge line.
7. If removing the condenser inlet jumper line, disconnect the A/C pressure transducer electrical connector.
8. If removing the condenser inlet jumper line, remove the condenser inlet fitting nut and disconnect the fitting.
-
Discard the O-ring seals and gasket seals.
-
To install, tighten to 15 Nm (133 lb-in).