
F 150 4WD V8-4.6L VIN 8 (2010)
7. Remove and discard the upper ball joint nut.
8. Remove and discard the shock absorber lower nut and bolt.
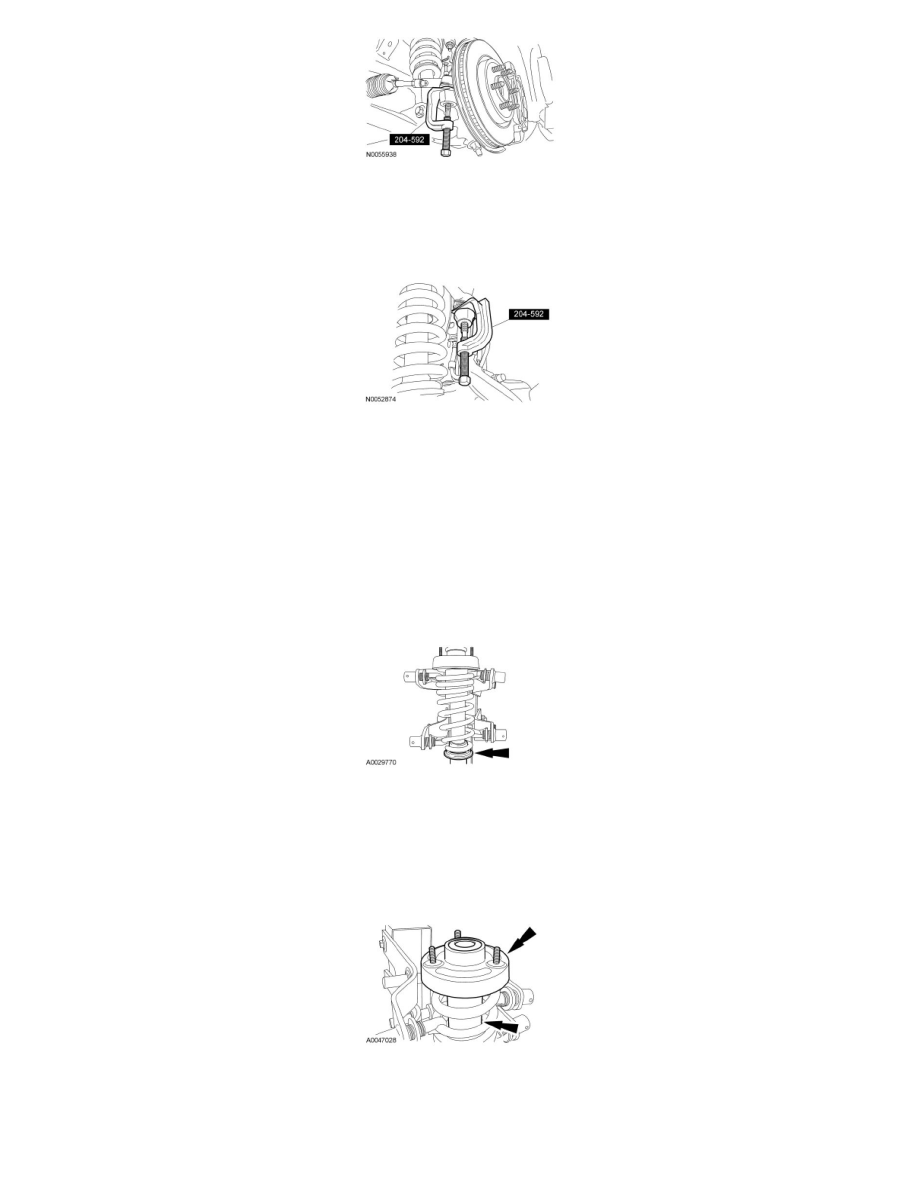
9. Using the Ball Joint Separator, disconnect the upper arm ball joint from the wheel knuckle and remove the shock absorber and spring assembly.
SVT Raptor
10. Remove the lock washer and the shock absorber and spring assembly lower spacer.
-
Discard the lock washer.
All vehicles
11. NOTE: If the individual spring and/or shock components are not being serviced, continue to the installation procedure.
NOTE: For reference during assembly, index the upper mount, spring and shock absorber.
Using a suitable spring compressor, compress the spring until the tension is released from the shock absorber.
12. NOTE: Use the hex-holding feature to prevent the shock rod from turning while removing the nut.
While holding the shock rod, remove the nut and the shock absorber.
-
Discard the nut.
13. Remove the upper mount, dust boot and insulator.
Installation
All vehicles
NOTICE: Do not tighten the lower shock nut until the installation procedure is complete and the weight of the vehicle is resting on the wheel