
F 150 Super Crew 2WD V8-4.6L SOHC VIN 6 (2003)
reconnected and the vehicle is driven. This is a temporary condition and will return to normal operating condition once the Powertrain Control
Module (PCM) relearns all the parameters from the driving conditions. There is no set time frame for this process. If this concern is present during
downshifts or converter clutch apply, it is not the fault of the shift strategy and will require diagnosis.
The customer needs to be notified that they may experience slightly different upshifts either soft or firm and that this is a temporary condition and
will eventually return to normal operating condition.
Disconnect the battery ground cable.
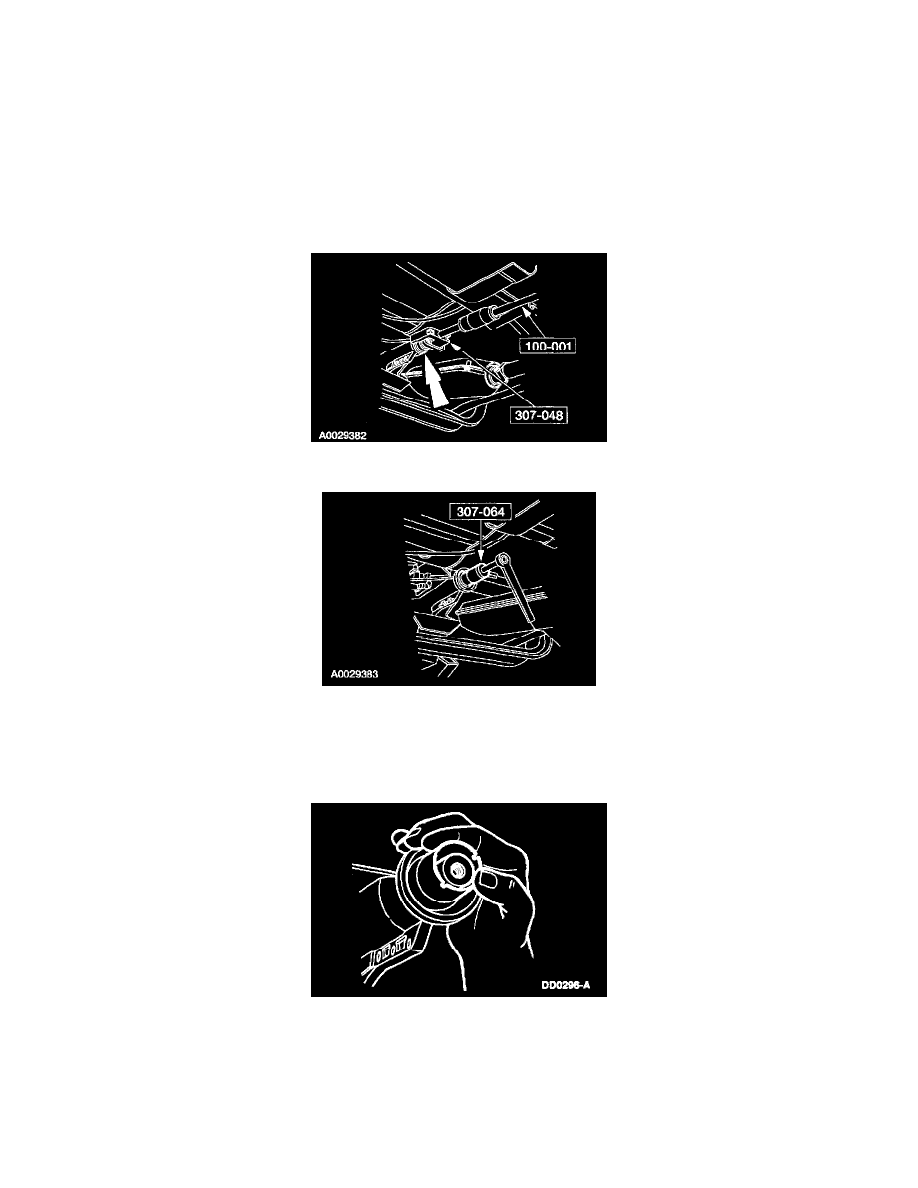
2. NOTE: 4x2 shown, 4x4 similar.
Raise the vehicle on a hoist.
3. Remove the driveshaft.
4. Using the special tools, remove the extension housing seal.
5. CAUTION: Do not damage any machined surfaces. Damage may cause the new seal to leak.
Using the special tool, remove the extension housing bushing.
Installation
1. CAUTION: Prior to installing the extension housing bushing, inspect the extension housing counterbore for burrs. If necessary, remove the burrs
with an oil stone or damage to new bushing may occur.
NOTE: The extension housing bushing is model dependent, refer to the the correct part usage.
Align the extension housing bushing in the extension housing so that the slots are in the 2 o'clock and 7 o'clock positions.