
F 250 2WD LD Pickup V8-4.6L SOHC VIN 6 (1997)
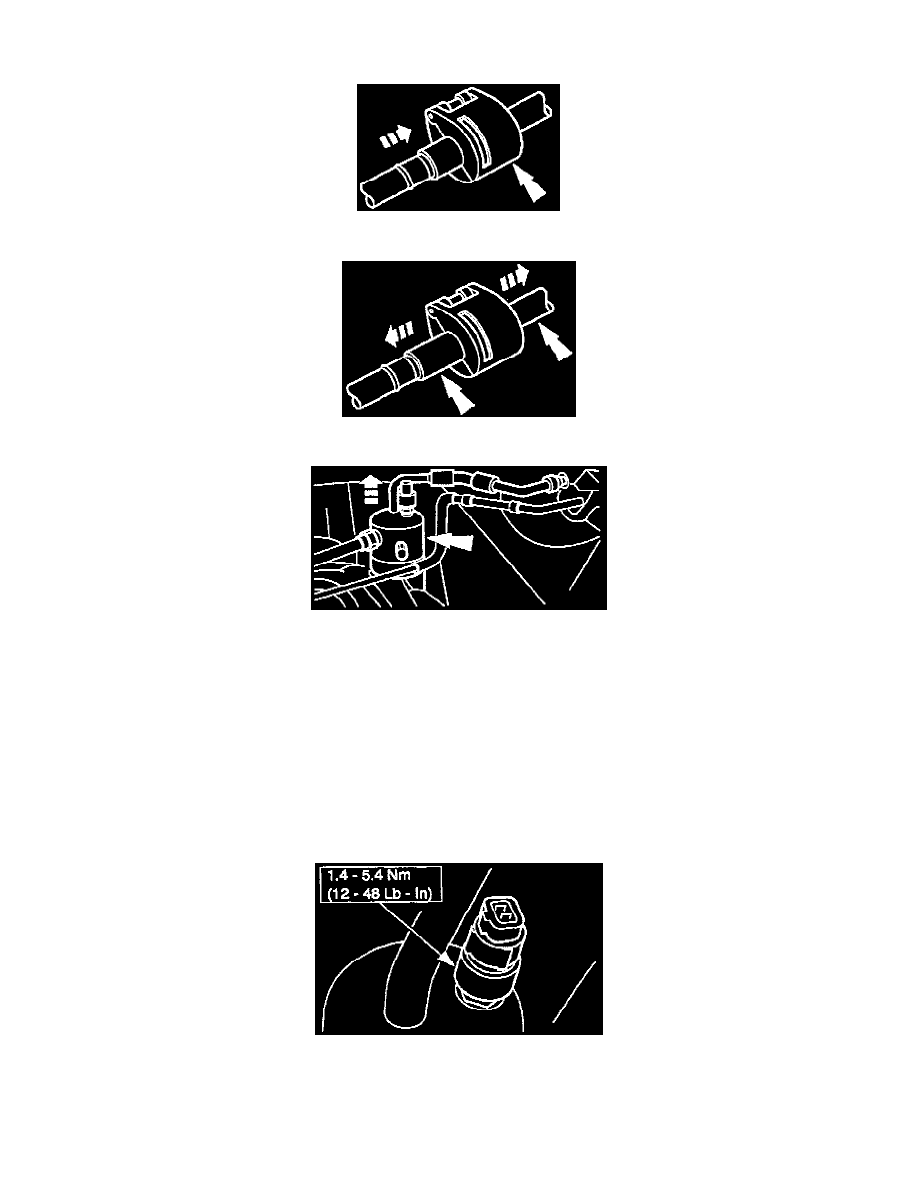
6. Fit Spring Lock Coupling Disconnect Tool to the evaporator lines so that the spring lock coupling tool can enter the cage opening to release the
A/C tube lock coupling spring.
7. Push the tool into the cage opening to release the female fitting from the A/C tube lock coupling spring.
8. Pull the spring lock coupling fittings apart.
9. Remove the suction accumulator/drier.
10. Drain the oil from the removed suction accumulator/drier into a suitable measuring container. It may be necessary to drill one or two 12.7 mm (1/2
inch) holes in the bottom of the old suction accumulator/drier to make sure that all the oil has drained out.
INSTALLATION
1. Add the same amount of clean new refrigerant oil that was removed, plus 59 ml (two fluid ounces) to the new suction accumulator/drier. Use only
the oil specified for the vehicle being serviced.
NOTE: When the battery is disconnected and reconnected, some abnormal drive symptoms may occur while the vehicle relearns its adaptive
strategy. The vehicle may need to be driven 16 km (10 miles) or more to relearn the strategy.
Add refrigerant oil.
^
Use YN-12b Compressor Oil F2AZ-19577-AC or equivalent meeting Ford specification WSH-M1C231-B.
2. Transfer the A/C cycling pressure switch to the new suction accumulator/drier.
3. Install new O-rings.
NOTE: Lubricate new O-ring seals liberally with clean YN-12b Compressor Oil F2AZ-19577-AC or equivalent meeting Ford specification
WSH-M1C231-B.