
F 250 2WD LD Pickup V8-4.6L SOHC VIN 6 (1997)
(1) Remove the lock bolt.
(2) Remove the differential pinion shaft.
CAUTION: Once the differential pinion shaft has been removed, turning the differential case or an axle shaft will cause the differential pinion
gears to fall out of the assembly. This could result in chipped or damaged components.
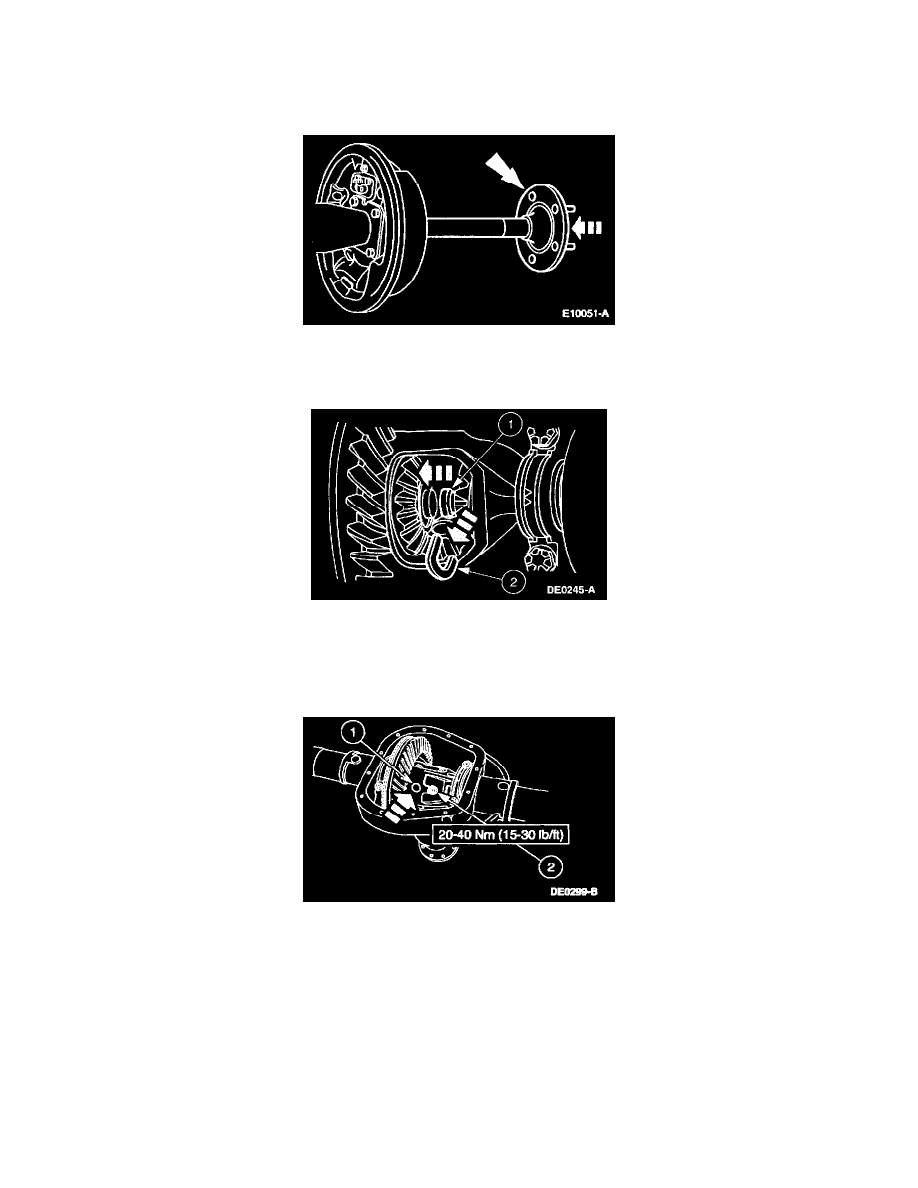
3. Install the two axle shafts.
CAUTION: Do not damage the axle shaft oil seal.
4. Install the U-washers.
(1) Position the two U-washers on the button end of the axle shaft.
(2) Pull the axle shafts outward.
CAUTION: Do not damage the rubber O-rings in the axle shaft grooves.
5. Install the differential pinion shaft.
(1) Align the hole in the differential pinion shaft with the case lock bolt hole.
(2) Install the lock bolt.
6. Install the rear brake drums, if equipped.
7. Install the rear disc brake rotors, if equipped.
8. Install the rear axle housing cover and fill the differential carrier with the correct amount of specified lubricant.
9. Clean the wheel hub and mounting surfaces.
WARNING: ALWAYS REMOVE ANY CORROSION, DIRT OR FOREIGN MATERIAL THAT MAY BE PRESENT ON THE
MOUNTING SURFACES OF THE WHEEL OR THE SURFACE OF THE WHEEL HUB, BRAKE DRUM, OR BRAKE ROTOR
THAT CONTACTS THE WHEEL. INSTALLING WHEELS WITHOUT PROPER METAL-TO-METAL CONTACT AT THE
WHEEL MOUNTING SURFACES CAN CAUSE THE LUG NUT TO LOOSEN AND THE WHEEL TO COME OFF WHILE THE