
F 250 2WD Pickup V8-6.9L DSL (1985)
cylinder stud hole.
NOTE: THE SHEET METAL VARIES FROM TRUCK TO TRUCK AND IT MAY BE NECESSARY TO BEND THE REINFORCEMENT TO
GET A GOOD FIT.
b.
Tighten the upper nut and bolt securely to compress any distortion in the four sheet metal laminations in this area.
12.
Drill the holes for the reinforcement plate.
a.
Using a 3/8" (9.5 mm) drill bit, with the reinforcement as a template, drill two holes up into the cowl inner and three holes into the inner side
of the dash.
b.
De-burr the outside of the holes as necessary.
c.
Remove any excess sealant in the area and clean up the drill chips inside the truck and cowl.
13.
Attach the smaller plate via the three threaded holes into the engine compartment side of the dash inner panel.
a.
Use three 8 mm bolts passed through the main reinforcement, from inside the cab.
b.
Install the rubber cap (N804118) onto the end of the uppermost screw from under the dash.
c.
Position the plate with the two studs attached inside the cowl, through the two holes drilled from below.
d.
Attach two 8 mm nuts from the inside of the cab.
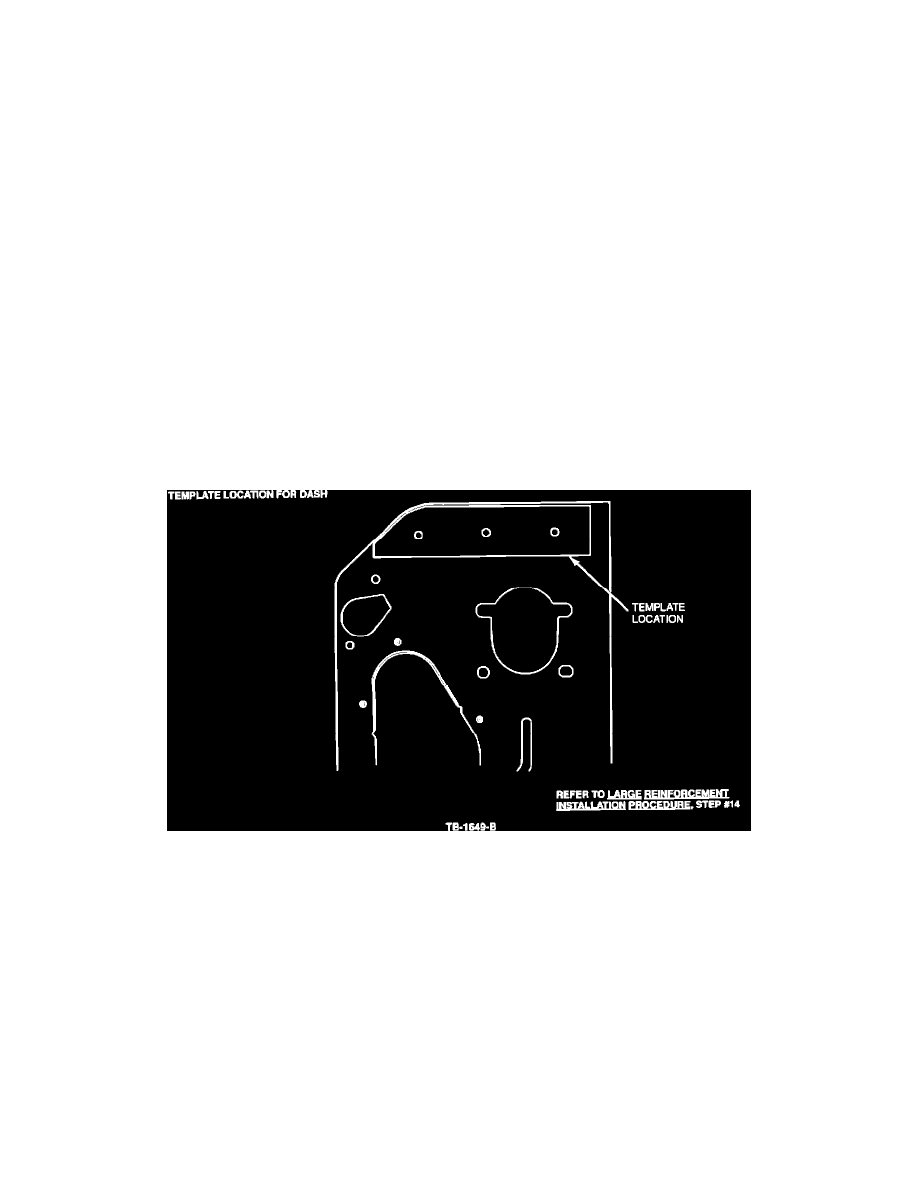
14.
Using the paper template provided in the kit, proceed as follows:
Figure 9
a.
Center punch and drill three 3/8" (9.5 mm) holes into the dash reinforcement and through the cowl, from the engine compartment side,
Figure 9.
NOTE: DRILLING WILL BE EASIER IF THERE ARE NO SPOTWELDS VISIBLE THROUGH THE THREE HOLES.
b.
If necessary, move the pattern outboard slightly to avoid any visible spotwelds.
c.
De-burr the holes inside the cowl as necessary and clean up the drill chips inside the cowl.