
F 250 2WD Pickup V8-7.3L DSL (1990)
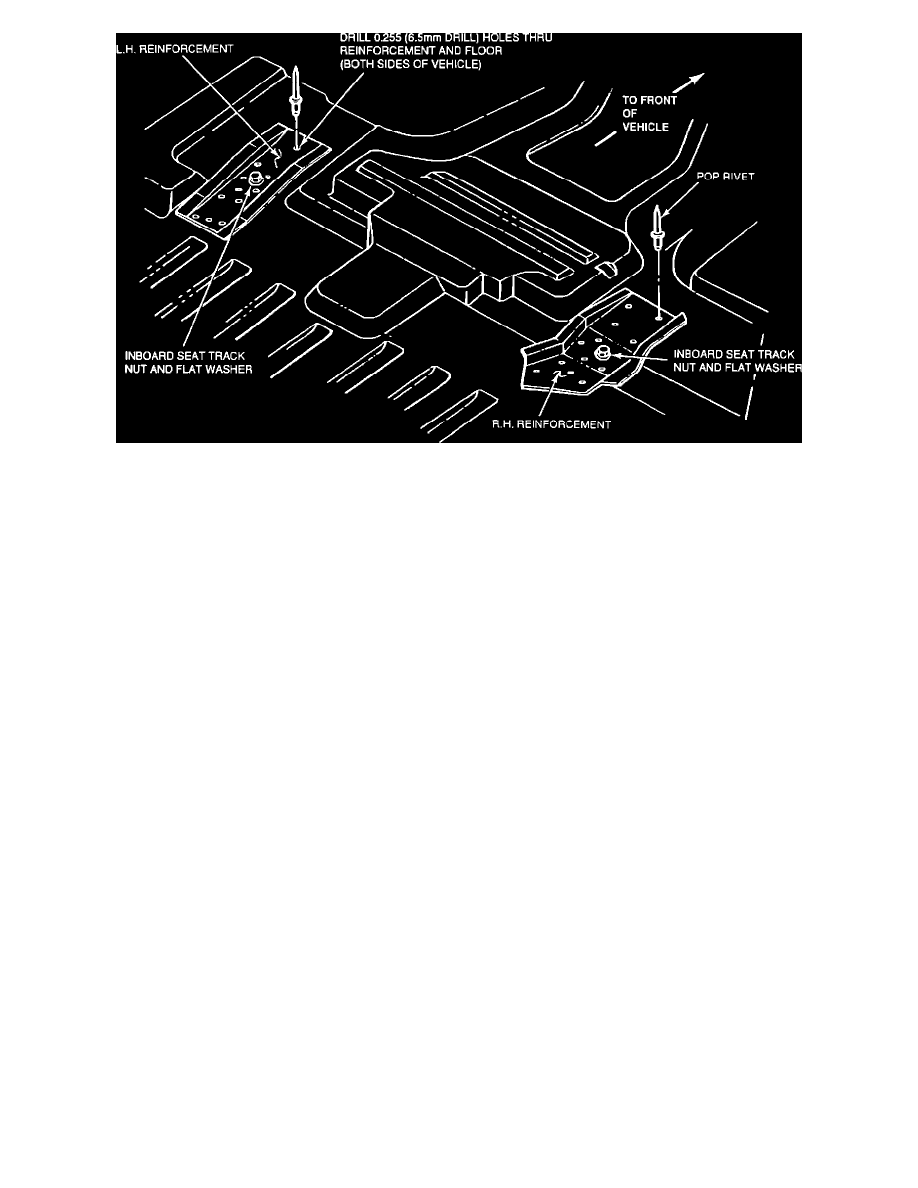
FIGURE 1
B.
Small Reinforcement Installation Procedure
1.
Place small reinforcement on top of the floor pan sheet metal. (See Figure 1). Remove any floor pan deadener from under the reinforcement.
2.
Attach the small reinforcement to the floor pan with 1 seat track nut and flat washer.
3.
Use the holes in the reinforcement as a guide. Drill a 0.255 diameter (6.5 mm drill) hole through the reinforcement and the floor pan.
4.
Install and set a pop rivet immediately after drilling hole. Repeat drilling/riveting for each hole.
5.
Remove the seat track bolt and washer when all holes are completed.
6.
Repeat procedure for other side of floor pan.
7.
Reinstall carpets/mats.
8.
Reinstall both seals.
9.
Raise truck and spray Super Seal on bottom side of floor pan to cover all pop rivets. 10.
If driver's side is cracked, use large reinforcement (FOTZ-1811299-A). See Section C.
Use small right side reinforcement (See Step B-1) to strengthen passenger's side floor pan.
If passenger's side is cracked, use large reinforcement (FOTZ-1811298-B). See Section C.
Use small left side reinforcement (See Step B-1) to strengthen driver's side floor pan.
C.
Large Reinforcement Installation Procedure - Floor Pan Cracked (Either Side)
1.
Remove heat bonded deadener from floor pan and clean the floor pan surface with 3M General Purpose Adhesive Cleaner.
2.
Apply 3M Joint and Seam Spaler on top of crack.
3.
Clean bottom surface of reinforcement plate with 3M General Purpose Adhesive Cleaner.
ATTACHMENT TO:
OWNER NOTIFICATION PROGRAM B93
ATTACHMENT III-2