
F 250 2WD Pickup V8-7.3L DSL (1990)
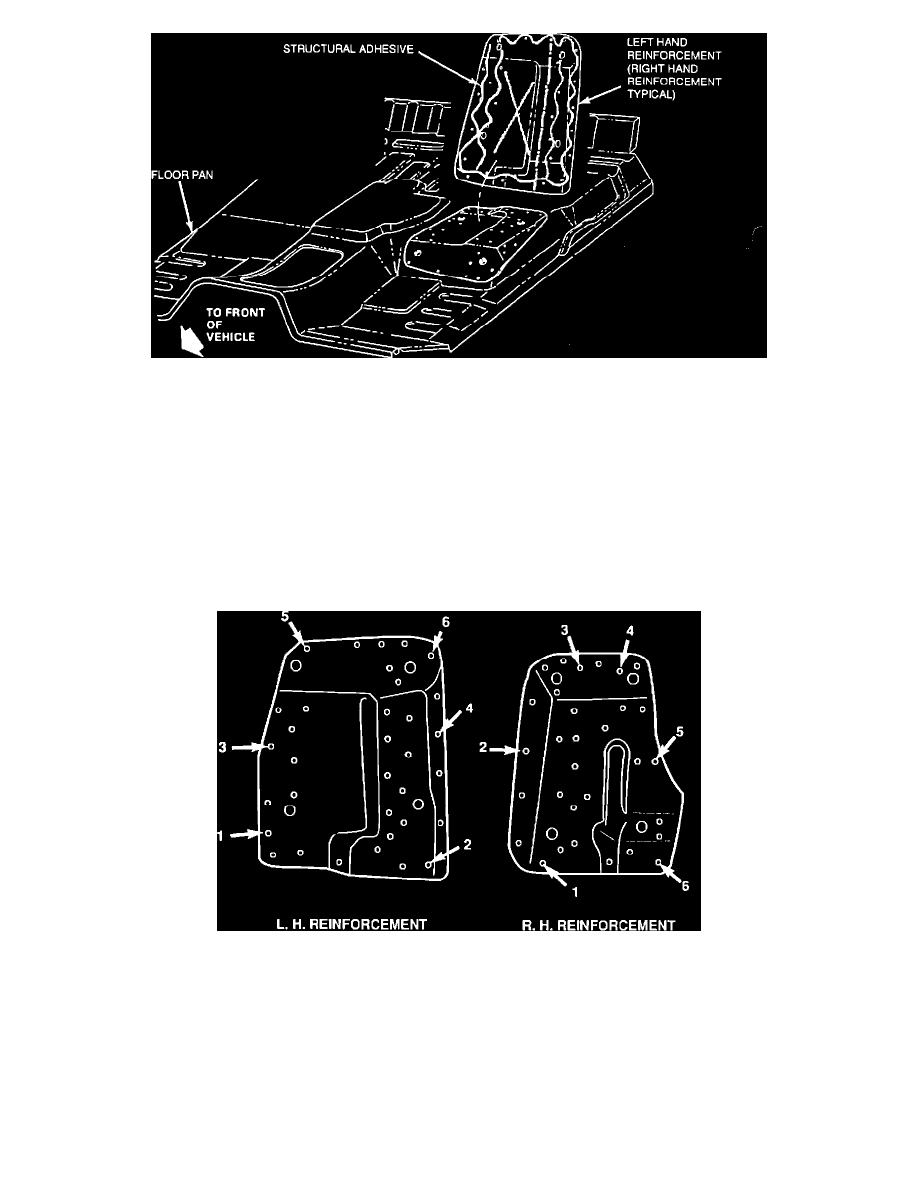
FIGURE 2
C.
Large Reinforcement Installation Procedure (Continued)
4.
Apply 1/4"-3/8" (6.3-9.5 mm) bead of 3M Structural Adhesive to the bottom surface of reinforcement. (See Figure 2).
NOTE:
A 3M AUTOMIX APPLICATOR GUN CAN BE PURCHASED FROM YOUR LOCAL 3M SUPPLIER. THE APPLICATOR
GUN IS REQUIRED TO APPLY THE STRUCTURAL ADHESIVE.
ADHESIVE HARDENS WITHIN 30 MINUTES. COMPLETE INSTALLATION STEPS AS SOON AS POSSIBLE BEFORE ADHESIVE
CURES.
5.
Place large reinforcement on top of floor pan.
6.
Attach the reinforcement to the floor pan with the four (4) seat track mounting bolts and flat washers.
FIGURE 3
7.
Using the numbered locations shown in Figure 3. Drill through the reinforcement and floor pan. Install and set a pop rivet after drilling each
hole. Drill the remaining 27 holes in the reinforcement and floor pan. Install and set 27 pop rivets.
8.
Remove the four (4) seat track bolts and washers.
9.
Reinstall carpets/mats.
10.
Reinstall both seats.
11.
Raise truck and spray Super Seal on bottom side of floor pan to cover all pop rivets and all visible cracks.
Owner Letter
Serial Number IFMCA11S6XYZ12345
September, 1990