
F 250 2WD Pickup V8-7.3L DSL (1990)
Brake Shoe: Service and Repair
Installation
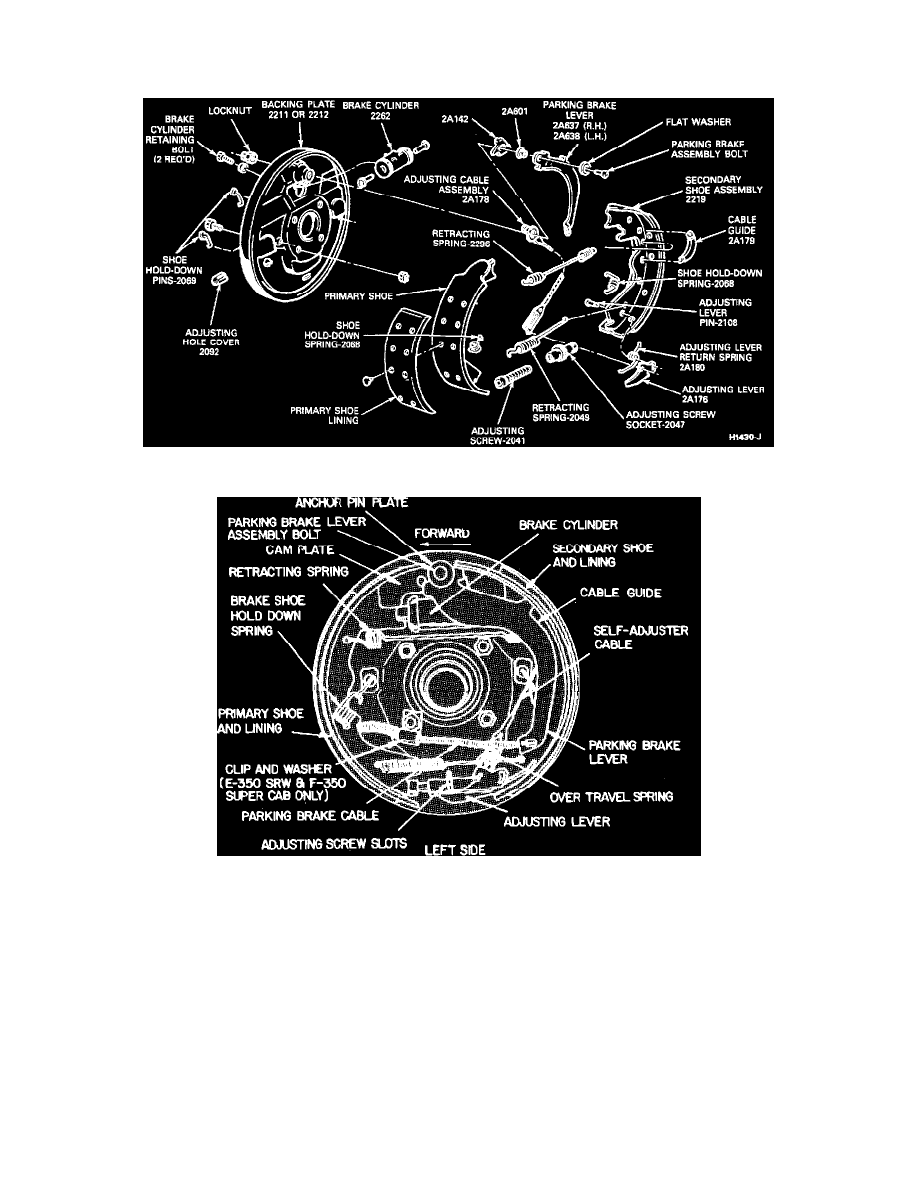
Exploded View
Assembled View
1. Clean ledge pads on backing plate, sanding lightly to bare metal.
2. Apply suitable lubricant to retracting and hold-down spring contacts on brake shoes and backing plate.
3. Apply suitable lubricant to threads and socket end of adjusting screw.
4. Install upper retracting spring on primary and secondary shoes and position shoe assembly on backing plate with wheel cylinder pushrods in shoe
slots. For additional information see Brake Spring Removal and Installation Notes.
5. Install brake shoe hold-down springs.
6. Install brake shoe adjustment screw assembly with the slot in the head of adjustment screw facing primary shoe, lower retracting spring, adjusting
lever, and lever spring assembly. Connect adjusting cable to adjusting lever. Socket end of each adjusting screw is stamped ``R'' or ``L'' to indicate
use on right or left side of vehicle. Adjusting pivot nuts can be identified by number of lines machined around body of nut. Two lines indicate
righthand nut and one line indicates lefthand nut.
7. Position cable in cable guide and install cable anchor fitting on the anchor pin.
8. Install parking brake assembly in anchor pin and secure with retaining nut behind backing plate.
9. On vehicles with full-floating axles, install brake drums as follows:
a. Place brake drum on hub and install attaching screws, bolts, or bolts and nuts.