
F 250 2WD Pickup V8-7.3L DSL (1990)
2. Install clutch piston.
3. Ensure steel pressure ring is in groove on piston. Position disc spring in cylinder with convex (dished) face downward. Install spring as shown in
the Removing Or Installing Disc Spring image. Secure disc with snap ring.
4. Install forward pressure plate with flat side up and beveled side down. Dip clutch plates in transmission fluid. Install wave plate, then a steel plate
and a composition driven plate. Install remaining plates in this sequence. The last plate installed will be the rear pressure plate as shown in the
Forward Clutch Disassembled image.
NOTE: Install snap ring, making sure it is seating in the groove. If new composition plates are to be used, they should be soaked in transmission
fluid for 15 minutes prior to assembly.
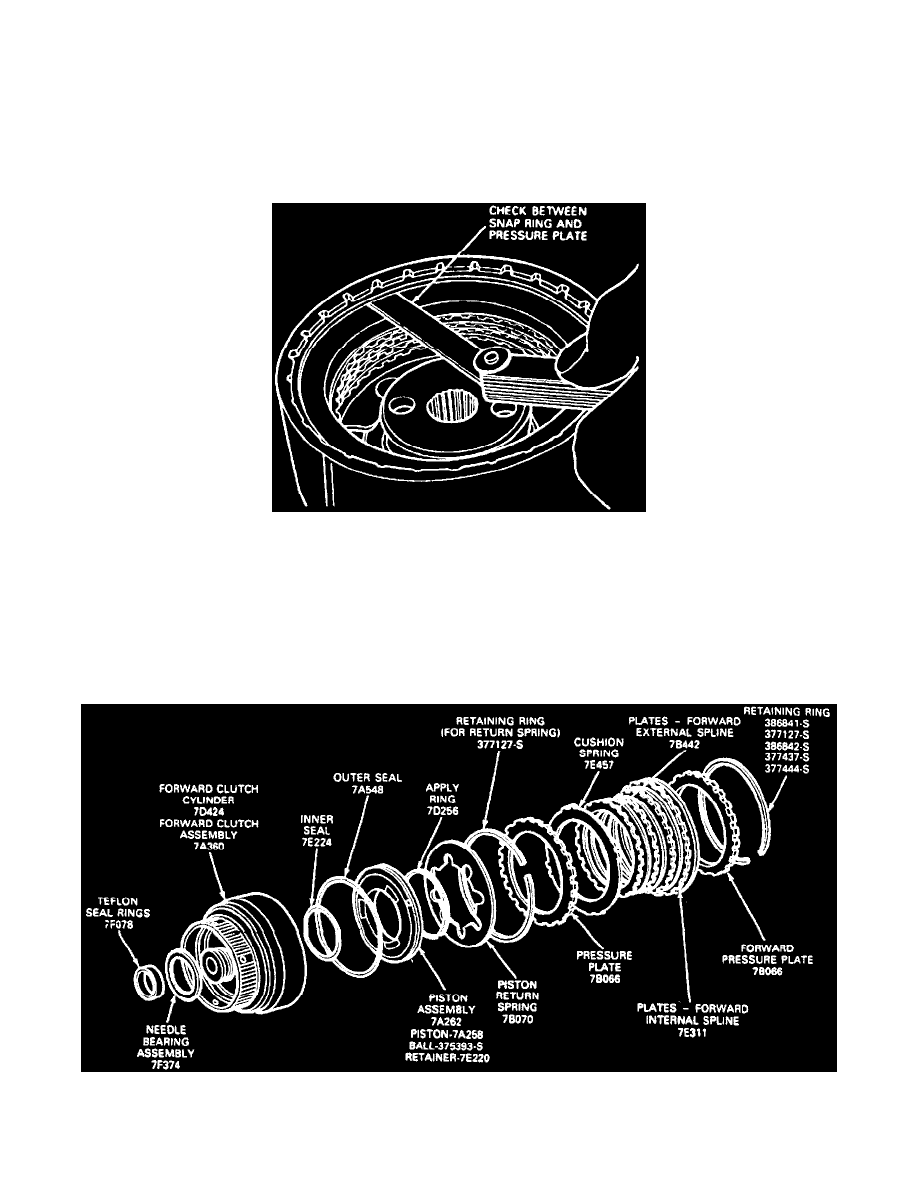
Checking Forward Clutch Snap Ring Clearance
5. With feeler gauge, check clearance between snap ring and pressure plate. Downward pressure on plate should be maintained when making this
check. Clearance should be 0.021-0.046 inch. If not, selective thickness snap rings are available in thicknesses of 0.056-0.060 inch, 0.065-0.069
inch, 0.074-0.078 inch, 0.083-0.087 inch, 0.092-0.096 inch, 0.110-0.114 inch and 0.128-0.132 inch. Install correct thickness snap ring and
recheck clearance.
With E4OD
DISASSEMBLE
Forward Clutch Exploded View
NOTE: Refer to the Forward Clutch Exploded View image when performing the following procedure.