
F 250 2WD Pickup V8-7.3L DSL Turbo VIN F (1994)
8.
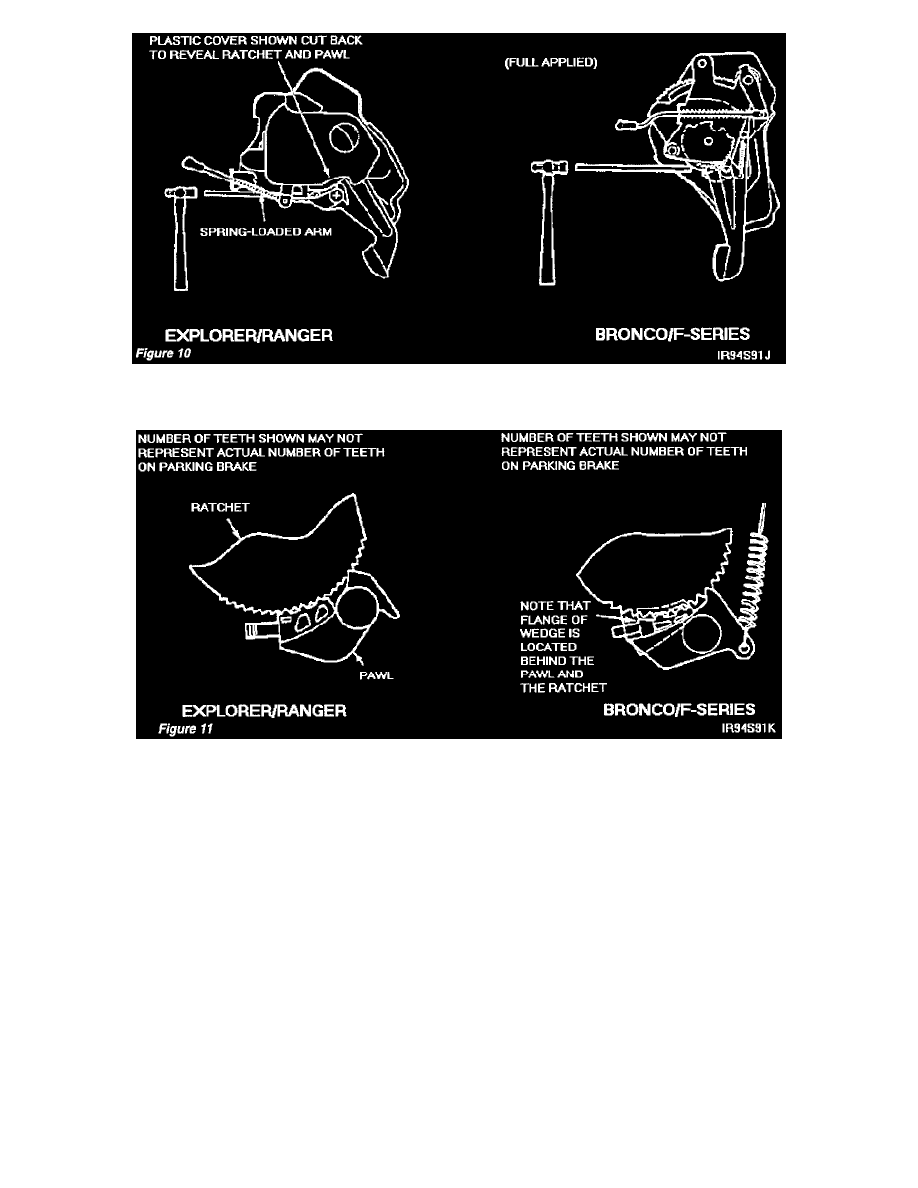
Use a small hammer and punch to apply light force to the back end (or drive area) of the wedge. See Figure 10.
9.
Use sufficient force to ensure adequate seating of the wedge into the ratchet teeth. On Explorer/Ranger models, more force may be required to
completely seat wedge. Check the wedge for proper alignment with the pawl after seating. See Figure 11.
10.
After the wedge is properly seated, cycle the lever mechanism "APPLIED" and "RELEASED" a minimum of six (6) times, leaving the pedal in the
full "APPLIED" position after the last application.
11.
Recheck the wedge to be sure it is fully engaged in its proper position.
NOTE:
The parking brake light should be off when the parking brake is released. If the light is on with the parking brake released, check the wedge
installation (Step 9).
Parking Brake Functional Test
NOTE:
The installation of the lock-in wedge disables the self-adjusting feature of the parking brake control assembly. The following parking brake
functional test must be performed to verify proper parking brake system adjustment.
1.
Place vehicle on hoist with the transmission in neutral.
a.
Verify the parking brake is fully released. Check for brake drag by turning the rear wheels by hand.