
F 250 2WD Pickup V8-7.3L DSL Turbo VIN F (1994)
Band Apply Servo: Service and Repair
Removal and Installation
Servo Apply Lever - With C6
REMOVAL
CAUTION: All parts must be handled carefully to avoid nicking or burring the bearing or mating surfaces. Lubricate all internal parts with clean
automatic transmission fluid before assembling them. Do not use any other lubricants except on gaskets and thrust washers. These may be coated with
petroleum jelly to facilitate assembly. Always use new gaskets and seals when assembling transmission.
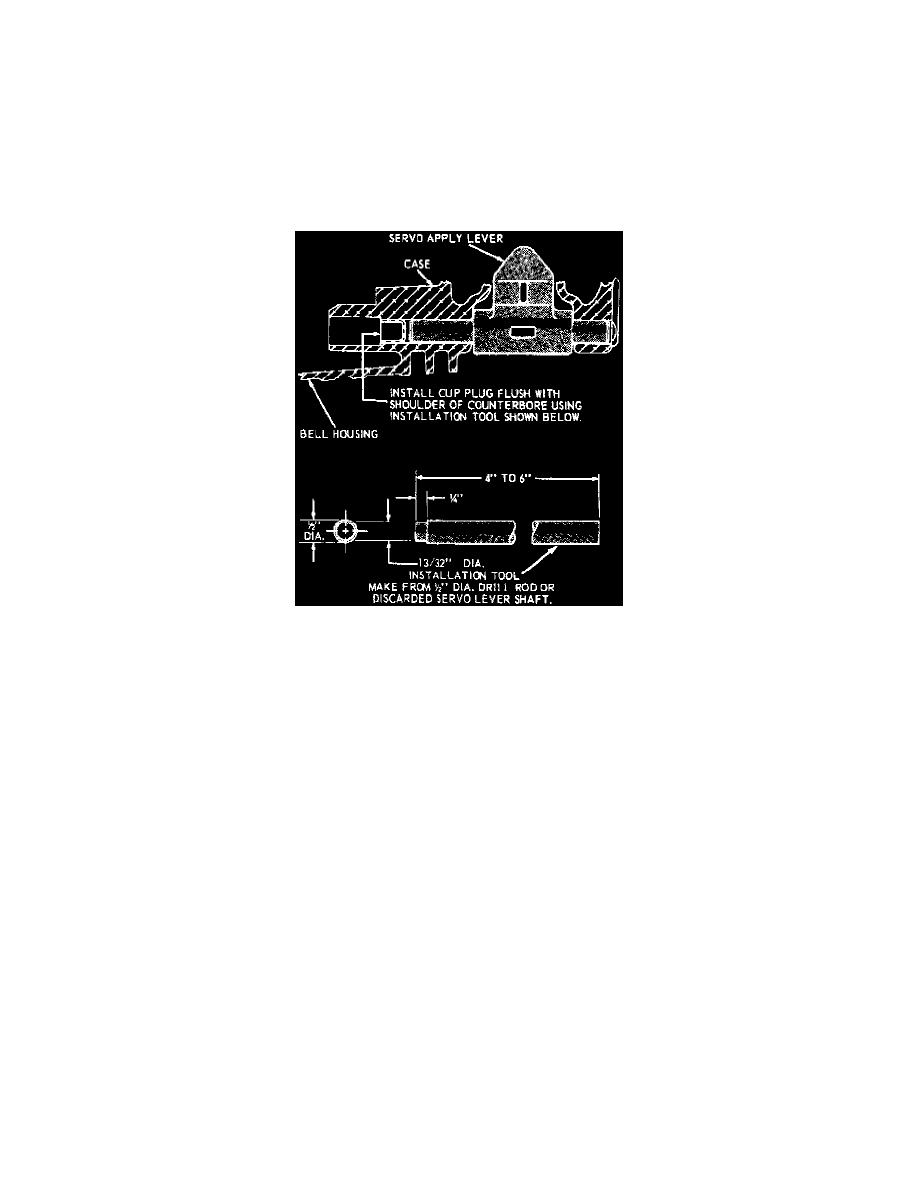
Cup Plug Installation
1. Working from inside of case, carefully drive on servo apply lever to remove cup plug. The shaft can be withdrawn from the case by hand.
INSTALLATION
1. Drive the cup plug into position using fabricated tool shown in the Cup Plug Installation image. Make certain the plug is flush with the
counterbore.
NOTE: Coat the plug with Loctite before installation.
Servo Assembly
REMOVAL
1. Raise vehicle and remove engine rear support to crossmember bolt.
2. Remove two crossmember to frame attaching bolts, then raise transmission enough to remove weight from crossmember and remove crossmember.
3. Disconnect muffler inlet pipe from exhaust manifolds and let pipe hang.
4. Place drain pan under servo and remove servo cover to transmission case attaching bolts.
5. Remove servo cover, piston, spring, and gasket from case, turning band adjusting screw inward as piston is removed. This ensures there will be
enough tension on the band to keep the struts properly engaged in the band end notches while the piston is removed.
6. Apply air pressure to port in servo cover to remove piston and stem.