
F 250 2WD Pickup V8-7.3L DSL Turbo VIN F (1994)
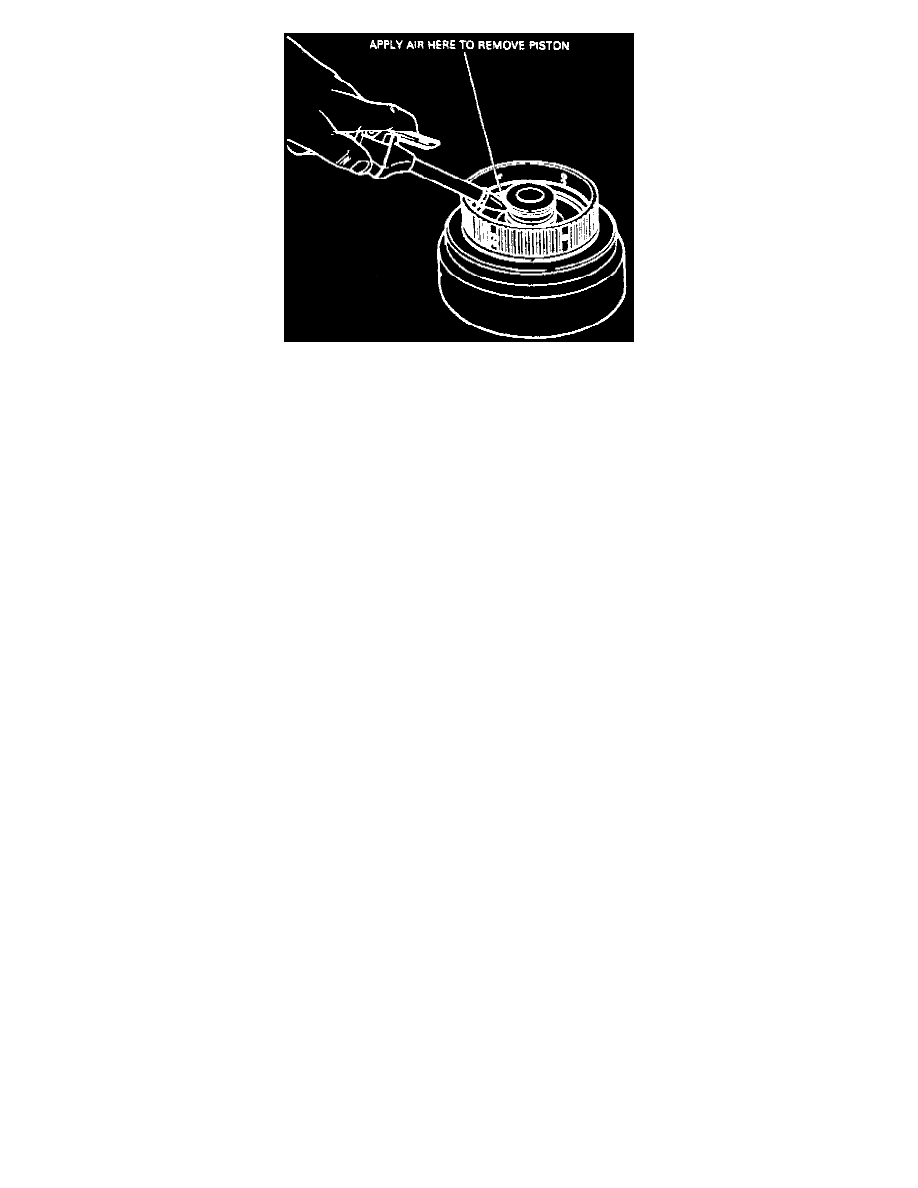
Air Application Location
8. Remove piston from cylinder using compressed air.
9. Remove outer seal from piston, then the inner seal from cylinder.
ASSEMBLE
NOTE: Soak all friction plates in clean transmission fluid for fifteen minutes.
1. Install inner seal in cylinder, then outer seal on piston.
2. Inspect piston check ball for freedom of movement and clean it necessary.
3. Using lip seal protector No. T77L-77548-A or equivalent, install piston into cylinder.
4. Install steel ring into groove on piston.
5. Install return spring into cylinder. Ensure return spring fingers are against piston/steel ring.
6. Install snap ring.
7. Install rear pressure plate, then cushion spring.
8. Install four steel plates and four friction plates alternately, starting with a steel plate.
9. Install selective snap ring. Using feeler gauge check stack-up. Clearance should not exceed 0.055-0.030 inch.
10. If clearance is not within specifications, install correct selective snap ring and recheck. Selective snap rings are available in following sizes:
0.056-0.060 inch, 0.074-0.078 inch, 0.092-0.096 inch, 0.110-0.114 inch and 0.128-0.132 inch.
11. Install Teflon seal rings in grooves.
12. Install needle bearing assembly No. 75374 over Teflon seal snout.
13. Install needle bearing assembly on inner face of cylinder. Ensure notched inner race is facing outward, as shown in the Needle Bearing Assembly
Replacement image.