
F 250 2WD Super Duty V8-5.4L (2008)
14. Remove 16 oil pan bolts and position the oil pan onto the crossmember.
15. Remove the 3 bolts and position the oil pump screen and pickup tube into the oil pan.
16. Position the oil pan onto the engine and install one bolt at the front and one bolt at the rear of the oil pan to hold it in position.
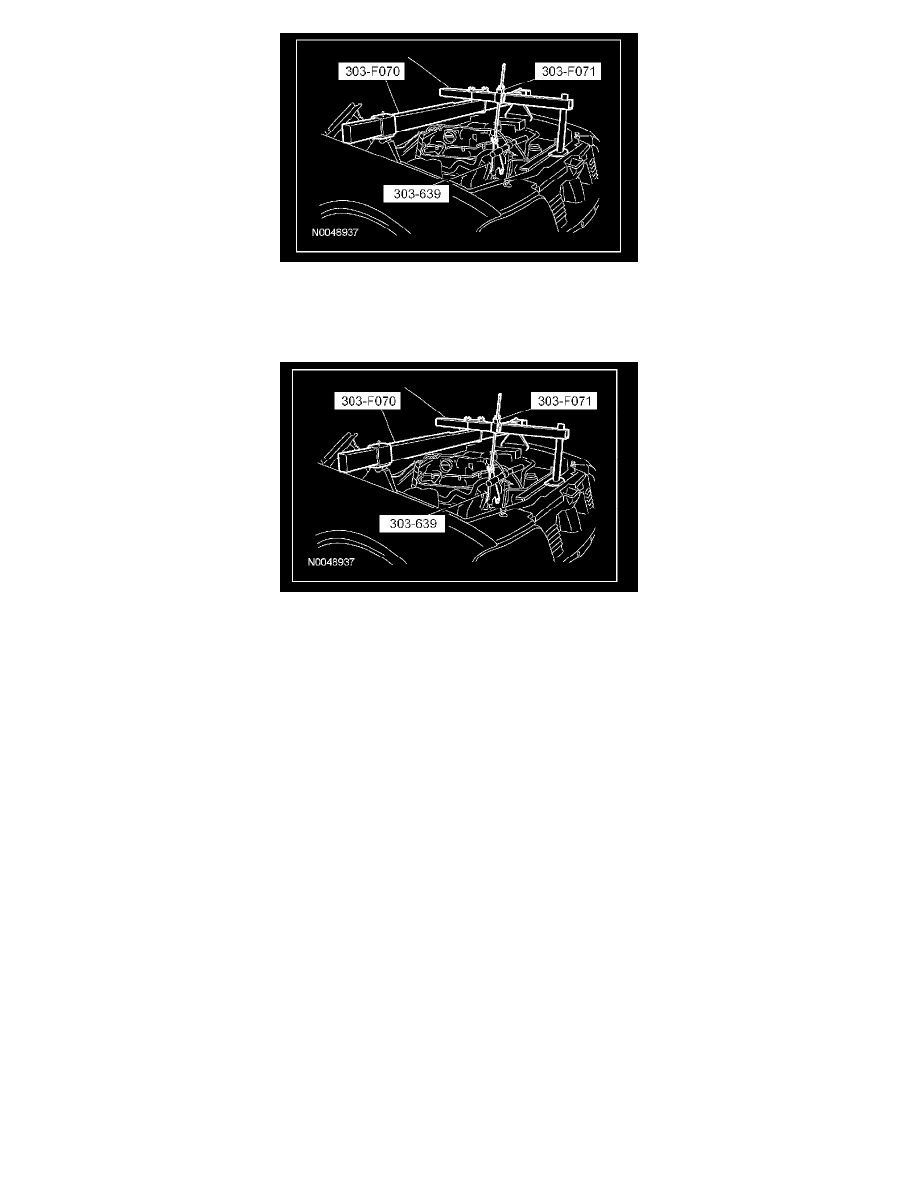
17. Using the special tools, align the engine support insulator studs and lower the engine.
Manual transmission equipped vehicles
18. Remove the flywheel.
Automatic transmission equipped vehicles
19. Remove the flexplate.
All vehicles
20. Remove the rear engine cover.
21. Remove the 2 bolts, the oil pan and the oil pump screen and pickup tube.
^
Inspect the oil pan gasket for damage.
^
Discard the oil pan gasket.
^
Discard the oil pump screen and pickup tube O-ring seal.
Installation
All vehicles
1. CAUTION: Do not use metal scrapers, wire brushes, power abrasive discs or other abrasive means to clean the sealing surfaces. These
tools cause scratches and gouges, which make leak paths. Use a plastic scraping tool to remove all traces of old sealant. Failure to follow
this procedure may cause future oil leakage.
Inspect the oil pan. Clean the mating surface for the oil pan with Silicone Gasket Remover and Motorcraft Metal Surface Prep. Follow the
directions on the packaging.
2. Install a new O-ring seal onto the oil pump screen and pickup tube.
3. Position the oil pump screen and pickup tube in the oil pan and position the oil pan and new gasket into the vehicle.
4. Install the rear engine cover.
Manual transmission equipped vehicles
5. Install the flywheel.
Automatic transmission equipped vehicles
6. Install the flexplate.