
F 250 2WD Super Duty V8-5.4L (2008)
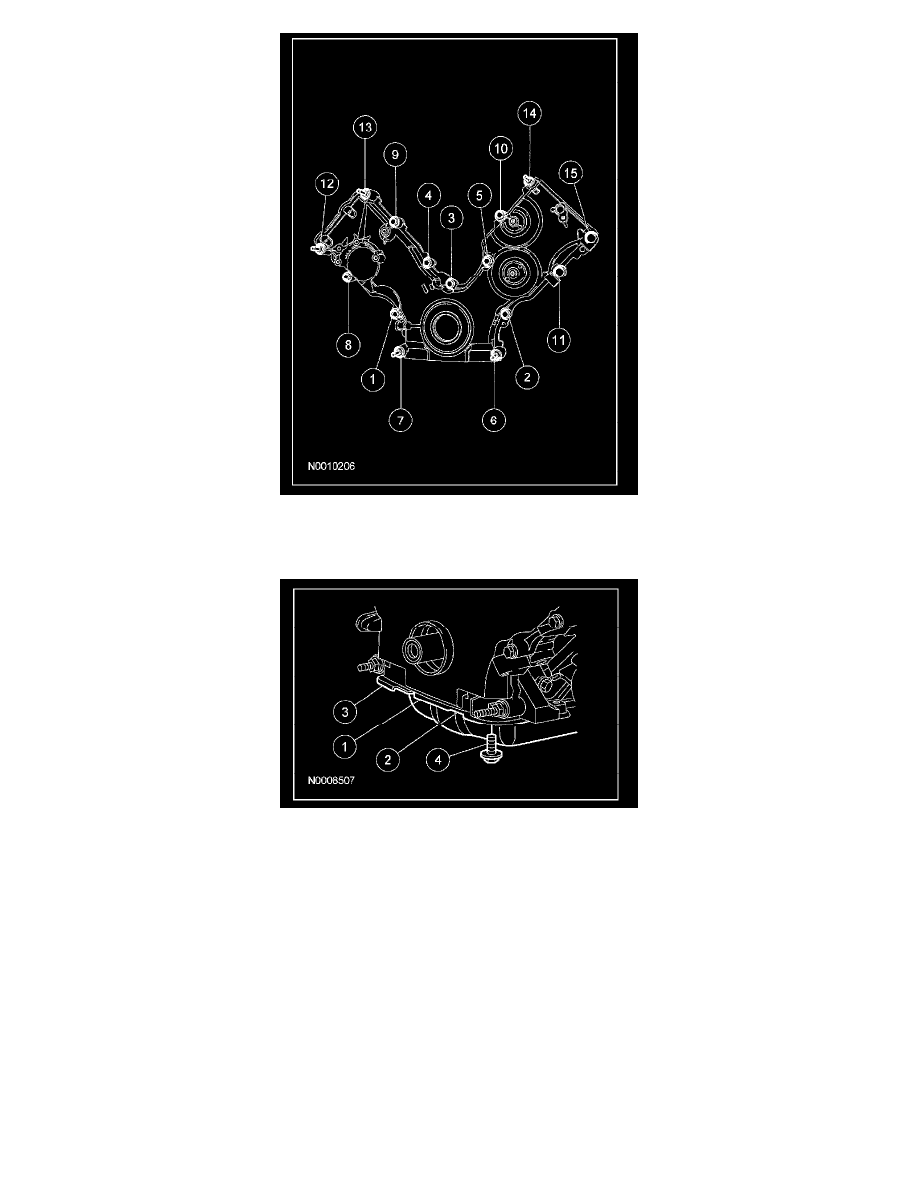
5. Loosely install the bolts, then tighten the bolts in 2 stages, in the sequence shown.
^
Stage 1: Tighten to 20 Nm (15 lb-ft).
^
Stage 2: Tighten an additional 60 degrees.
6. Connect the CKP sensor electrical connector.
7. Position the starter wiring harness and transmission fluid cooler tubes support brackets and install the nut.
^
Tighten to 25 Nm (18 lb-ft).
8. Position the power steering pump assembly and install the 3 bolts.
^
Tighten to 25 Nm (18 lb-ft).
9. NOTE: Lubricate the O-ring seal with clean engine oil prior to installation.
Install the RH CMP sensor and the bolt.
^
Tighten to 10 Nm (89 lb-inch).
10. Connect the RH CMP sensor electrical connector.
11. NOTE: Lubricate the O-ring seal with clean engine oil prior to installation.
Install the LH CMP sensor and the bolt.
^
Tighten to 10 Nm (89 lb-inch).
12. Connect the LH CMP sensor electrical connector.
13. Install the RH and LH radio ignition interference capacitors and the 2 nuts.
^
Tighten to 10 Nm (89 lb-inch).