
F 250 4WD HD Pickup V8-460 7.5L VIN G EFI (1997)
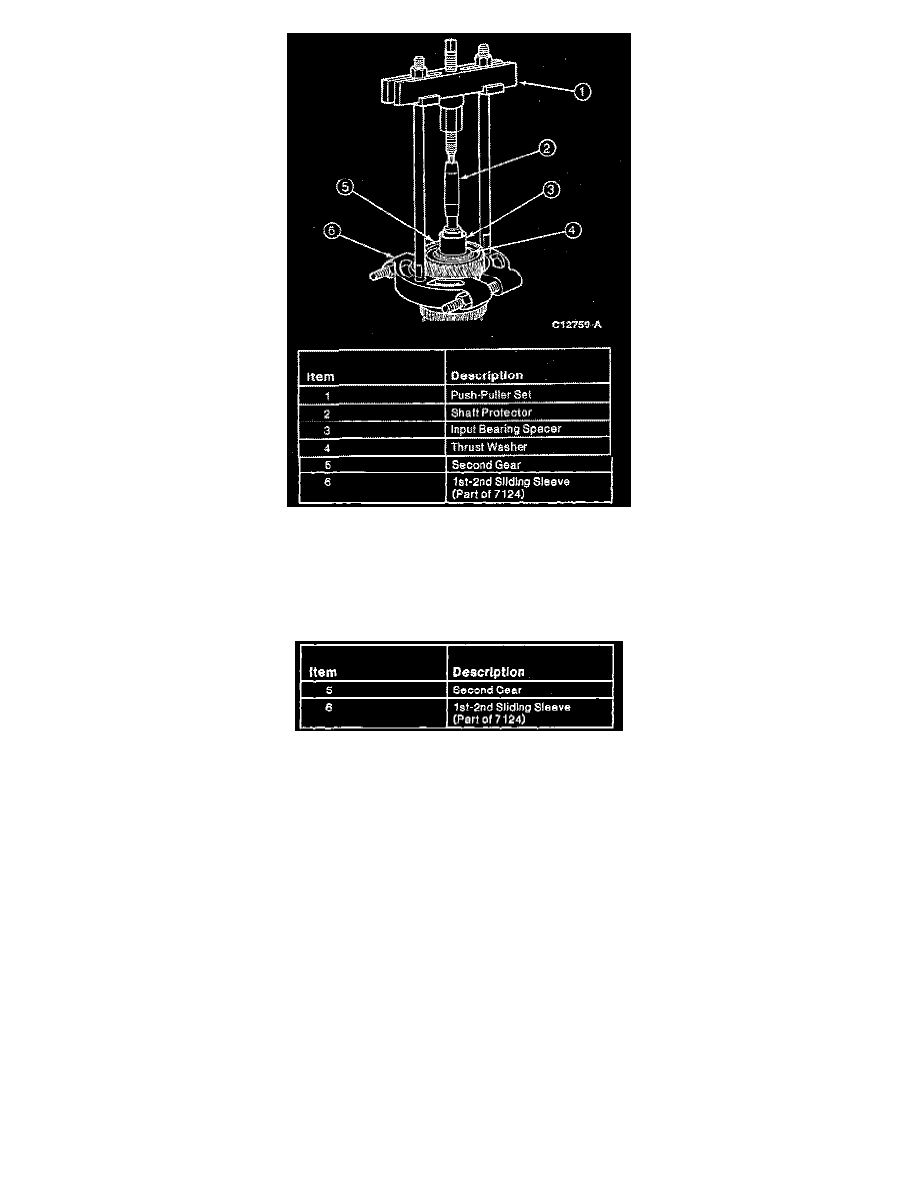
14. Position Shaft Protector D80L-625-4 or equivalent on the end of the mainshaft. Position the Push-Puller Set D80L-927-A or equivalent on the
Collet Retaining Ring and pull the 1st-2nd sliding sleeve (part of synchronizer), 2nd gear, thrust washer, and input bearing spacer from the
mainshaft.
CAUTION: Position a cloth around the 1st-2nd synchronizer to catch the springs and pressure pieces that will be released when the sliding sleeve
(part of synchronizer) clears the 1st-2nd synchronizer.
15. Remove the snap ring (part of small parts repair kit) retaining the 1st-2nd synchronizer body to the mainshaft.
16. Reposition the mainshaft in the vise so that the output end of the mainshaft is now facing up.
NOTE: Use brass pads or equivalent to prevent damage.
17. Position a bearing gripper such as Bearing Pulling Attachment D79L-4621-A or equivalent on the output shaft rear bearing. The gripper used must
pull the output shaft rear bearing by the shoulder of the tapered rollers, not from the bearing cage.
CAUTION: Failure to use a bearing gripper will destroy the output shaft rear bearing.
NOTE: On 4x4 versions and F-Super Duty versions, a snap ring (part of small parts repair kit) retaining the taper roller bearing inner race must
be removed.