
F 250 4WD LD Pickup V8-5.4L SOHC VIN L (1997)
Brake Shoe Adjuster Screw
-
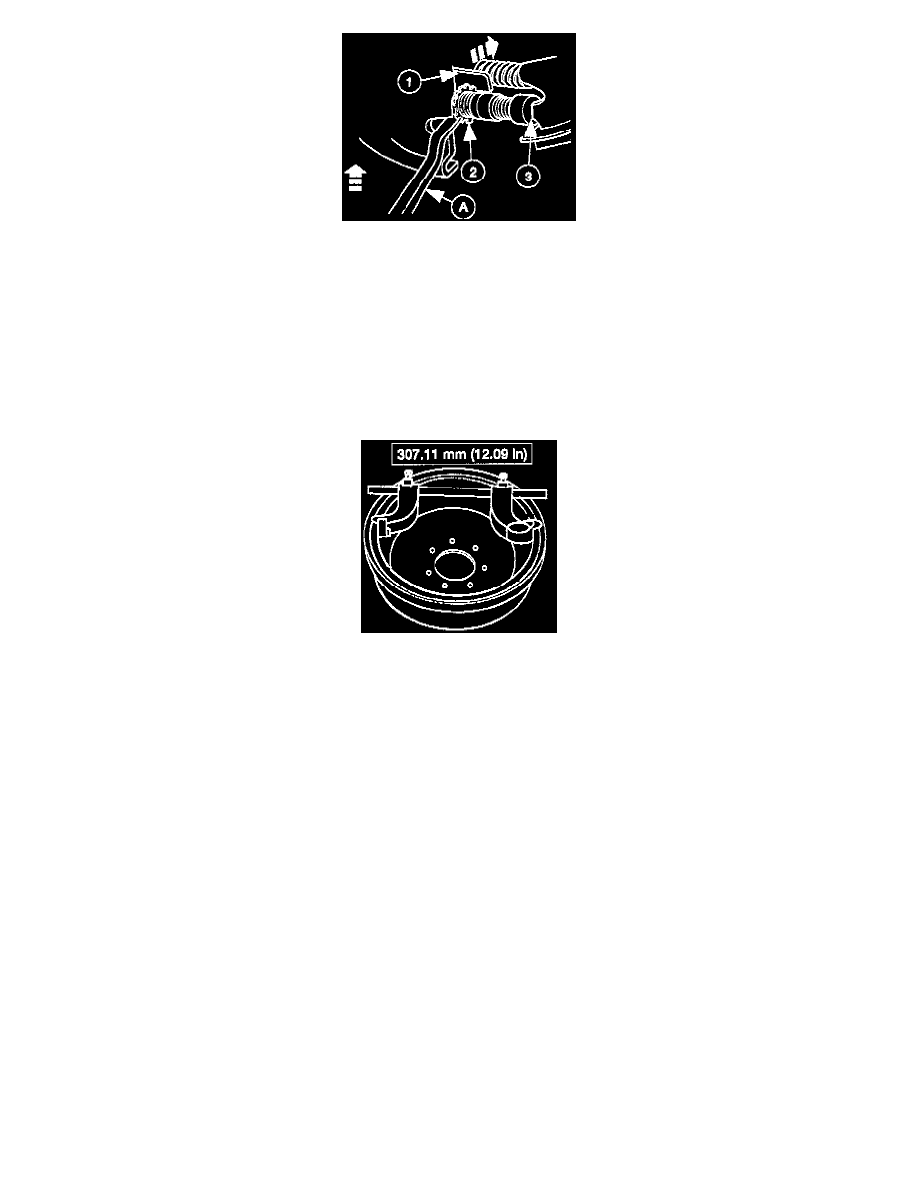
NOTE: If the brake drum will not come off, follow these steps.
Disengage the brake shoe adjusting lever from the brake adjuster screw.
1
Use (A) Brake Adjustment Tool to loosen the brake adjuster screw.
NOTE: Do not burr, chip, or damage the notches in the brake adjuster screw or the self-adjusting mechanism will not function properly.
2
Be sure the brake shoe adjusting lever is still properly seated in the shoe web.
3
Remove the brake drum.
Measuring Brake Drum W/Brake Drum Micrometer
-
Use a Brake Drum Micrometer to measure the brake drum inside diameter. Replace if brake drum exceeds maximum inside diameter.
INSTALLATION:
WARNING:
LUG NUTS MUST BE CHECKED AND RETIGHTENED TO PROPER TORQUE SPECIFICATION AFTER 800 KM
(500MILES) OF NEW VEHICLE OPERATION OR AFTER TIRE ADJUSTMENT. RETIGHTEN LUG NUTS TO PROPER
TORQUE SPECIFICATIONS 800 KM (500 MILES) AFTER ANY WHEEL CHANGE OR ANY TIME THE LUG NUTS HAVE
BEEN LOOSENED. IMPROPERLY TIGHTENED LUG NUTS COULD ALLOW THE WHEEL TO COME OFF WHILE THE
VEHICLE IS IN MOTION, CAUSING LOSS OF CONTROL.
WARNING:REPLACE WHEELS IF THEY ARE BENT, LEAKING AIR OR HEAVILY RUSTED OR IF THE LUG NUTS OFTEN
BECOME LOOSE. DO NOT USE BENT WHEELS THAT HAVE BEEN STRAIGHTENED. DO NOT USE INNER TUBES IN
LEAKING WHEELS. DO NOT REPLACE WHEELS WITH USED WHEELS. WHEELS THAT HAVE BEEN
STRAIGHTENED, ARE LEAKING AIR, OR USED MAY HAVE STRUCTURAL DAMAGE AND COULD FAIL WITHOUT
WARNING. CHECK FOR DAMAGE THAT COULD AFFECT THE RUNOUT OF THE WHEELS. WOBBLE OR SHIMMY
WILL EVENTUALLY DAMAGE THE WHEEL BEARINGS.
-
If adjusting the rear brakes with brake drums removed, refer to the procedure in this section.
NOTE: The front hub and rear axle wheel pilots are fitted with rubber 0-rings which help center the wheels. Remove the 0-ring and clean the
machined groove and clean and lubricate the 0-ring if required. Replace the 0-ring if damaged. 0-ring should be pulled on (not pushed) so
that the yellow paint identification stripe is visible after installation.