
F 250 4WD Pickup V8-7.3L DSL Turbo VIN K (1994)
3. Install oil pump and tighten bolts.
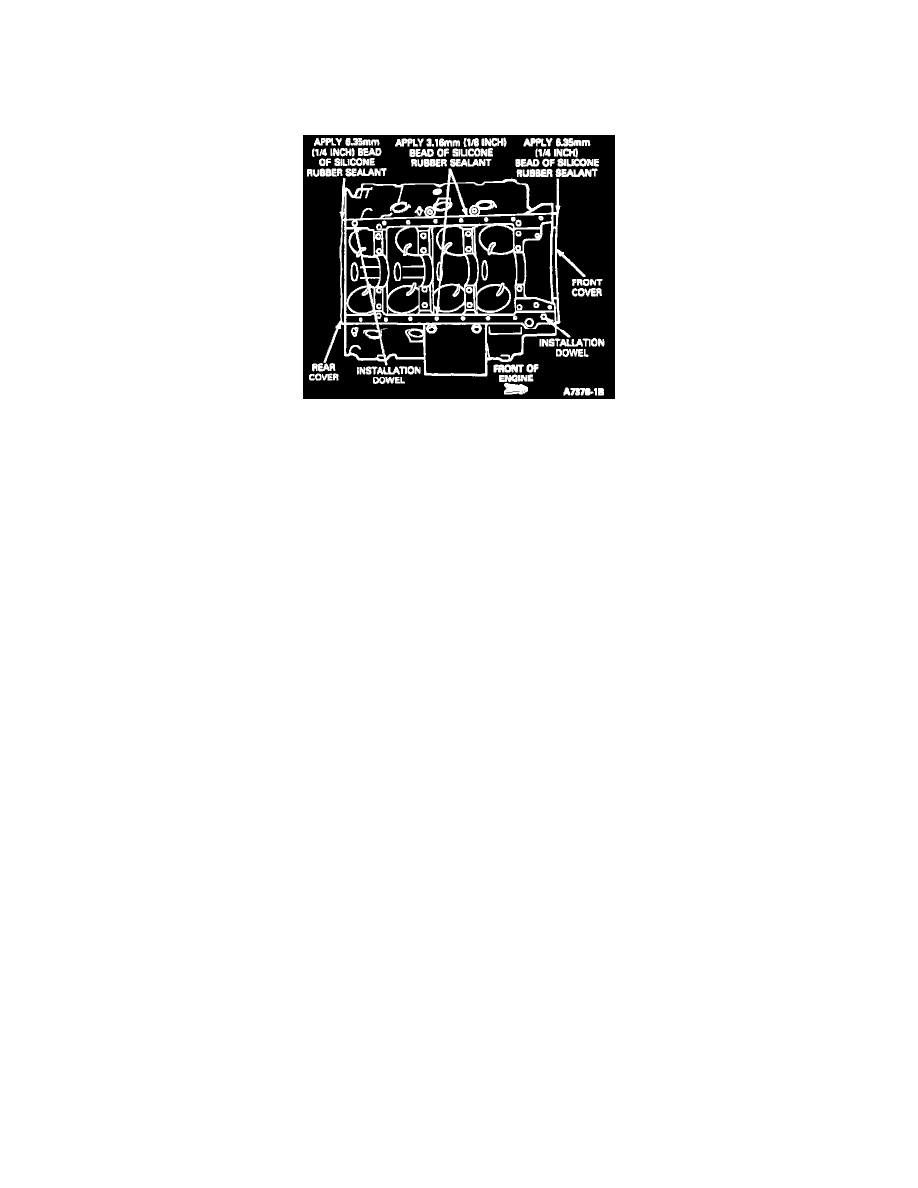
NOTE: When applying Silicone Rubber Sealant always use the bead size specified and join the components within 15 minutes of application.
After 15 minutes, sealant begins to set-up and sealing effectiveness may be reduced.
Block Sealant Application
4. Apply a 3.16mm (1/8-inch) bead of Silicone Rubber Sealant D6AZ-19562-A (ESB-4G92-A) or equivalent on aids rails of engine block oil pan
mating surface end on ends of engine oil pan mating surface on front and rear covers, and in mating corners.
5. Install locally fabricated oil pan installation dowels in position.
6. Position oil pan onto engine.
7. Install oil pan bolts.
8. Remove oil pan locating dowels and install two remaining oil pan bolts.
9. Tighten all oil pan retaining bolts.
10. Lower transmission and Install the transmission mount retaining nuts. Tighten nuts to 125 Nm (7-94 ft lb).
11. Install flywheel inspection plate.
12. Lower vehicle.
13. Raise engine and remove wooden engine support blocks
14. Lower engine onto No. 1 cross-member.
15. Remove lifting sling.
16. Raise vehicle.
17. Position the automatic transmission filler tube (with a new O-ring) and install the retaining bolts.
18. Install nuts and washers attaching engine insulators to No. 1 crossmember and tighten.
19. On automatic transmission-equipped vehicles position the shift linkage bell crank to the transmission and tighten the bolts to 27 Nm (20-30 ft lb).
20. Install oil pan drain plug and new oil filter. Tighten plug to 37 Nm (27 ft lb).
21. Connect fuel pump inlet line to fuel pump.
NOTE: Make sure fuel line clip is installed in No. 1 cross-member.
22. Connect transmission oil cooler lines, if so equipped, and tighten.
23. Lower vehicle.
24. Connect alternator and air conditioner compressor wiring harness to alternator and compressor.
25. Connect power steering return hose to power steering pump.
26. Connect upper and lower radiator hoses and tighten clamps to 2-3 Nm (18-27 in-lb) double wire clamp; 3-4 Nm (27-35 in-lb) screw clamp.
CAUTION: The Fan Clutch has Left-hand threads. Remove by turning nut counterclockwise.
27. Install radiator fan and clutch assembly using Fan Clutch Pulley Folder T83T-63 12-A and Fan Clutch Nut Wrench T8ST-03 12-8 and tighten to
54-163 Nm (120 ft lb).
28. Install turbocharger assembly.
29. Remove Intake manifold cover, and install air cleaner and intake tube.
30. Install engine oil and transmission oil dipsticks.
31. Refill and bleed cooling system.
32. Fill crankcase with specified quantity and viscosity of engine oil.
33. Connect ground cables to both batteries.
34. Run engine and check for oil, fuel and coolant leaks.
35. Check power steering fluid and add, if necessary.