
F 250 4WD Pickup V8-7.3L DSL Turbo VIN K (1994)
9.
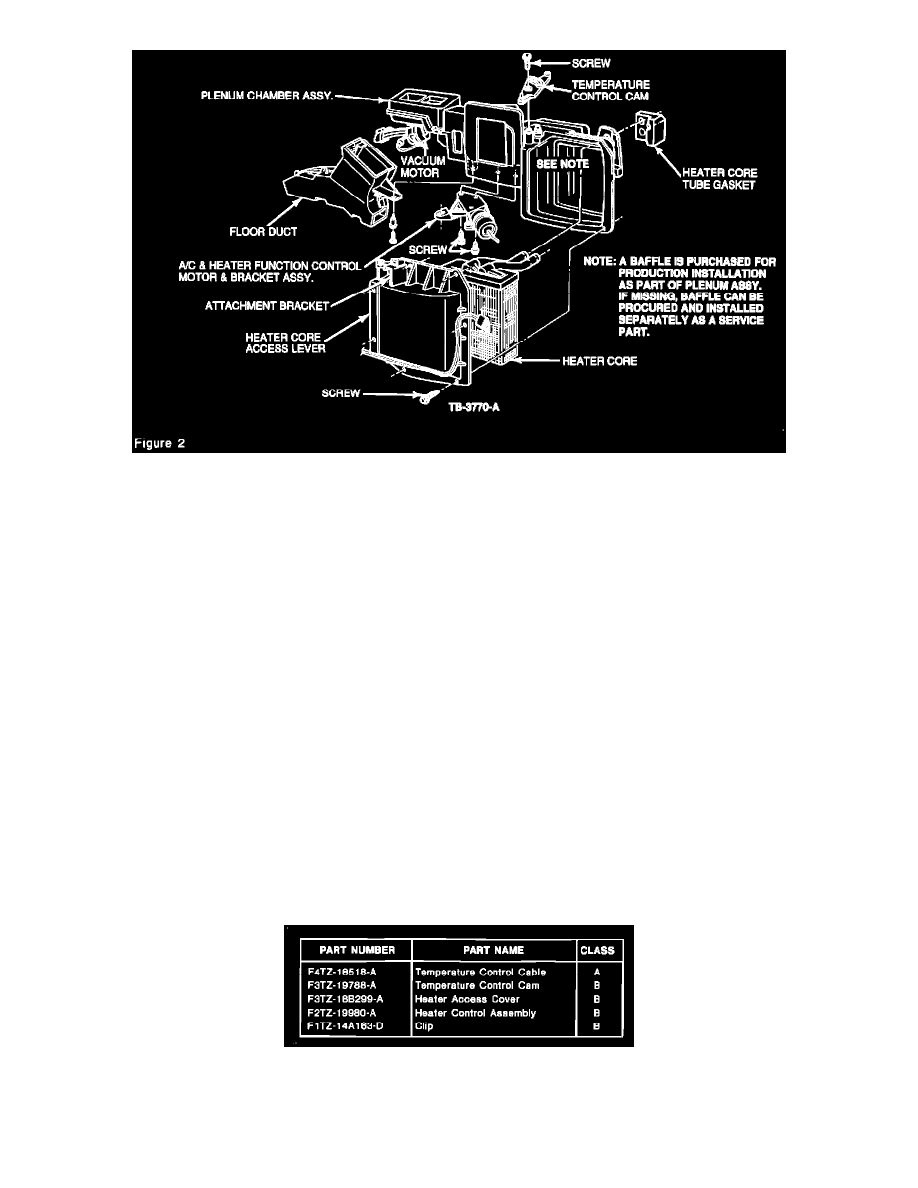
If the temperature door control cam is being replaced, it should be removed at this time. Refer to Figure 2.
10.
If the heater core access cover is being replaced, it should be removed at this time. Refer to Figure 2.
CABLE INSTALLATION
1.
Attach the new temperature door control cam (F3TZ-19788-A) if it is being replaced. DO NOT OVER TORQUE. Minimum torque is 0.7 N-m (6
in.lb.) and maximum torque is 1.7 N-m (15 in.lb.). Check for binding or too much movement effort and adjust if necessary.
2.
Install the heater core access cover (F3TZ-18B299-A) if it is being replaced.
3.
Install the A/C-Heater Control Assembly if it is being replaced. Refer to the appropriate Service Manual for installation procedures.
4.
On the adjustment clip at the cable end, move the barrel so the red insert is on "center" and the red does not show out from either end. Further
adjustment is not normally required, but can be made after installation, if necessary.
5.
Attach the cable to the control assembly if not already attached in Step 3.
6.
Attach the wire coil end to the temperature control cam. Be sure the cable is under the cable retainer. Refer to Figure 1.
7.
Align the adjustment clip with the opening in the molded-in bracket as shown in Figure 3.
8.
Push the clip firmly into place and ensure that both tabs hold the clip to the bracket (an audible click should be heard on engagement). Pull firmly
on the clip to verify proper retention of the clip.
9.
Rotate the temperature control to make sure the temperature door closes at both ends.
Parts Block
OTHER APPLICABLE ARTICLES: 91-19-10
WARRANTY STATUS:
Eligible Under The Provisions Of Bumper To Bumper Warranty Coverage