
F 250 4WD Super Duty V10-6.8L VIN Z CNG (2003)
42. CAUTION: Do not use metal scrapers, wire brushes, power abrasive discs or other abrasive means to clean the sealing surfaces. These tools
cause scratches and gouges, which make leak paths. Use a plastic scraping tool to remove all traces of sealant.
Clean the mating surfaces and thoroughly clean the oil pan.
Installation
1. NOTE: Clean and inspect the oil pump screen cover and tube mating surfaces and install a new O-ring. Lubricate the O-ring with clean engine
oil. The oil pump screen cover and tube must be in the oil pan when the oil pan is positioned in the vehicle.
Position the oil pan gasket and the oil pan in the vehicle from the rear of the engine.
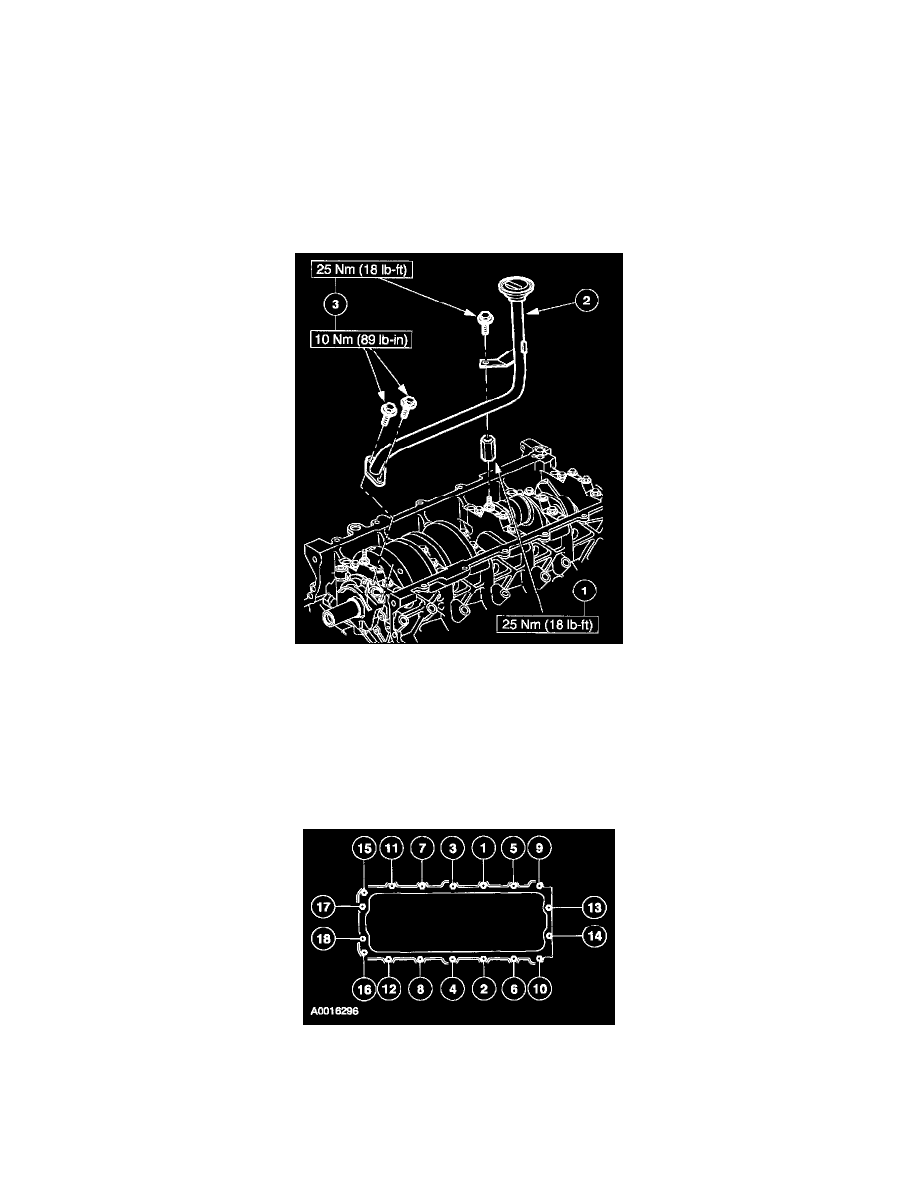
2. Install the oil pump screen and pickup tube.
1
Install and tighten the spacer.
2
Insert the oil pump screen pickup tube into the oil pump and position the support bracket over the spacer.
3
Install and tighten the bolts.
3. NOTE: If the oil pan is not secured within four minutes, the sealant must be removed and the sealing area cleaned with metal surface cleaner.
Allow to dry until there is no sign of wetness, or four minutes, whichever is longer. Failure to follow this procedure can cause future oil leakage.
Apply a bead of silicone gasket and sealant where the front cover and rear crankshaft seal retainer fit to the engine block.
4. NOTE: Be sure to tighten the bolts in three stages.
Tighten the bolts in the sequence shown:
^
Stage 1: Tighten to 2 Nm (18 inch lbs.).
^
Stage 2: Tighten to 20 Nm (15 ft. lbs.).
^
Stage 3: Tighten an additional 90 degrees.