
F 250 4WD Super Duty V10-6.8L VIN Z CNG (2003)
5. Install the brackets over the studs and loosely install the nuts.
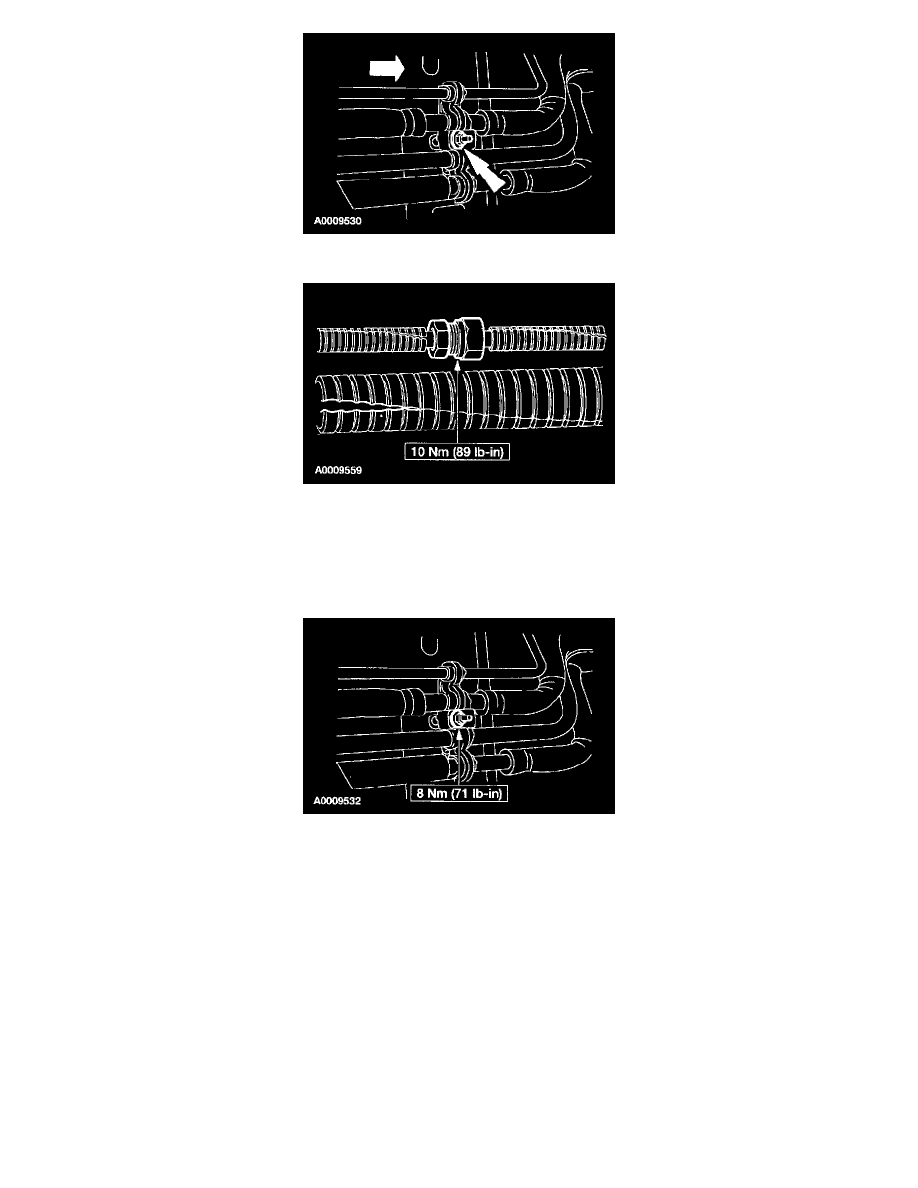
6. Connect the two auxiliary evaporator inlet lines.
CAUTION: Use a wrench on each side of the fitting to prevent damage to the A/C fitting.
NOTE: Lubricate the O-ring seals with PAG Refrigerant Compressor Oil (R-134a Systems) F7AZ-19589-DA (Motorcraft YN-12-C) or
equivalent meeting Ford specification WSH-M1C231-B.
7. Tighten the five bracket nuts.
CAUTION: Overtightening of the nut will cause the stud to break away from the floor pan.
8. Install the right-hand fender splash shield.
9. Install the right-hand wheel.
10. Lower the vehicle.
11. Evacuate, leak test and charge the A/C system. Refer to: Heating and Air Conditioning, Service and Repair, Evacuating and Charging, See:
Service and Repair/Evacuation and Charging
Auxiliary Evaporator Outlet Line
REMOVAL
CAUTION: It may be necessary to cut the underbody auxiliary line(s) being serviced into sections to facilitate removal. Make sure to correctly identify
the line(s) being serviced before carrying out any cutting of the line(s).
NOTE: Lay out the new lines in vehicle position to assist in the installation.