
F 250 4WD Super Duty V8-5.4L (2009)
2. Position the seat or seat backrest forward enough to access the center safety belt retractor.
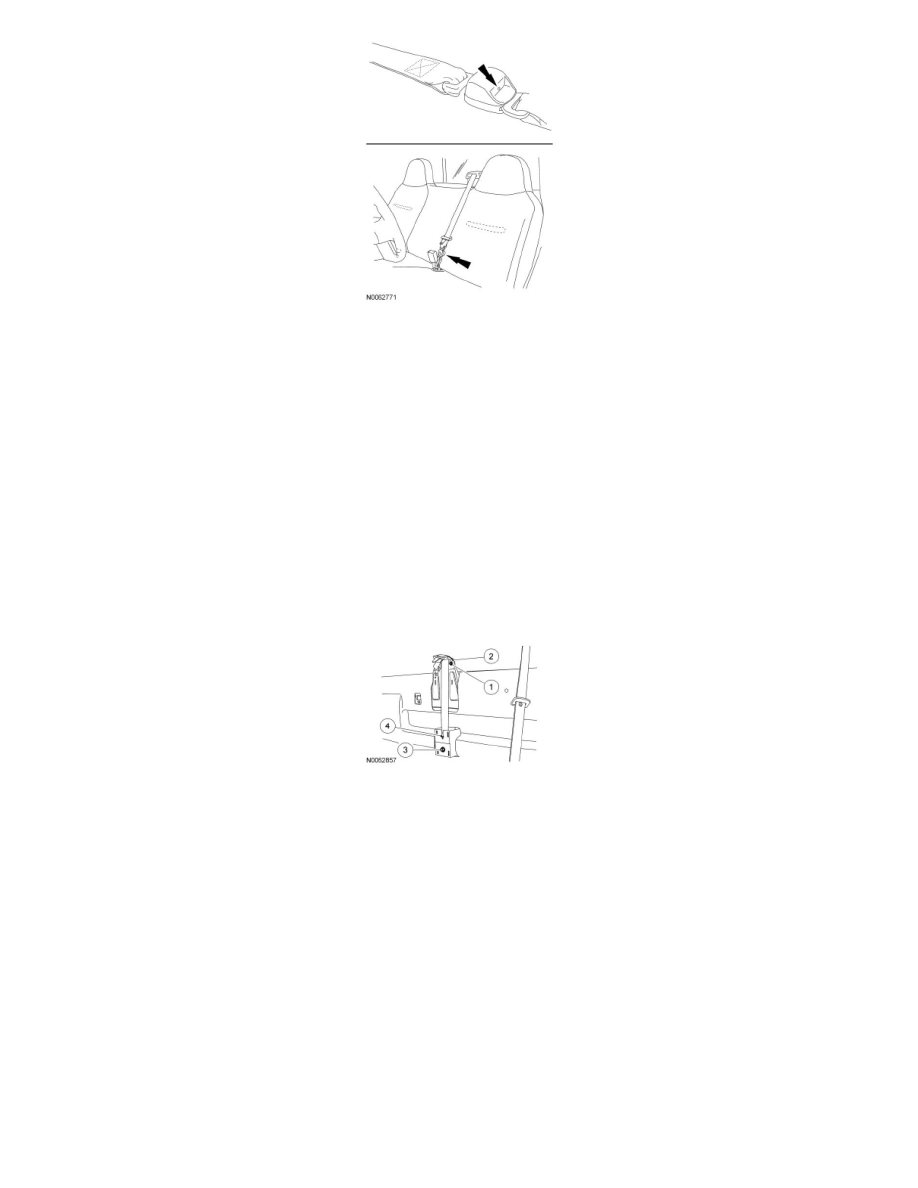
3. Remove the center safety belt retractor cover bezel.
4. Pull to release the clips and remove the center safety belt retractor cover.
-
Feed the center safety belt retractor belt and tongue through the center safety belt retractor cover.
5. Remove the center safety belt retractor.
1. Remove the 2 center safety belt retractor D-ring nuts (1 shown).
-
To install, tighten to 30 Nm (22 lb-ft).
2. Separate the center safety belt retractor D-ring from the sheet metal.
3. Remove the center safety belt retractor bolt.
-
To install, tighten to 30 Nm (22 lb-ft).
4. Slide the center safety belt retractor up, releasing the tab and remove the center safety belt retractor.
6. NOTICE: When installing a new safety belt retractor do not remove the shipping clip until the D-ring is secured in position. Allowing the
safety belt to be retracted further into the safety belt retractor may cause the safety belt retractor to lock and not release the safety belt.
NOTE: Before installation, make sure the safety belt webbing is not twisted and the safety belts and buckles are accessible to the occupants.
To install, reverse the removal procedure.
7. Check the active restraint system for correct operation. For additional information, refer to the appropriate Functional Test procedure in Safety
Belt System See: Testing and Inspection/Component Tests and General Diagnostics.