F 250 4WD Super Duty V8-6.4L DSL Turbo (2008)

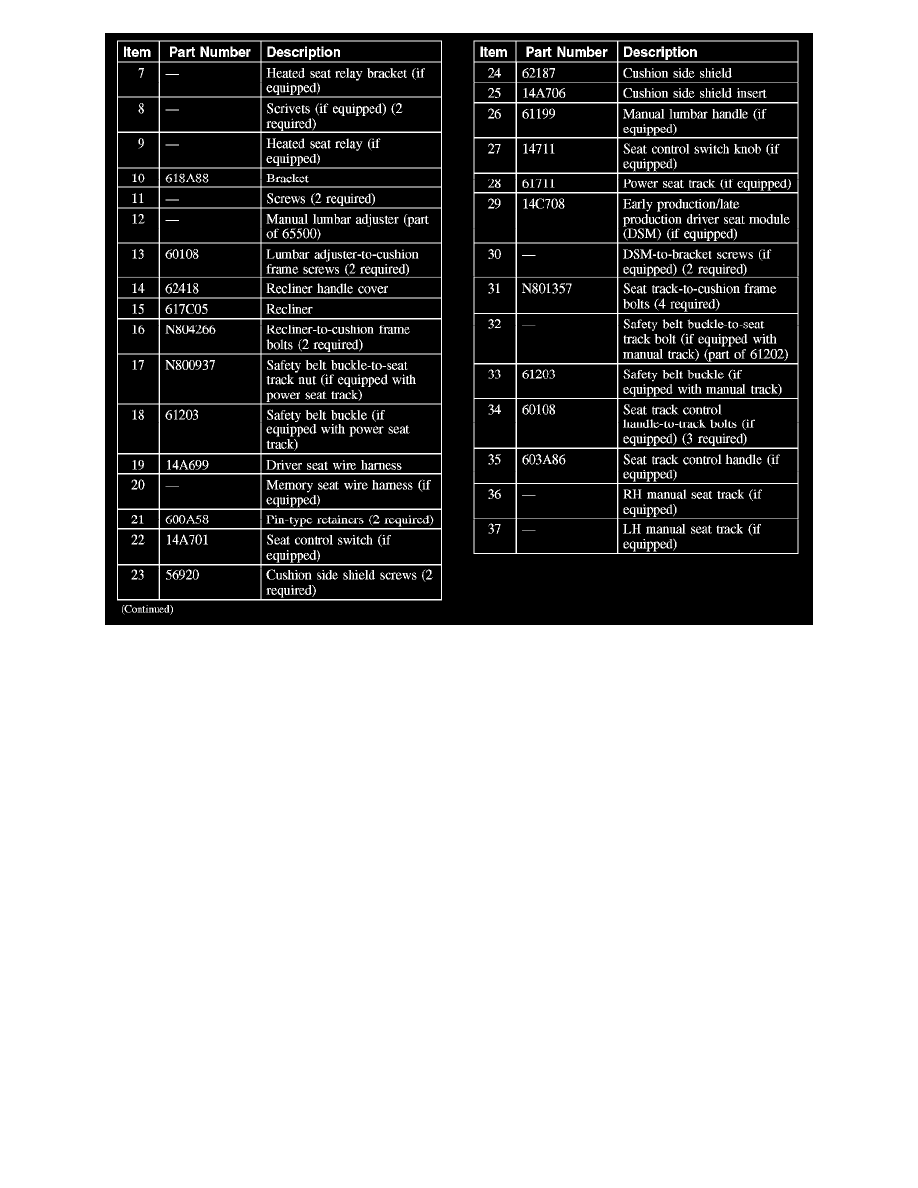
Bucket Seat Cushion (Part 2)
Removal and Installation
1. Remove the seat.
2. Remove the 4 riser-to-track nuts and remove the LH and RH risers.
-
To install, tighten to 50 Nm (37 lb-ft).
3. Position the seat tracks to access the track-to-cushion frame front bolts.
4. Remove the 2 seat track-to-cushion frame bolts.
-
To install, tighten to 25 Nm (18 lb-ft).
5. Position the seat tracks to access the track-to-cushion frame rear bolts.
6. Remove the 2 seat track-to-cushion frame rear bolts and seat track assembly.
-
To install, tighten to 25 Nm (18 lb-ft).
7. Remove the 3 seat track adjusting bar-to-track bolts.
-
To install, tighten to 12 Nm (9 lb-ft).
8. To install, reverse the removal procedure.
9. Install the front seat.
10. Prove out the SRS as follows:
Turn the ignition switch ON. Visually monitor the air bag warning indicator. The air bag warning indicator will light continuously for
approximately 6 seconds and then turn OFF. If an air bag SRS fault is present, the air bag warning indicator will:
-
fail to light.
-
remain lit continuously.
The air bag warning indicator might not light until approximately 30 seconds after the ignition switch has been turned from the OFF to the ON
position. This is the time required for the RCM to complete the testing of the SRS. If the air bag warning indicator is inoperative and a SRS fault
exists, a chime will sound in a pattern of 5 sets of 5 beeps. If this occurs, the air bag warning indicator and any SRS fault discovered must be
