
F 350 2WD Pickup V8-460 7.5L VIN G EFI (1997)
Climate Control Assembly: Service and Repair
With Manual A/C-Heater
Bulbs
REMOVAL
1. Remove trim strip above the A/C control and glove compartment area.
2. Remove two screws retaining the center finish trim panel to the instrument panel.
3. Remove center finish trim panel.
4. Remove four screws retaining the A/C control to the instrument panel.
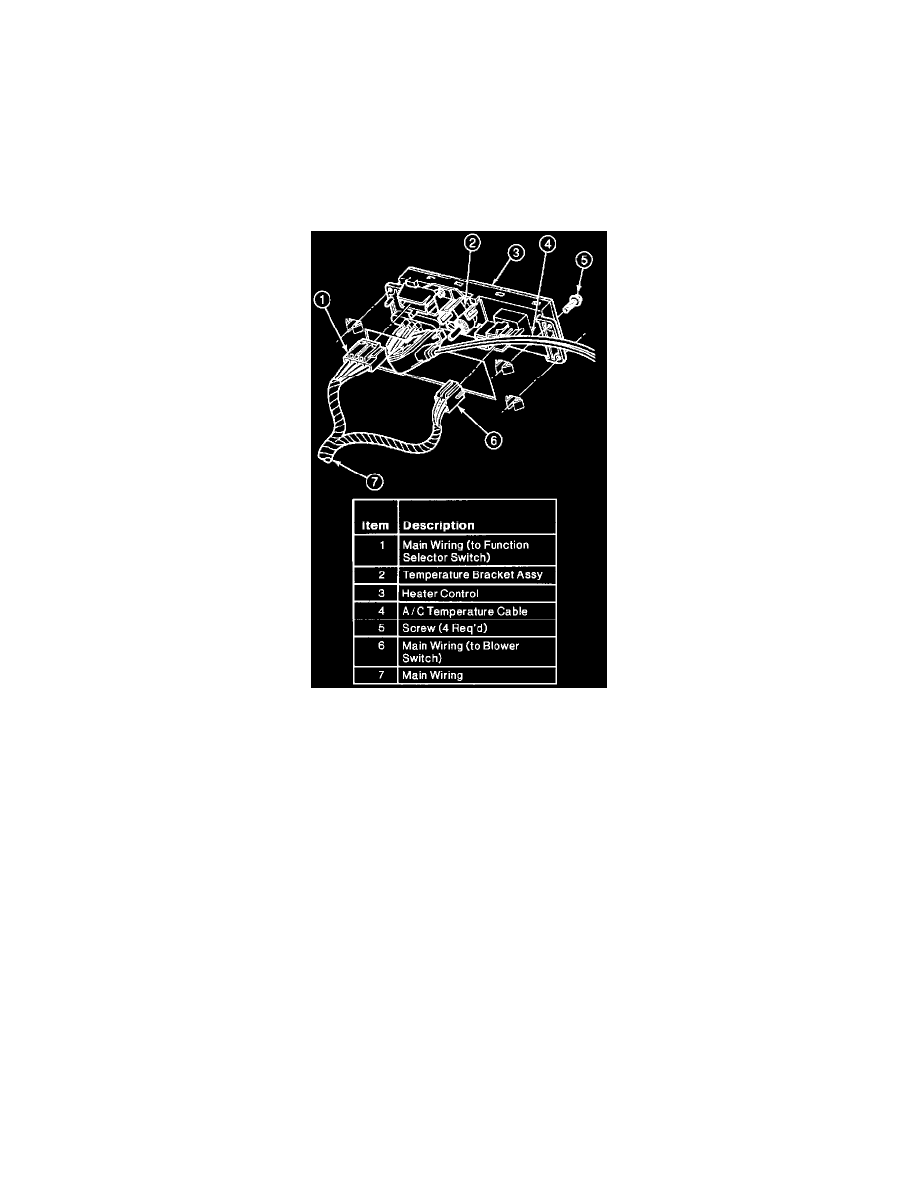
Heater Control Electrical Connections
5. Pull A/C control from instrument panel far enough to gain access to the back of the A/C control.
6. Remove instrument panel lamp socket and bulb (2) from the A/C control by turning one-quarter turn and pull out of A/C control (one is located to
the left of the function selector switch, the other is located between the heater blower motor switch and A/C temperature control bracket.
7. Remove the bulb from the socket by pulling straight out.
INSTALLATION
1. Replace bulb with correct replacement. Refer to the Ford Master Parts Catalog for replacement bulb specification.
2. Insert instrument panel lamp socket and bulb into the A/C control and twist one-quarter turn to secure in place.
3. Install A/C control in instrument panel opening.
4. Install four screws retaining A/C control to instrument panel.
5. Install center finish trim panel.
6. Install two screws retaining center finish trim panel to instrument panel.
7. Install trim strip above A/C control and glove compartment area (push on).
8. Check system for proper operation.
Climate Control Assembly
Special Service Tool(s) Required