
F 350 2WD Super Duty V10-6.8L (2009)
-
Tighten to 10 Nm (89 lb-in).
10. Connect the CMP sensor electrical connector.
11. Install the LH radio ignition interference capacitor and the nut.
-
Tighten to 25 Nm (18 lb-ft).
12. Install the RH radio ignition interference capacitor and the nut.
-
Tighten to 25 Nm (18 lb-ft).
13. Connect the radio ignition interference capacitor electrical connectors.
14. Install the accessory drive belt tensioner and the 3 bolts.
-
Tighten to 25 Nm (18 lb-ft).
15. Install the coolant pump pulley and the 4 bolts.
-
Tighten to 25 Nm (18 lb-ft).
16. Install the accessory drive idler pulley and the 3 bolts.
-
Tighten to 25 Nm (18 lb-ft).
17. Lubricate the engine front cover and the crankshaft seal inner lip with clean engine oil.
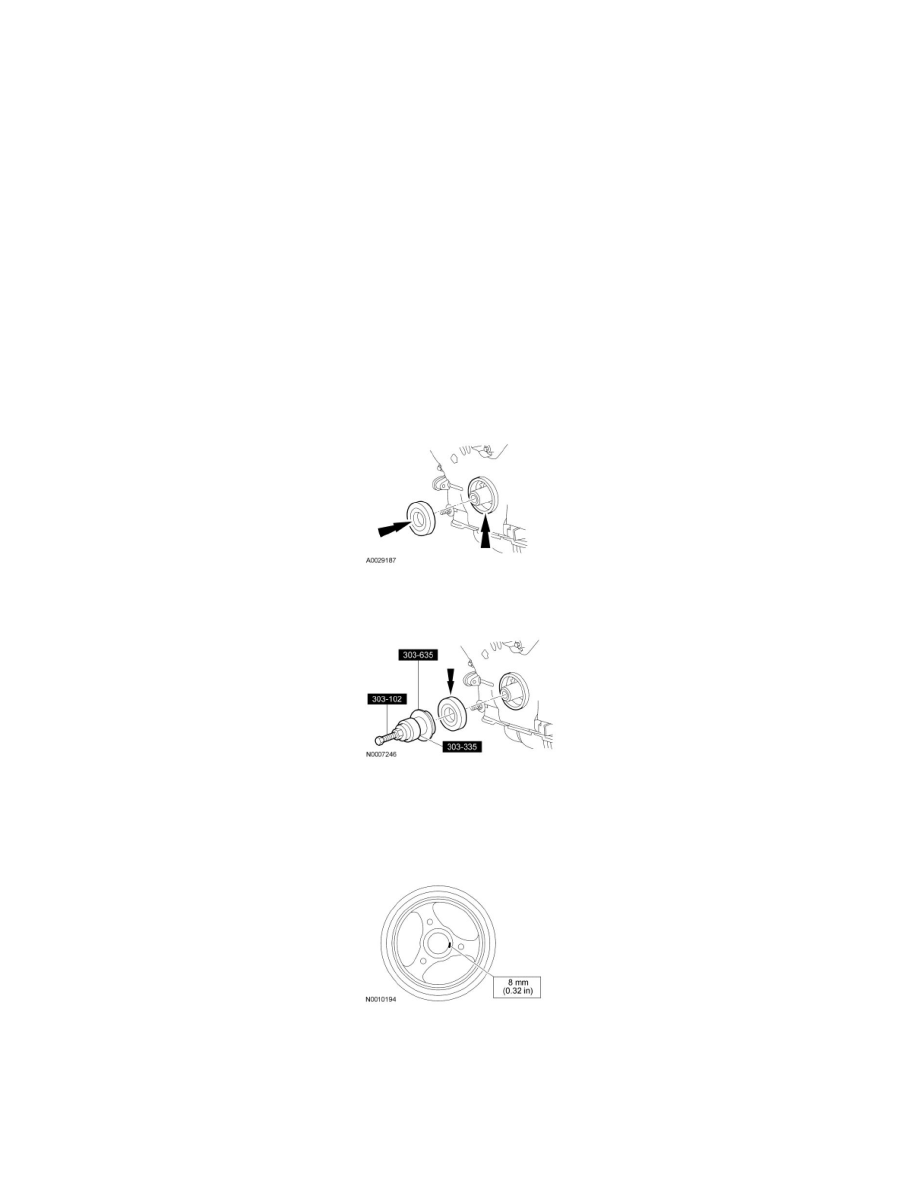
18. Using the Crankshaft Vibration Damper Installer, Front Cover Oil Seal Installer and Crankshaft Front Oil Seal Installer, install a new crankshaft
front seal.
19. NOTE: If not secured within 4 minutes, the sealant must be removed and the sealing area cleaned. To clean the sealing area, use silicone gasket
remover and Motorcraft metal surface prep. Follow the directions on the packaging. Allow to dry until there is no sign of wetness, or 4 minutes,
whichever is longer. Failure to follow this procedure may cause future oil leakage.
Apply silicone gasket and sealant to the Woodruff key slot on the crankshaft pulley.
20. Using the Crankshaft Vibration Damper Installer, install the crankshaft pulley.