
F 350 2WD Super Duty V10-6.8L (2009)
5. Inspect the exhaust manifold.
6. NOTICE: Do not use metal scrapers, wire brushes, power abrasive discs or other abrasive means to clean the sealing surfaces. These tools
cause scratches and gouges which make leak paths. Use a plastic scraping tool to remove all traces of old sealant. Failure to follow this
procedure may cause future oil leakage.
NOTE: Clean the sealing surfaces with Motorcraft metal surface prep. Follow the directions on the packaging.
Remove and discard the exhaust manifold gaskets. Clean the sealing surfaces with Motorcraft metal surface prep.
7. Remove and discard the 10 exhaust manifold-to-cylinder head studs.
Installation
1. Install 10 new exhaust manifold-to-cylinder head studs.
-
Tighten to 12 Nm (106 lb-in).
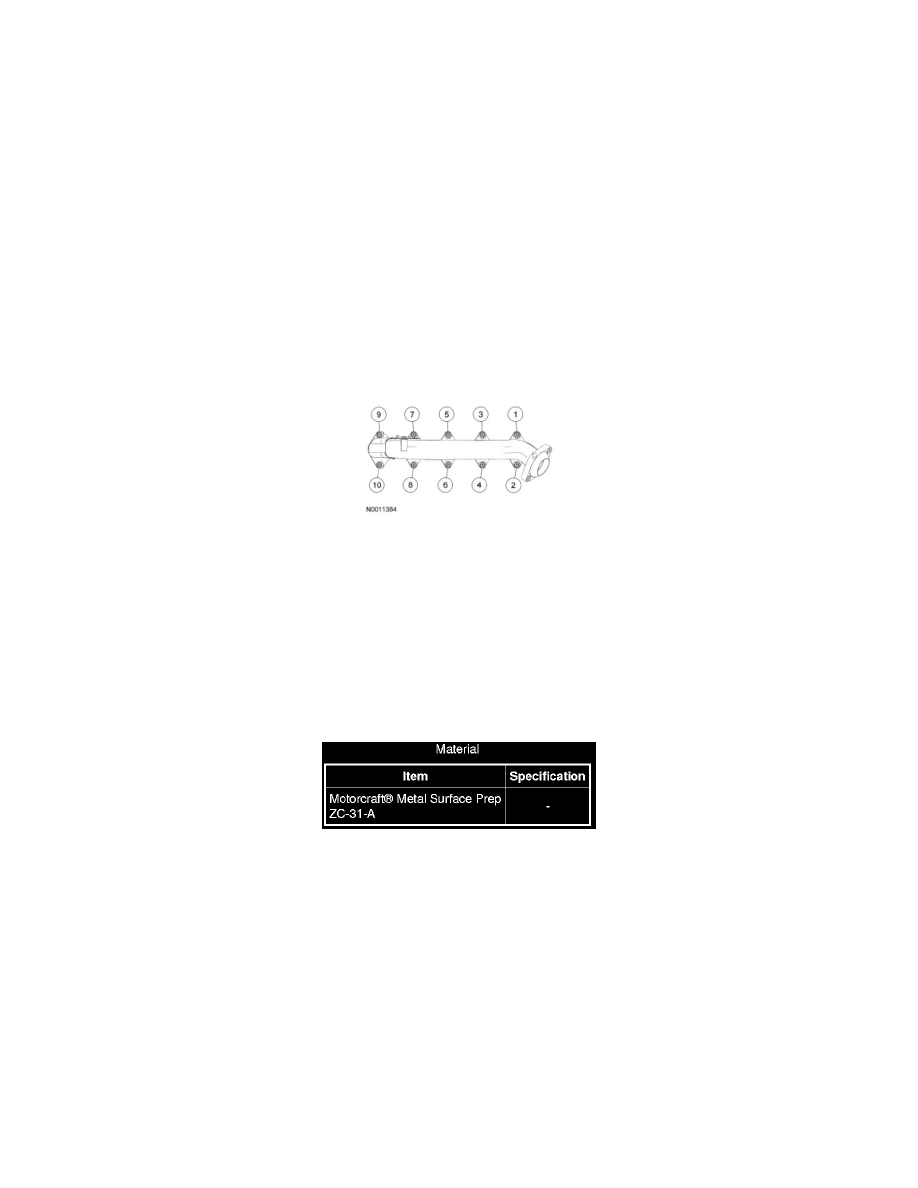
2. Using new exhaust manifold gaskets, position the gaskets and the exhaust manifold and install 10 new exhaust manifold nuts.
-
Tighten to 25 Nm (18 lb-ft) in the sequence shown.
Exhaust Manifold - LH
3. Position the exhaust manifold heat shield and install the 3 bolts.
-
To install, tighten to 14 Nm (124 lb-in).
4. Install the 4 exhaust Y-pipe flange nuts.
-
Tighten to 40 Nm (30 lb-ft).
Exhaust Manifold - RH
Exhaust Manifold - RH