
F 350 2WD Super Duty V8-5.4L (2008)
4. NOTE: It may be necessary to tap the driveshaft yoke with a plastic or rubber soft-faced hammer if a pry area is not present on the driveshaft side.
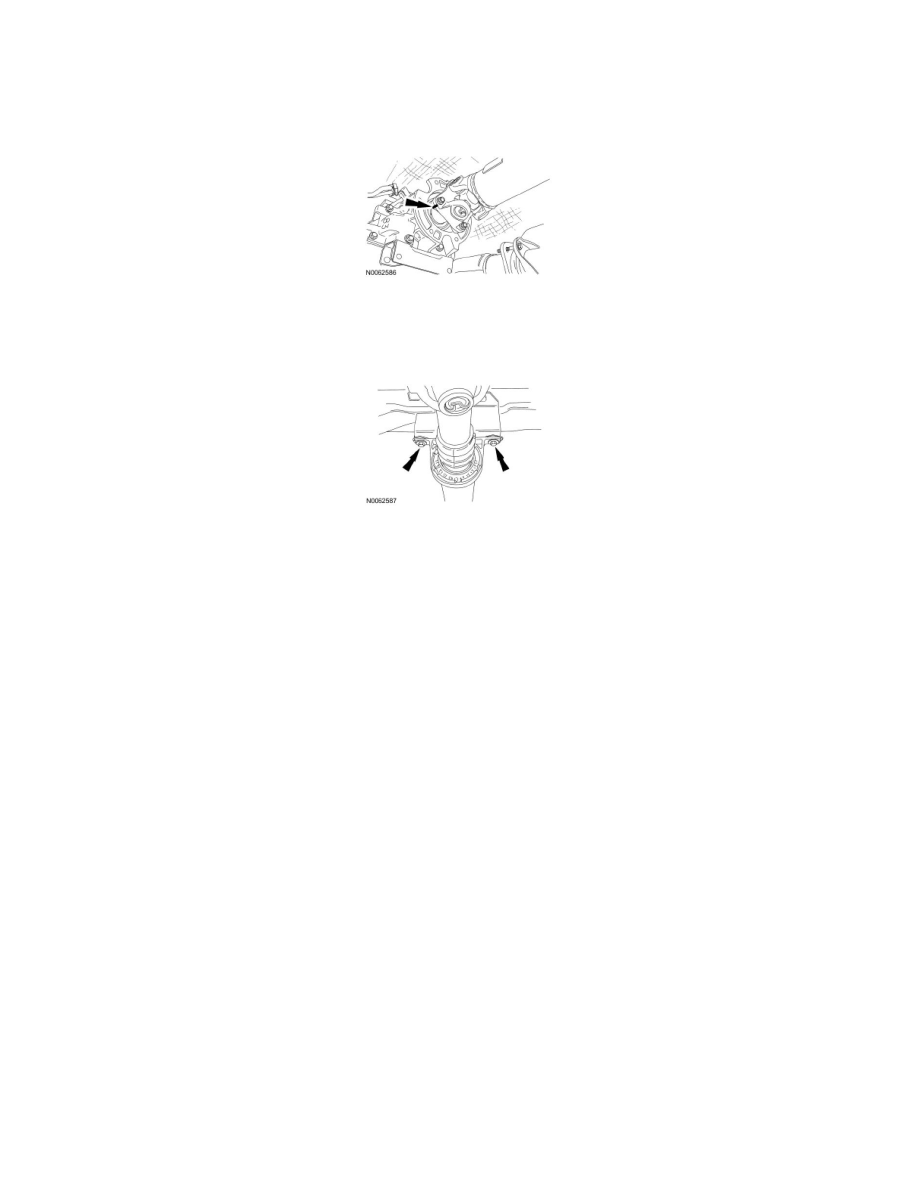
Remove and discard the 4 driveshaft-to-transmission flange bolts. Disconnect the driveshaft from the transmission.
-
Using mechanic's wire, support the driveshaft.
-
To install, tighten flange to 100 Nm (74 lb-ft).
5. Index-mark the center support bearing bracket for reference during installation.
6. Remove the 2 center bearing support bolts.
-
To install, tighten to 70 Nm (52 lb-ft).
7. Remove the driveshaft assembly.
8. Clean grease deposits, dirt and rust from the following:
-
The driveshaft flange yoke areas.
-
All driveshaft slip yoke areas.
9. NOTICE: Make sure that the center bearing is correctly aligned when tightening fasteners or bearing failure and/or NVH issues may
occur.
NOTE: Align index marks made during removal.
NOTE: Install new bolts and retainers.
To install, reverse the removal procedure.
Driveshaft - Rear, Three-Piece
Driveshaft - Rear, Three-Piece
Removal
1. With the vehicle in NEUTRAL, position it on a hoist. For additional information, refer to Vehicle Jacking and Lifting.
2. Index-mark the driveshaft flanges and slip joints.
3. NOTE: It may be necessary to unseat the bearing cup assembly by tapping on the yoke or bearing cup with a plastic or rubber soft-faced hammer.
Disconnect the driveshaft from the axle flange.
1. Remove and discard the 4 bolts.
2. Remove and discard the 2 U-joint retainers.
-
Using mechanic's wire, support the driveshaft.