
F 350 2WD Super Duty V8-5.4L SOHC VIN L (2002)
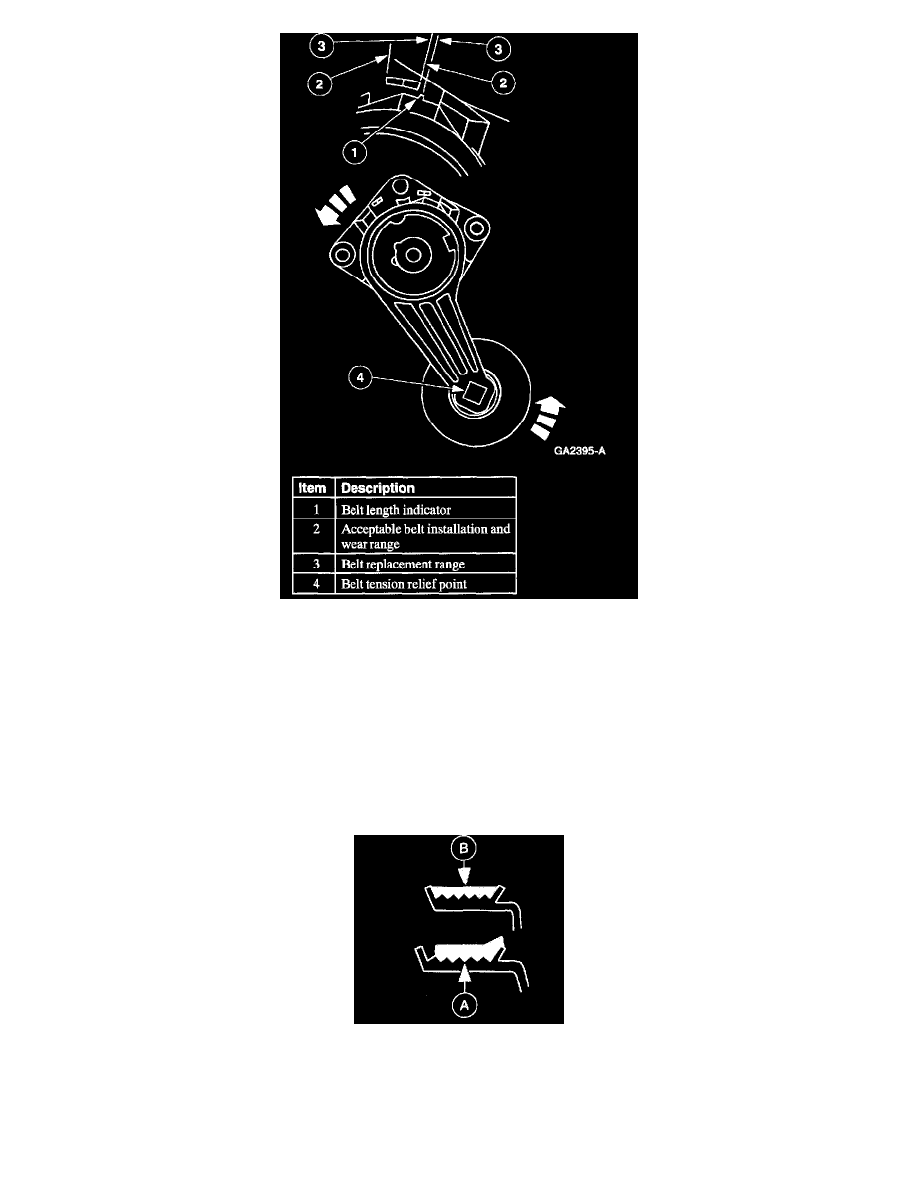
Drive Belt Tensioner/Belt Length Indicator Without A/C
Automatic tensioners are calibrated at the factory to provide the correct amount of tension to the belt. Unless a spring within the tensioner assembly
breaks or some other mechanical part of the tensioner fails, there is no need to check tensioners for proper tension.
The only mechanical check that need be made, if you have any doubt about the tensioner function, would be to remove the belt in the area of the
tensioner, to avoid belt contact, then using the proper tool, rotate the tensioner from its relaxed position through its full stroke and back to the relaxed
position to make sure that there is no "stick, grab, bind," and to make sure that there is tension on the spring. It is a normal condition for the tensioner
to be moving, under certain conditions, when the engine is running. If the tensioner meets these criteria, it should be assumed to be a good tensioner.
DRIVE BELT MISALIGNMENT
CAUTION: Incorrect drive belt installation will cause excessive drive belt wear and may cause the drive belt to come off the drive pulleys.
Non-standard replacement drive belts may track differently or improperly. If a replacement drive belt tracks improperly, install a new drive belt to
avoid performance failure or loss of belt.
With the engine running, check drive belt tracking. If the (A) edge of the drive belt rides beyond the edge of the pulleys, noise and premature wear
may occur. Make sure the (B) drive belt rides correctly on the pulley. If a drive belt tracking condition exists, proceed with the following:
Visually check the drive belt tensioner for damage, especially the mounting pad surface. If the drive belt tensioner is not installed correctly, the
mounting surface pad will be out of position. This will result in chirp and squeal noises.