
F 350 4WD Pickup V8-351 5.8L VIN H EFI (1997)
Climate Control Assembly: Service and Repair
Heating and Defrosting
Climate Control Assembly
SPECIAL SERVICE TOOL(S) REQUIRED
Description
Tool Number
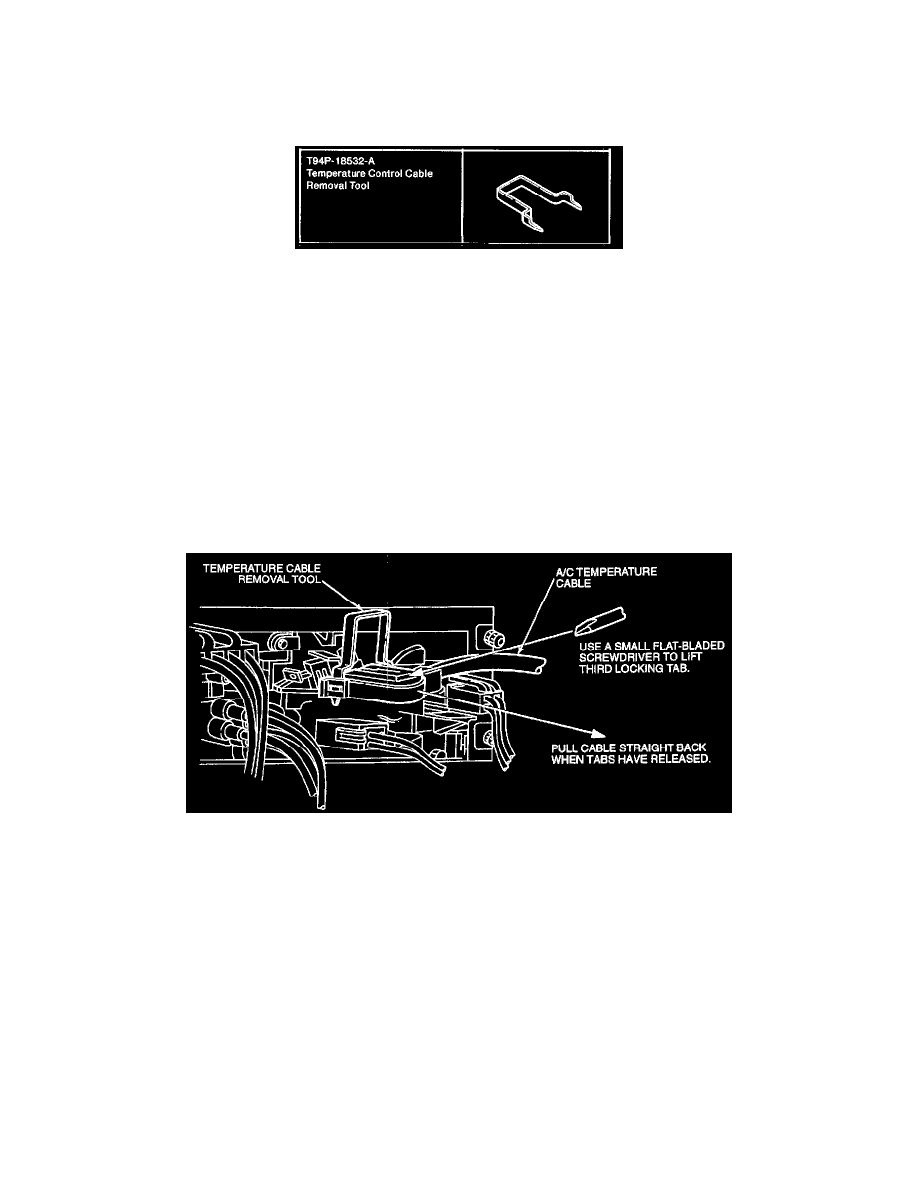
Temperature Control Cable Removal
T94P-18532-A Tool
REMOVAL
1. Disconnect the battery ground cable(s).
2. Remove the trim strip above the heater control and glove compartment area.
3. Remove the two screws that attach the center finish panel to the instrument panel to gain access to the four screws that attach the heater control to
the instrument panel.
4. Remove the four screws. Then, pull the heater control far enough through the opening in the panel to allow disengagement of the electrical
connectors for the heater blower motor switch and control illumination lamps, etc.
5. Disconnect the electrical harness connectors from the heater blower motor switch and illumination connectors on the heater control.
6. Remove the connector from the stowage notch in the heater outlet floor duct. Disconnect the vacuum hose harness from the connector.
7. Pull heater control away from instrument panel far enough to install Temperature Control Cable Removal Tool T94P-18532-A on the A/C
temperature cable connector on the backside of the heater control.
Temperature Cable Removal
8. Using a small flat-bladed screwdriver, lift the third locking tab as indicated in the Temperature Cable Removal illustration and remove the A/C
temperature cable by pulling straight back.
9. Move the heater control from the instrument panel.
INSTALLATION